
Serene Lake Thingvallavatn of Iceland
Serene Lake Thingvallavatn of Iceland
By Taylor van Biljon
Poised at the very center of Icelandic history, the crystalline waters of Thingvallavatn continue to draw visitors to its pristine shore.
Serene Lake Thingvallavatn of Iceland
Poised at the very center of Icelandic history, the crystalline waters of Thingvallavatn continue to draw visitors to its pristine shore.
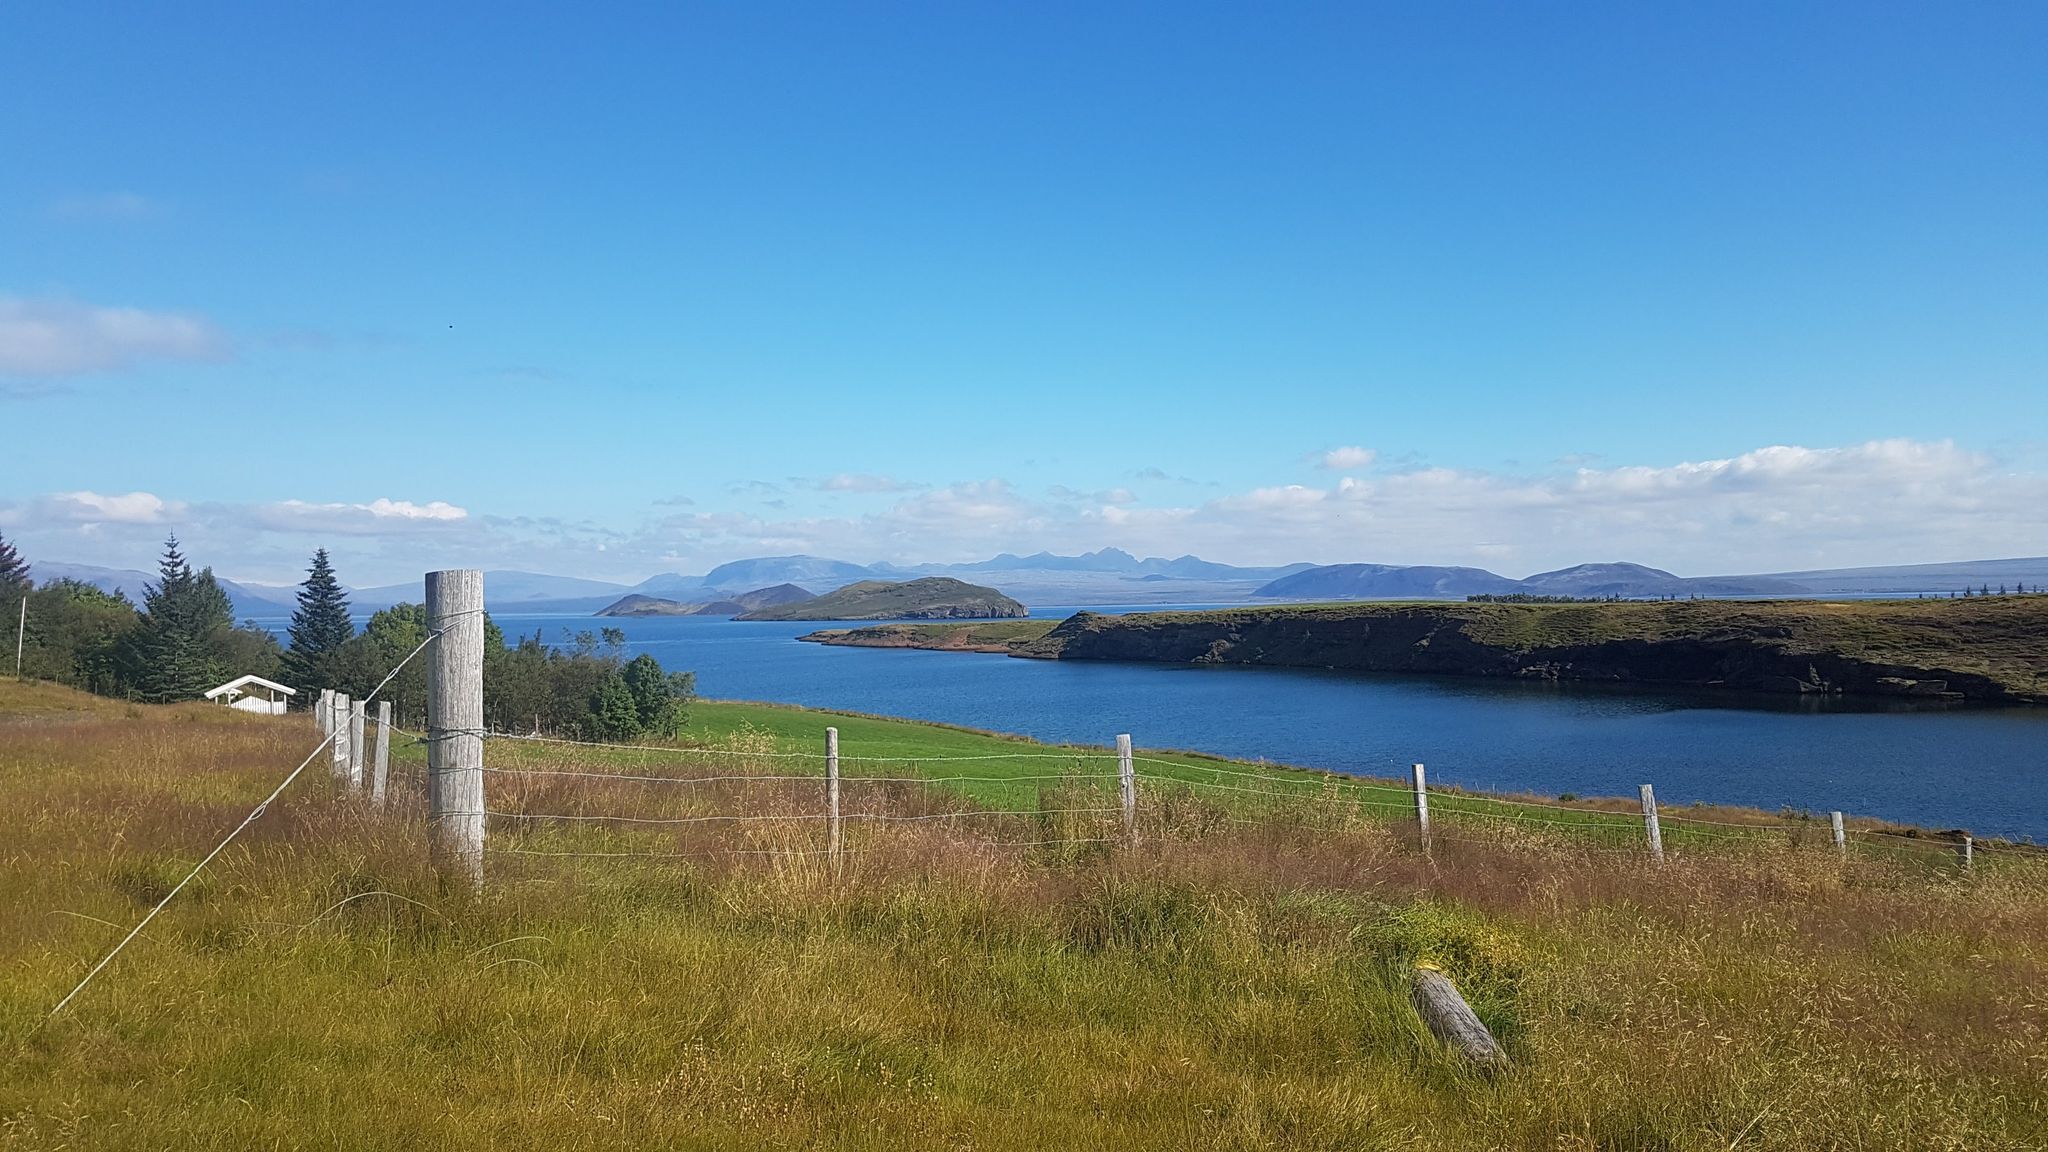
The shores of Lake Thingvallavatn (Þingvallavatn) have been a gathering place for the people of Iceland for many generations.
One of the largest naturally occurring bodies of water on the island, it was already an important landmark for settlers in 930 AD; and it continues to draw us today to its quiet, glistening shores.
Where is Thingvallavatn?
The sprawling waters of Iceland’s beautiful Thingvallavatn lie at the southern edge of first national park Thingvellir (Þingvellir). Located in the Mid Atlantic Ridge rift valley, Thingvallavatn is a popular first stop on a Golden Circle journey. This really is an amazing place for many reasons, however geologically, it is among the only areas on Earth where you can see the Eurasian and North American plate rift above the water. Because of this relationship between the plates, Thingvellir and Iceland are growing inch by inch over time as they pull apart.
PLAN YOUR JOURNEY
Travelling to Iceland?
Check our overnight tours with a driver guide that includes a one night stay in a bubble.
*Starting from ISK 59.900 per person
History and Heritage
Thingvallavatn is partially located in Iceland’s only UNESCO World Heritage Cultural site, Thingvellir. Named for the gathering of people in the field north of the lake, (literally assembly/parliament field), the park and the water itself serve as a reminder of Iceland’s early quests for independence.
Thingvellir hosted Iceland’s recurring sessions of old parliament governance until 1798, when this same evolved parliament, or Alþiing, was eventually moved to Reykjavik. One of the oldest still functioning parliaments in the world, Thingvallavatn has stood witness to the unfolding of history here for over a thousand years.
Due to the slow separation of the tectonic plates, the land has grown a bit since the founding of the Alþiing; but it is not far removed from its original state. You can still visit the very same sites of social importance, like the Lögberg (Law Rock) where the justice of the day was meted out, or the nearby Drekkingarhylur (Drowning cove) and Brennugjá, (Burning gorge), places that served as public execution spots in the Middle Ages. Society has grown a great deal since those days, but the long process of much of it took place on the very shores of Thingvallavatn.
Fishing
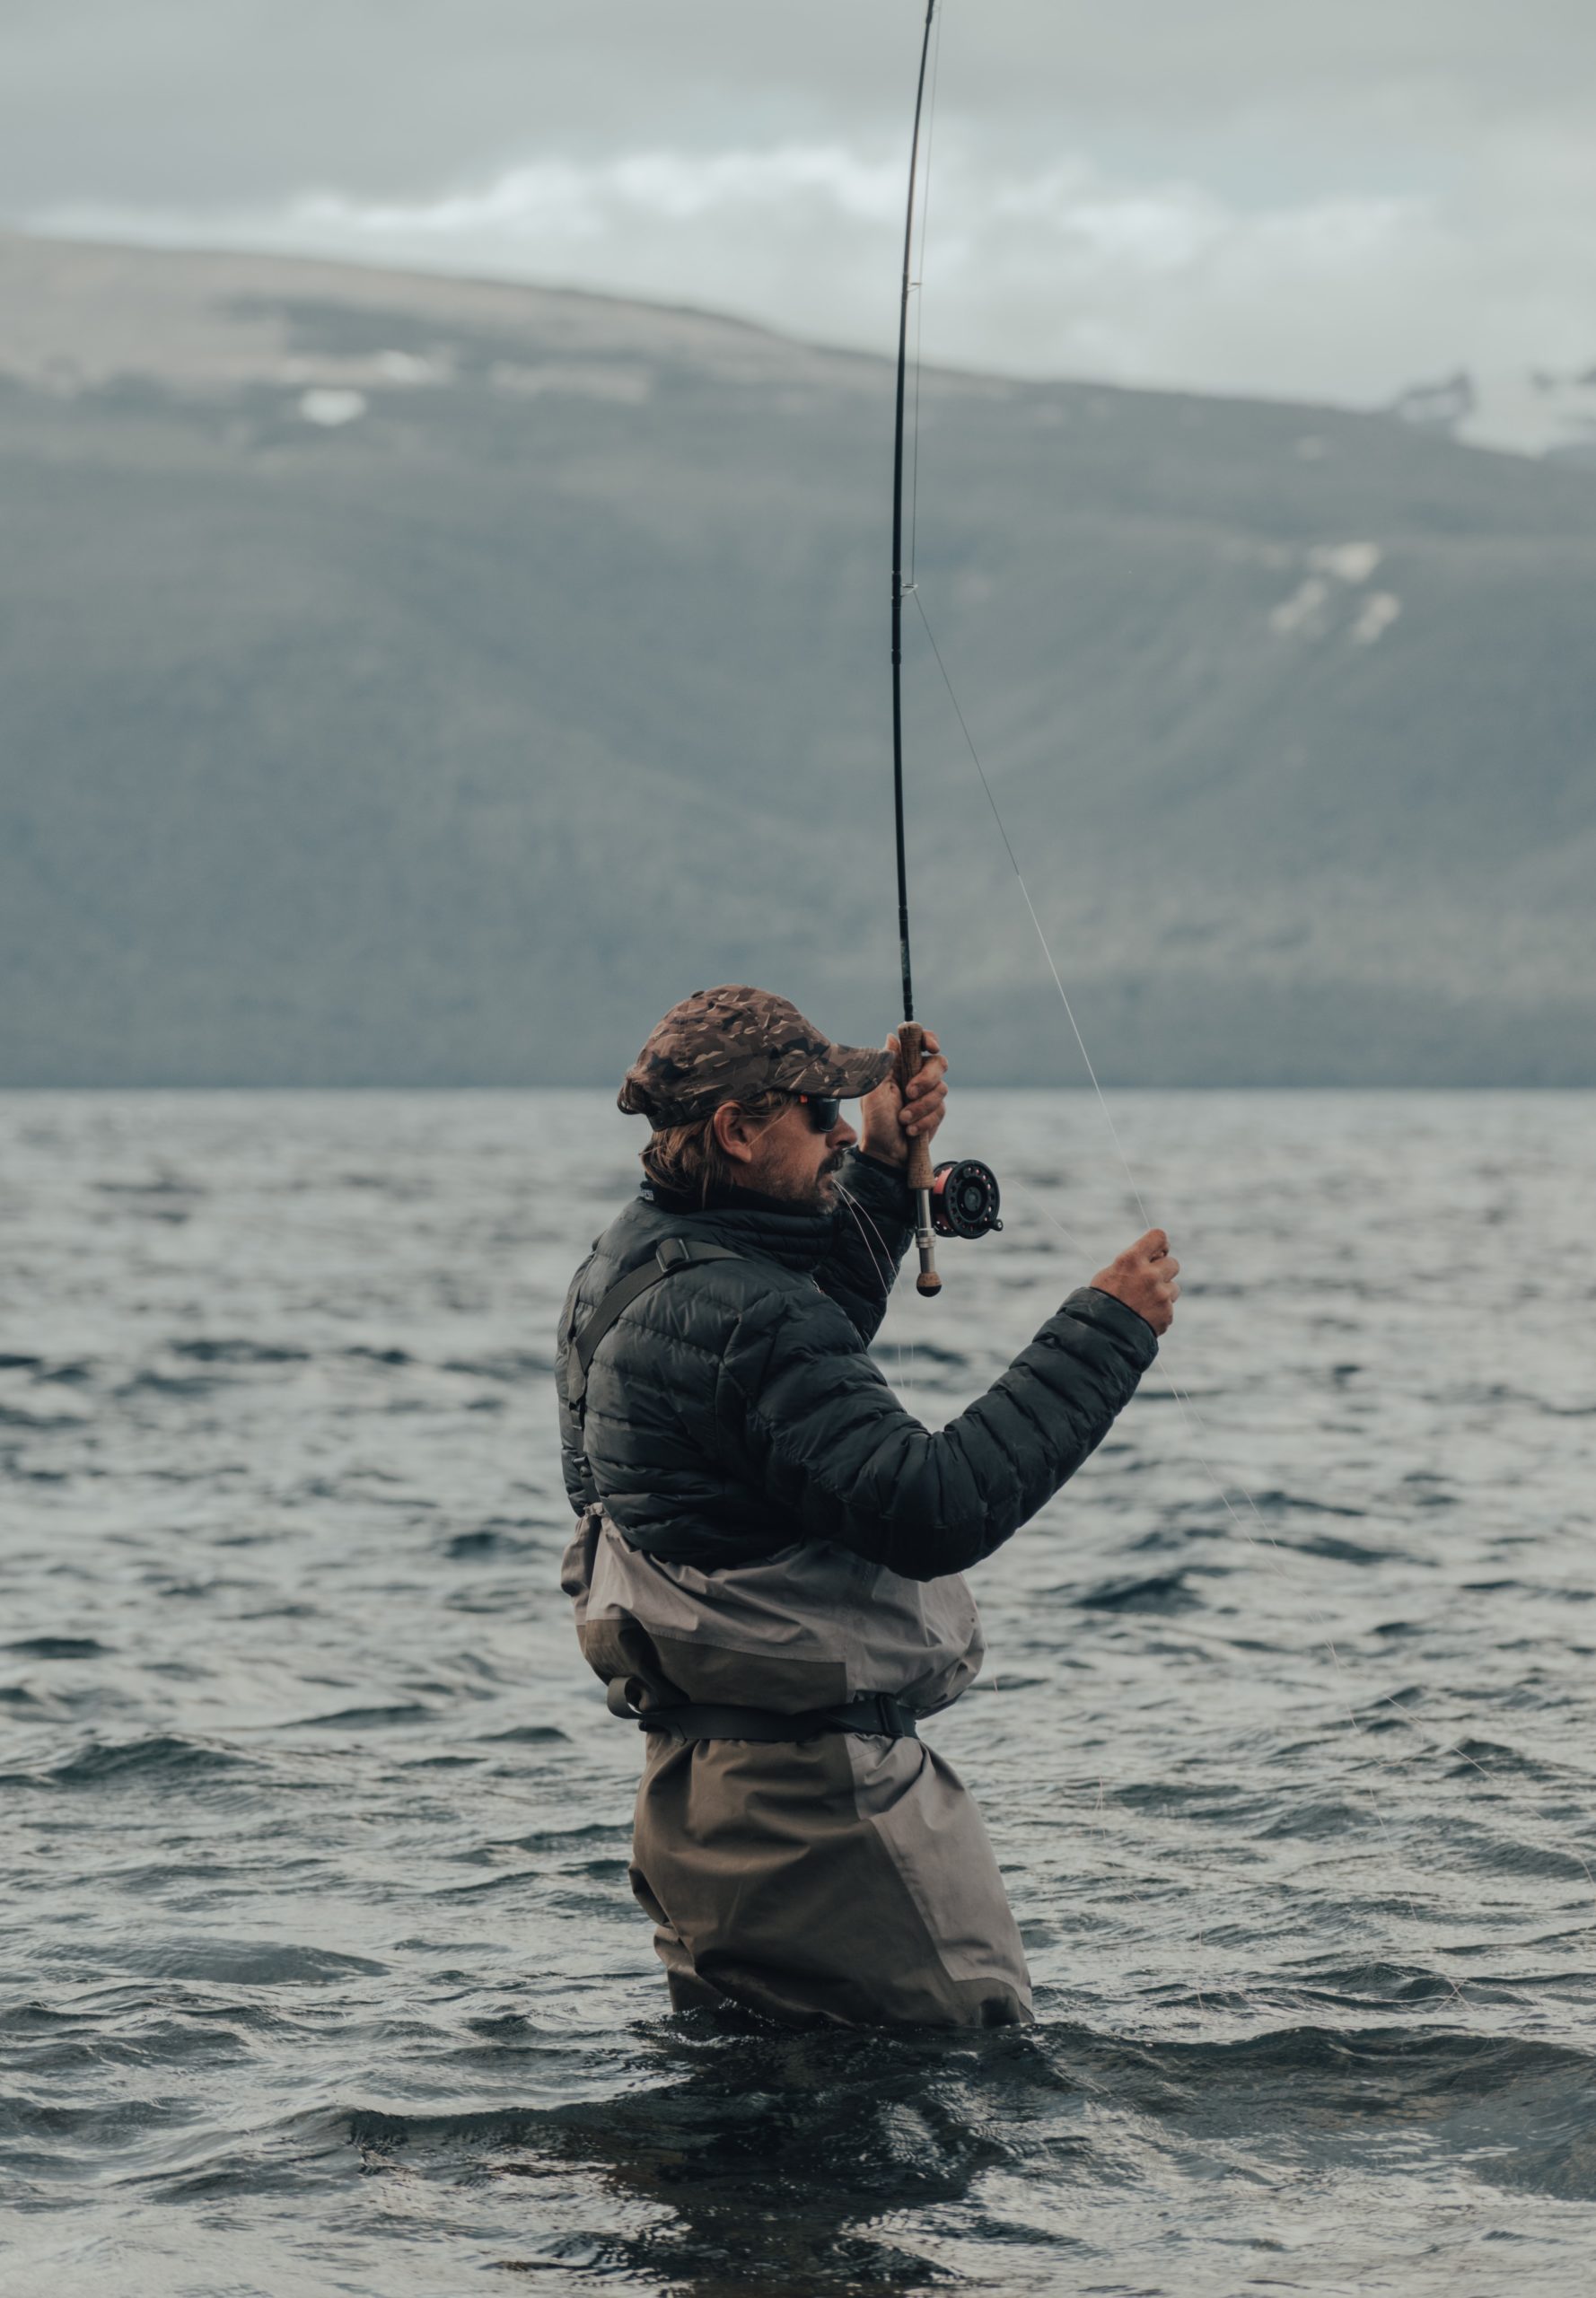
History, culture, nature and story are great reasons on their own to visit Lake Thingvallavatn- but for those that fish, this is truly a destination. Lake Thingvallavatn reaches a depth of 114m (374ft), and is one of the largest bodies of water in Iceland at a surface area of 84km2. In order to enter the lake, water must journey through vast porous lava fields on the way. Melt water from the glacier Langjökull travels for 20-30 years before it meets the shores of Thingvallavatn, and rain in the catchment area is said to take a comparatively short 2-4 months.
This process gives us the crystal clear and colorful waters of Thingvallavatn, which despite its cold temperature, houses some of the biggest and most varied Arctic Char and Brown Trout in the area. Due to their unique isolation, this is in fact one of the only places in the world that one can fish from not just one, but four varieties of Arctic Char.
Known far and wide for high quality wild fishing due to strict environmental protection, wading into the clear waters of Thingvallavatn like the settlers of old is an experience for the ages. Fishing in Iceland is a popular pastime, so purchasing a fishing card for this activity is a fairly streamlined and simple process, and it can grant access to 34 lakes across the country.
Diving and Snorkeling
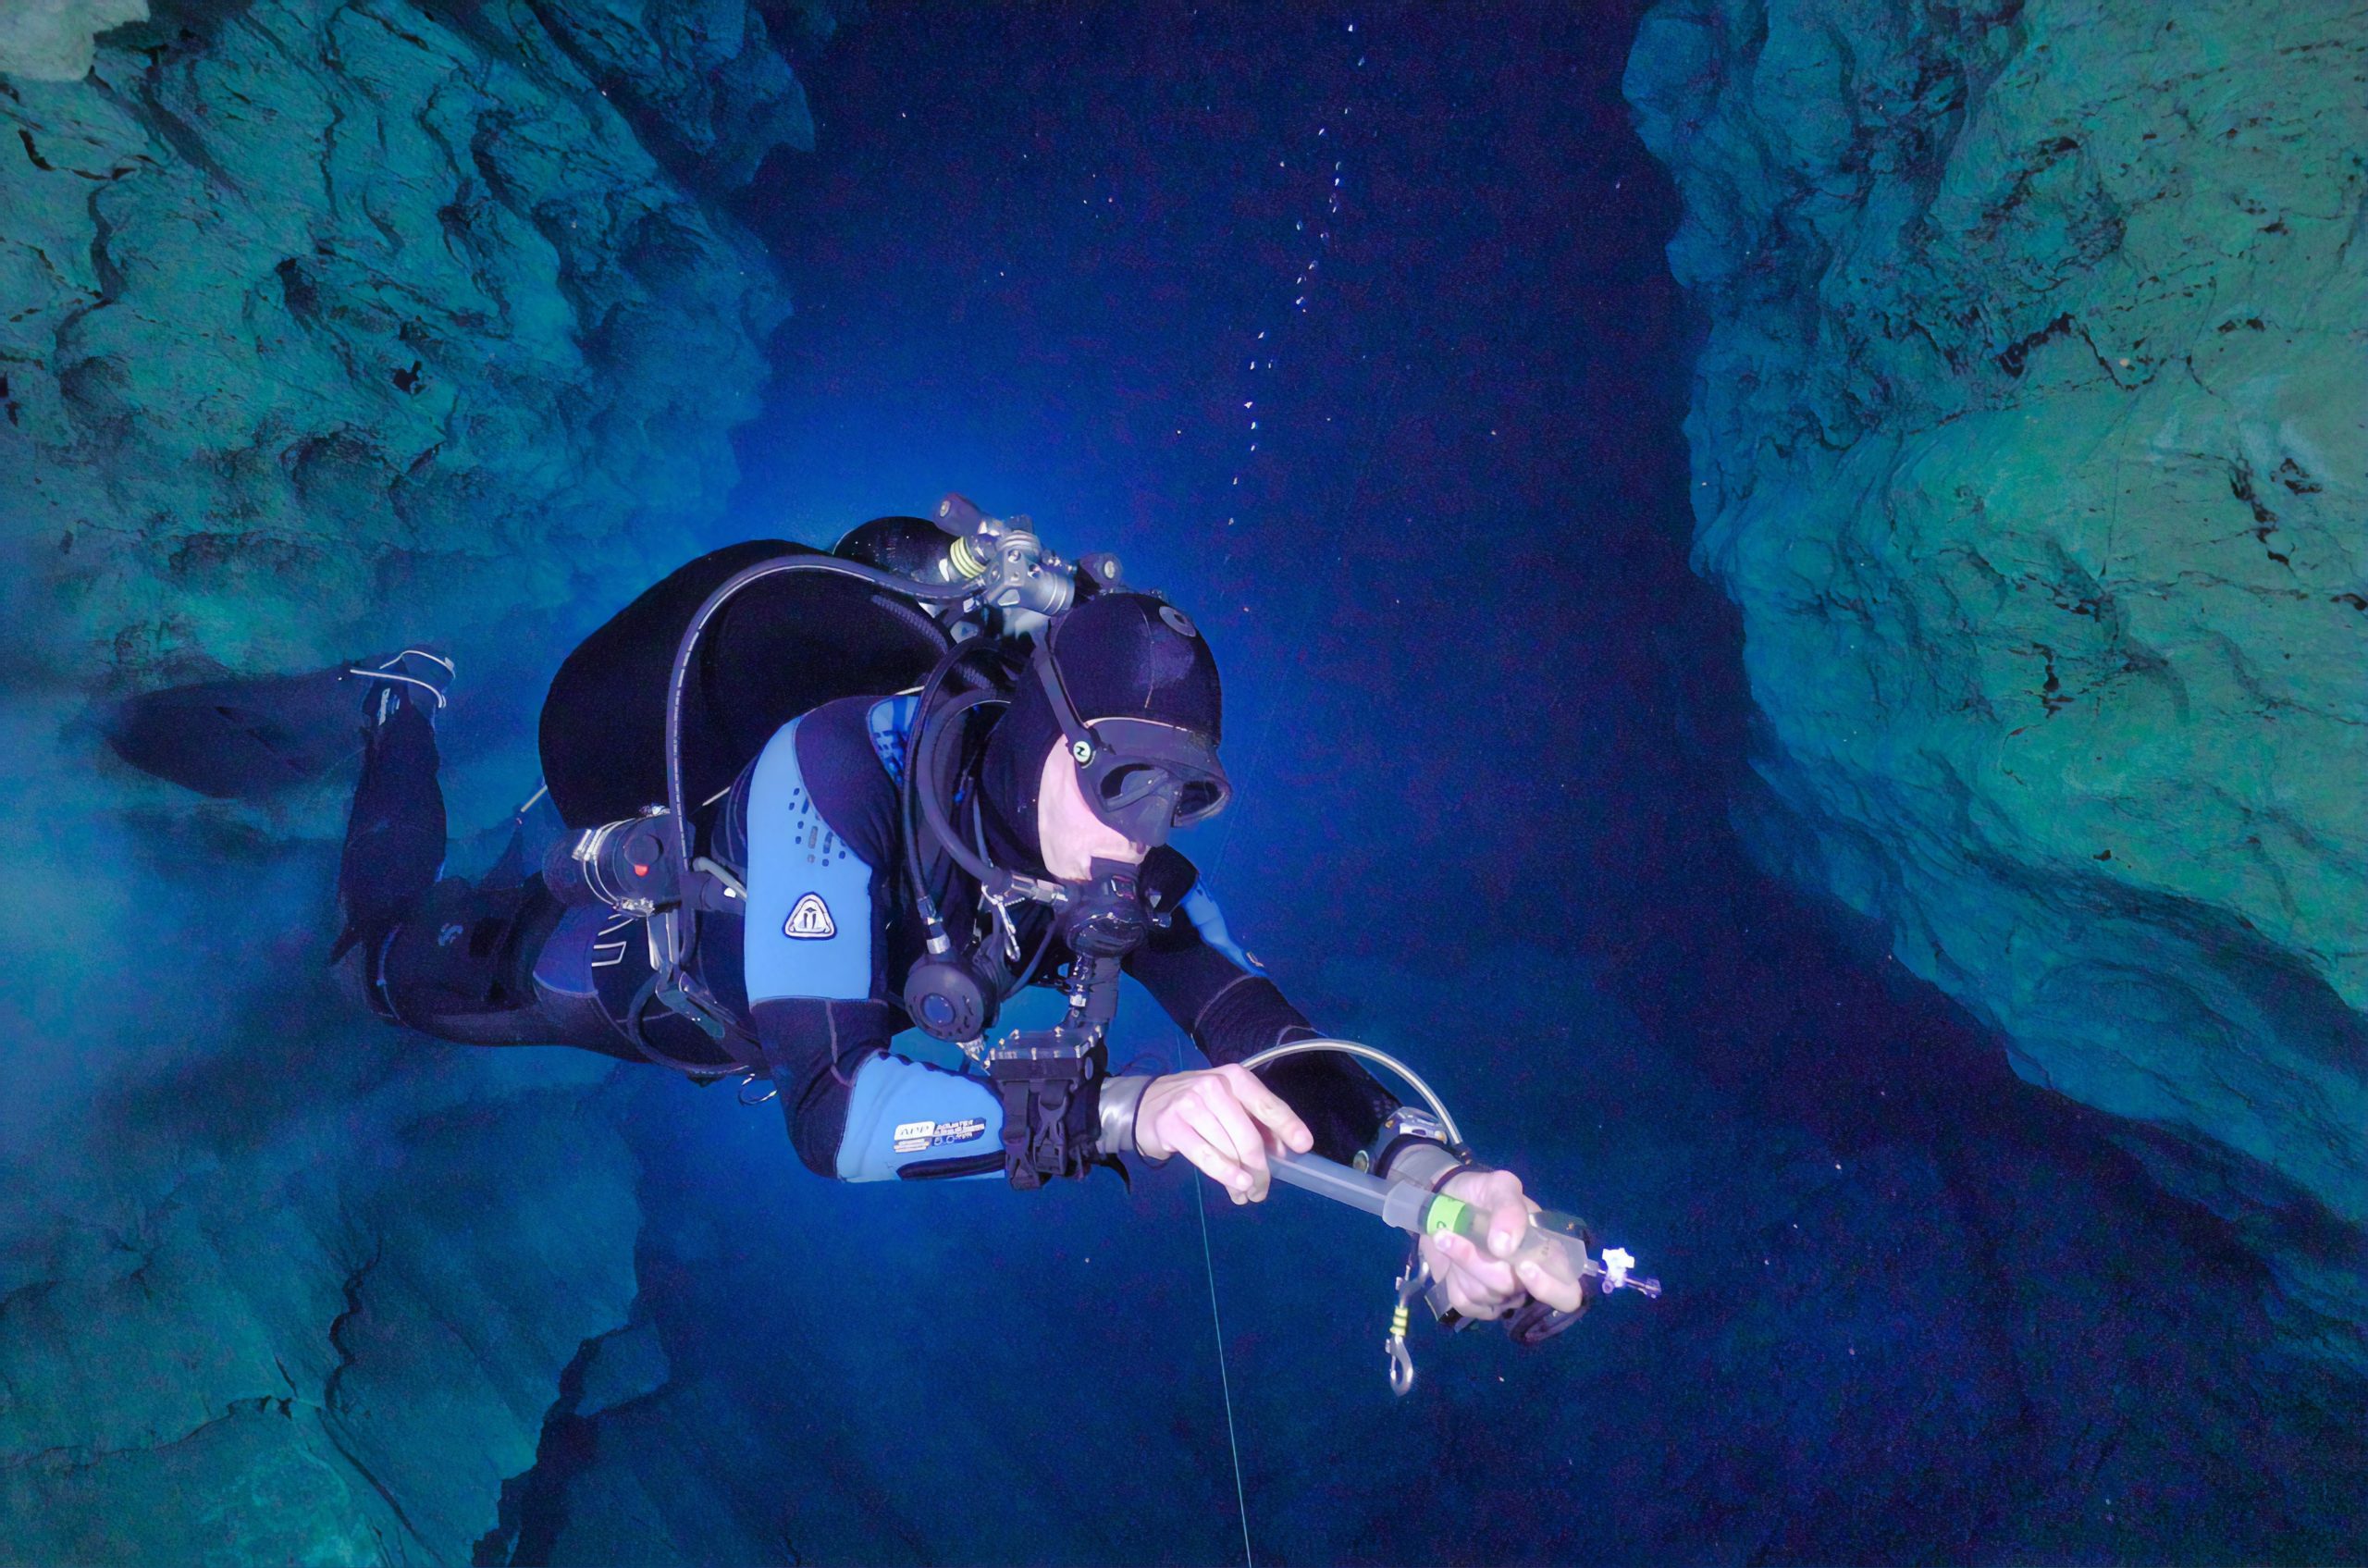
The clean, cool waters of Thingvallavatn aren’t just for the fish! Thingvallavatn is home to some of the best diving and snorkeling in the world, including the Silfra and Davíðsgjá fissures in between the tectonic plates. A gentle current keeps the filtered glacial waters of the lake from freezing over, so taking a guided dip is frequently possible here.
Visibility is truly unparalleled, and the colors below are strong neon tints of green “troll hair” algae, warm iron-rich basalt rock, and the otherworldly sapphire of the water. In photographs of the activity, there is hardly any visible trace of sediment- only the signature cerulean glow of the ancient water.
Popular for diving enthusiasts and students of all levels of experience, it is possible to both learn and practice in the waters of the lake, with a certified guide. In 2010, an open water “Midnight Swim” event even took place in the lake, and swimmers from all over the world came to join the open 5k. The water in Thingvallavatn comes close to 11°C (51.8°), so this kind of swimming is best left to experienced experts. (You can catch us on the other hand, wearing dry suits and staying warm, or watching for giant trout from the bridge!)
PLAN YOUR JOURNEY
Travelling to Iceland?
Check our overnight tours with a driver guide that includes a one night stay in a bubble.
*Starting from ISK 59.900 per person
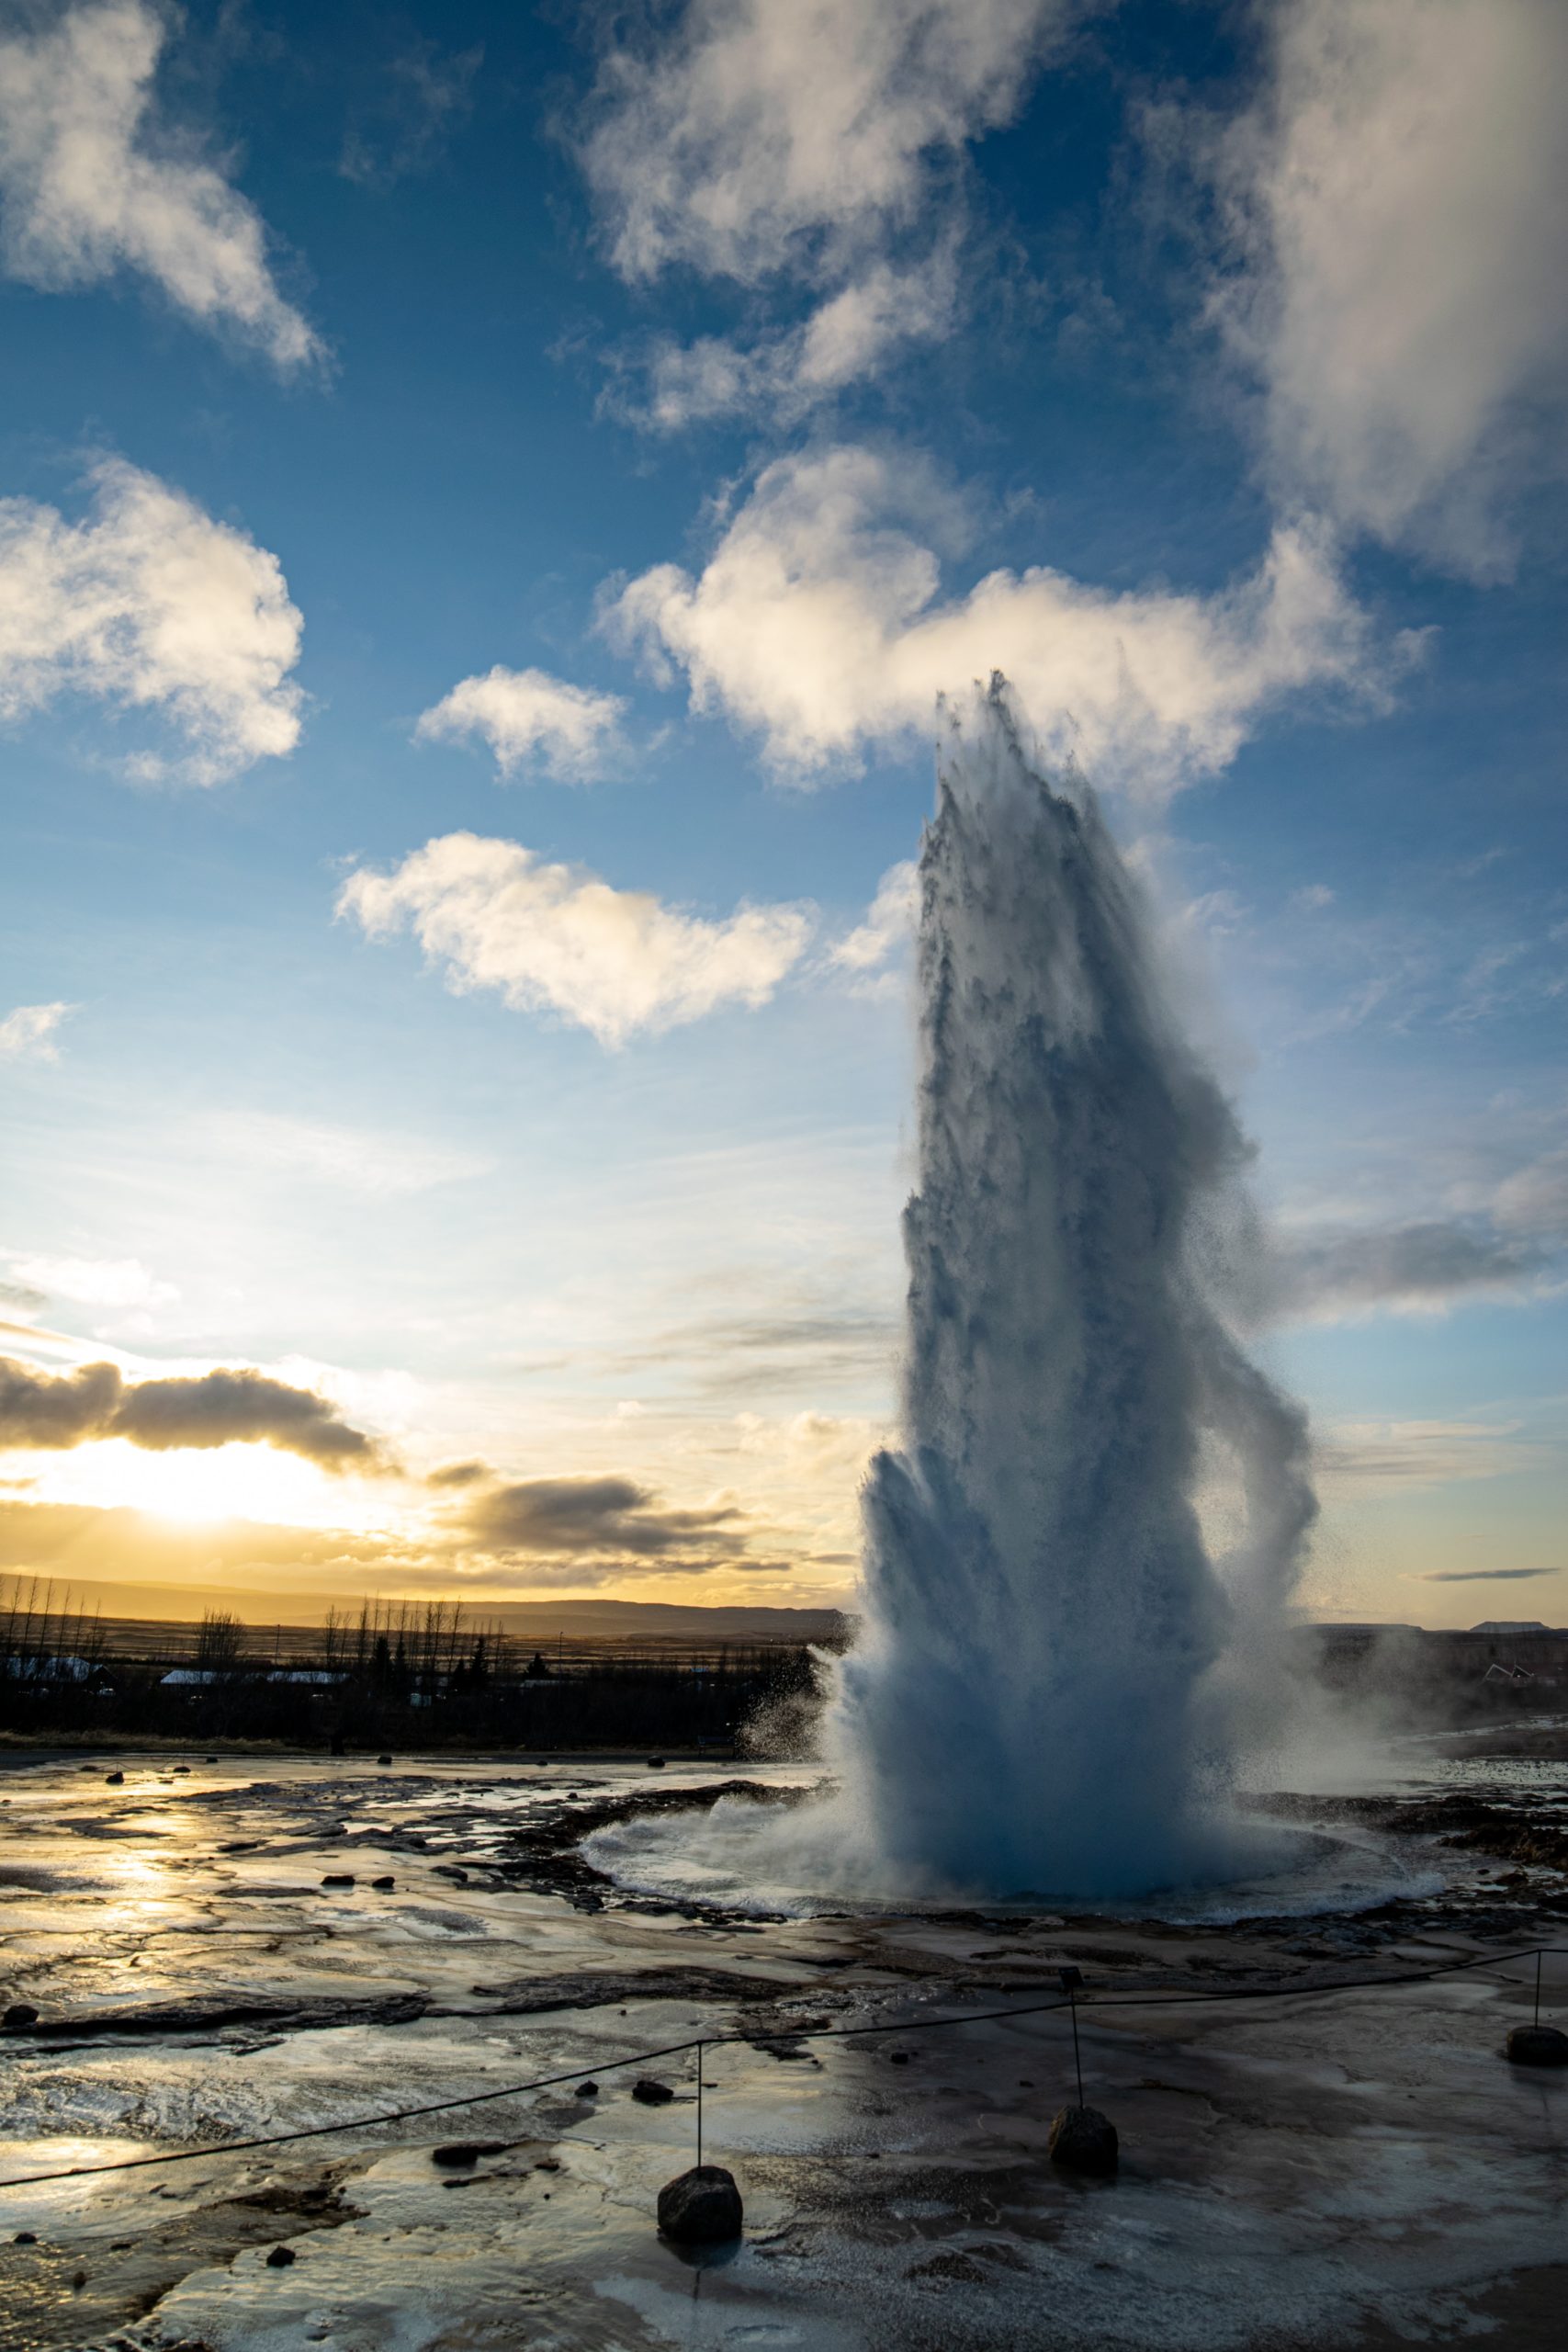
Geysir: An Icelandic Treasure
Geysir: An Icelandic Treasure
By Taylor van Biljon
Experience one of the most explosive sights that Iceland has to offer
Geysir: An Icelandic Treasure
By Taylor van Biljon
Experience one of the most explosive sights that Iceland has to offer
Iceland’s Great Geysir cannot be missed, especially on a Golden Circle visit. Home to nearly thirty reported geysers, Iceland’s historical record has mentioned the presence of these explosive phenomena as early as 1294 in the saga Oddaverja annáll. Some of these have since slipped into dormancy, while new openings in the ever-active surface of the island continue to form.
What are geysers?
A geyser, much like the Northern Lights, is a natural phenomenon that can only happen upon the serendipity of multiple factors occurring at once. For geysers, these factors are the presence of hot rocks underground, a bountiful groundwater source collecting in an underground cavity, and of course, an opening where this superheated water can escape to the surface.
Geysers erupt because the boiling hot water expands after being confined- creating a steam explosion. Due to regular geologic activity in Iceland, it is not uncommon for geysers to be changed, or newly formed. Things like seismic activity, weather, or even the build up of minerals in the water can “clog up the pipes”, so to speak, and change the frequency or the way in which the geyser can erupt.
As windows into the Earth, geyser activity can also warn us of underground changes. Studying these changes is one of the ways in which scientists learn about volcanic eruptions, and how to better predict them. Geysers are a rare look into the inner workings of our living planet, and are a rare treat in a world where the movements of nature are often imperceptible, or too small to often see.
The study of geysers is even informing our study of space and our evolving understanding of the surfaces of other planets. Though some of these great steam giants are many generations old- like many things in Iceland, they are contrasted by the very new. There are a few geysers still that are unnamed, and it is conceivable to expect that more may be born or lost in the future.
PLAN YOUR JOURNEY
Travelling to Iceland?
Check our overnight tours with a driver guide that includes a one night stay in a bubble.
*Starting from ISK 59.900 per person
Geysir vs. geyser
Did you know that the English term “geyser” comes from the Icelandic word geysir ([ˈceiːsɪr̥])? This word comes from the verb geysa, which means “to gush”. One of the rarest natural occurrences in the world- geysers only occur in five countries.
While the word “geyser” is used to describe the actual object, in Iceland, Geysir is a name for a specific geyser in the Golden Circle. Also known as “The Great Geysir”, it is one of the most famous, despite not being a very common eruptor. The last known eruption of this centuries old geyser was recorded in 2016. Before that, we hadn’t seen an explosion since 2000! Typically, geysers erupt randomly and at irregular intervals, though there are some that do keep a fairly tight schedule. One of these is the nearby neighbor of Geysir, Strokkur.
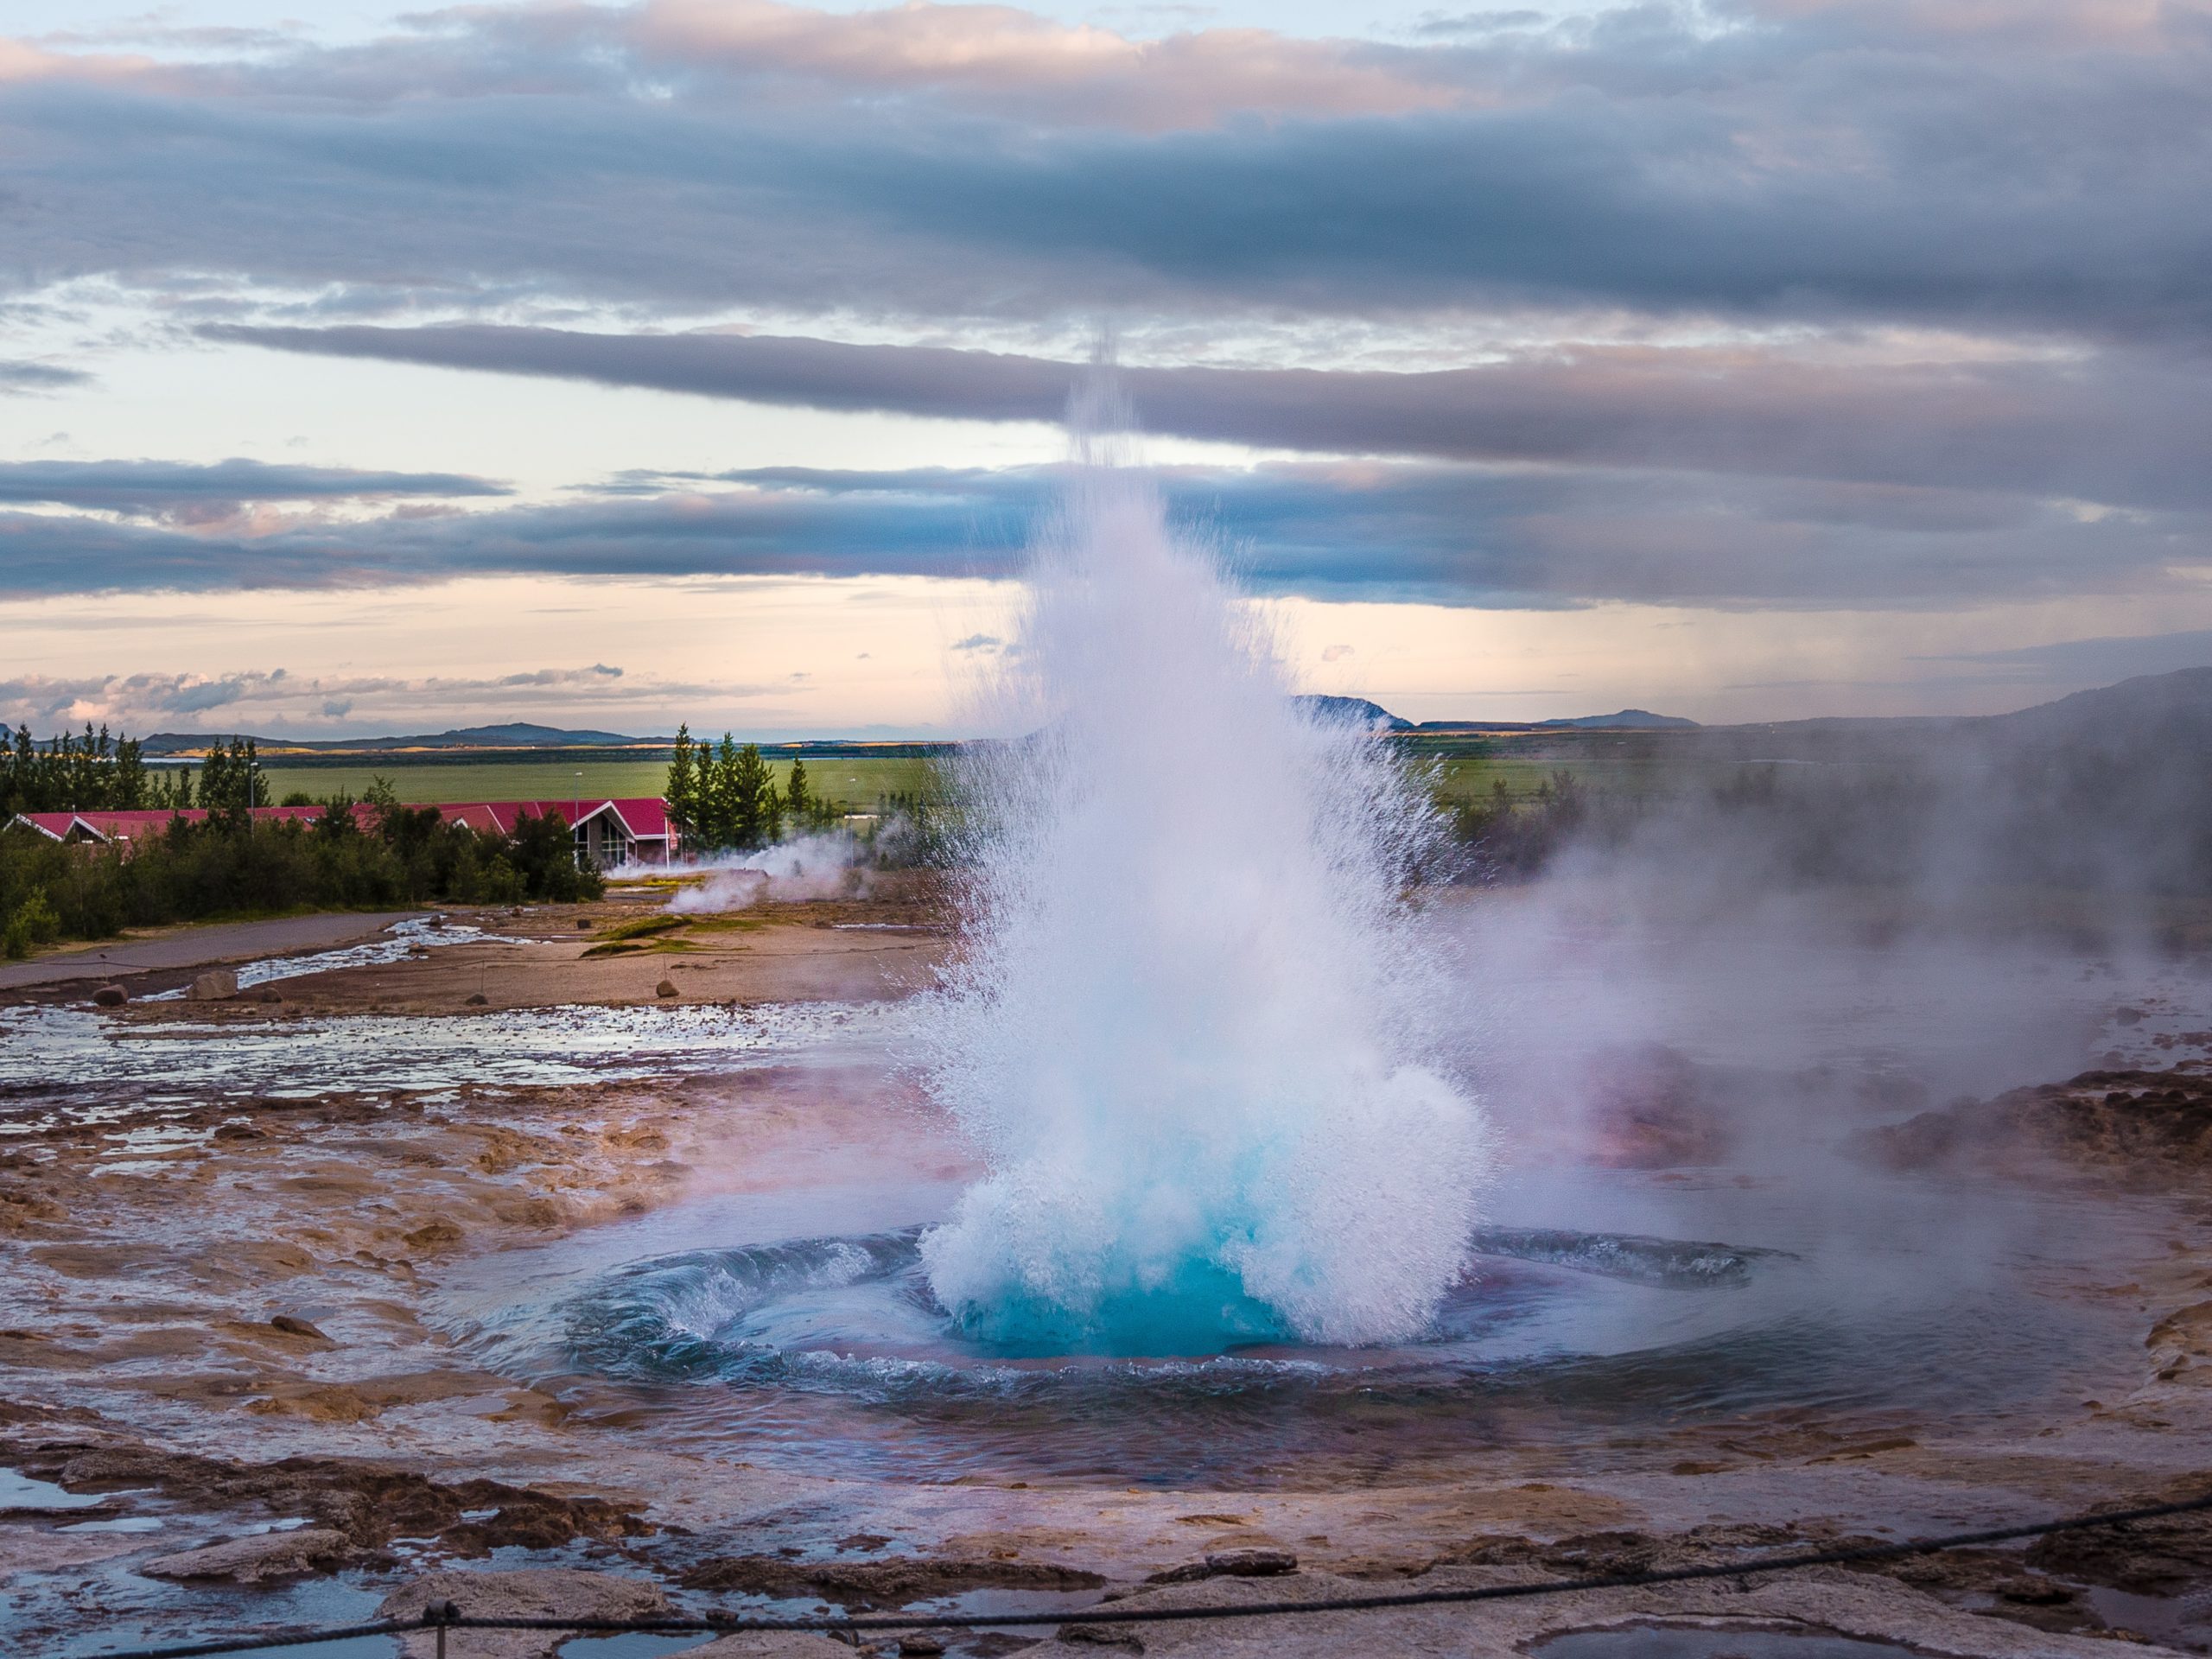
Where are Geysir and Strokkur?
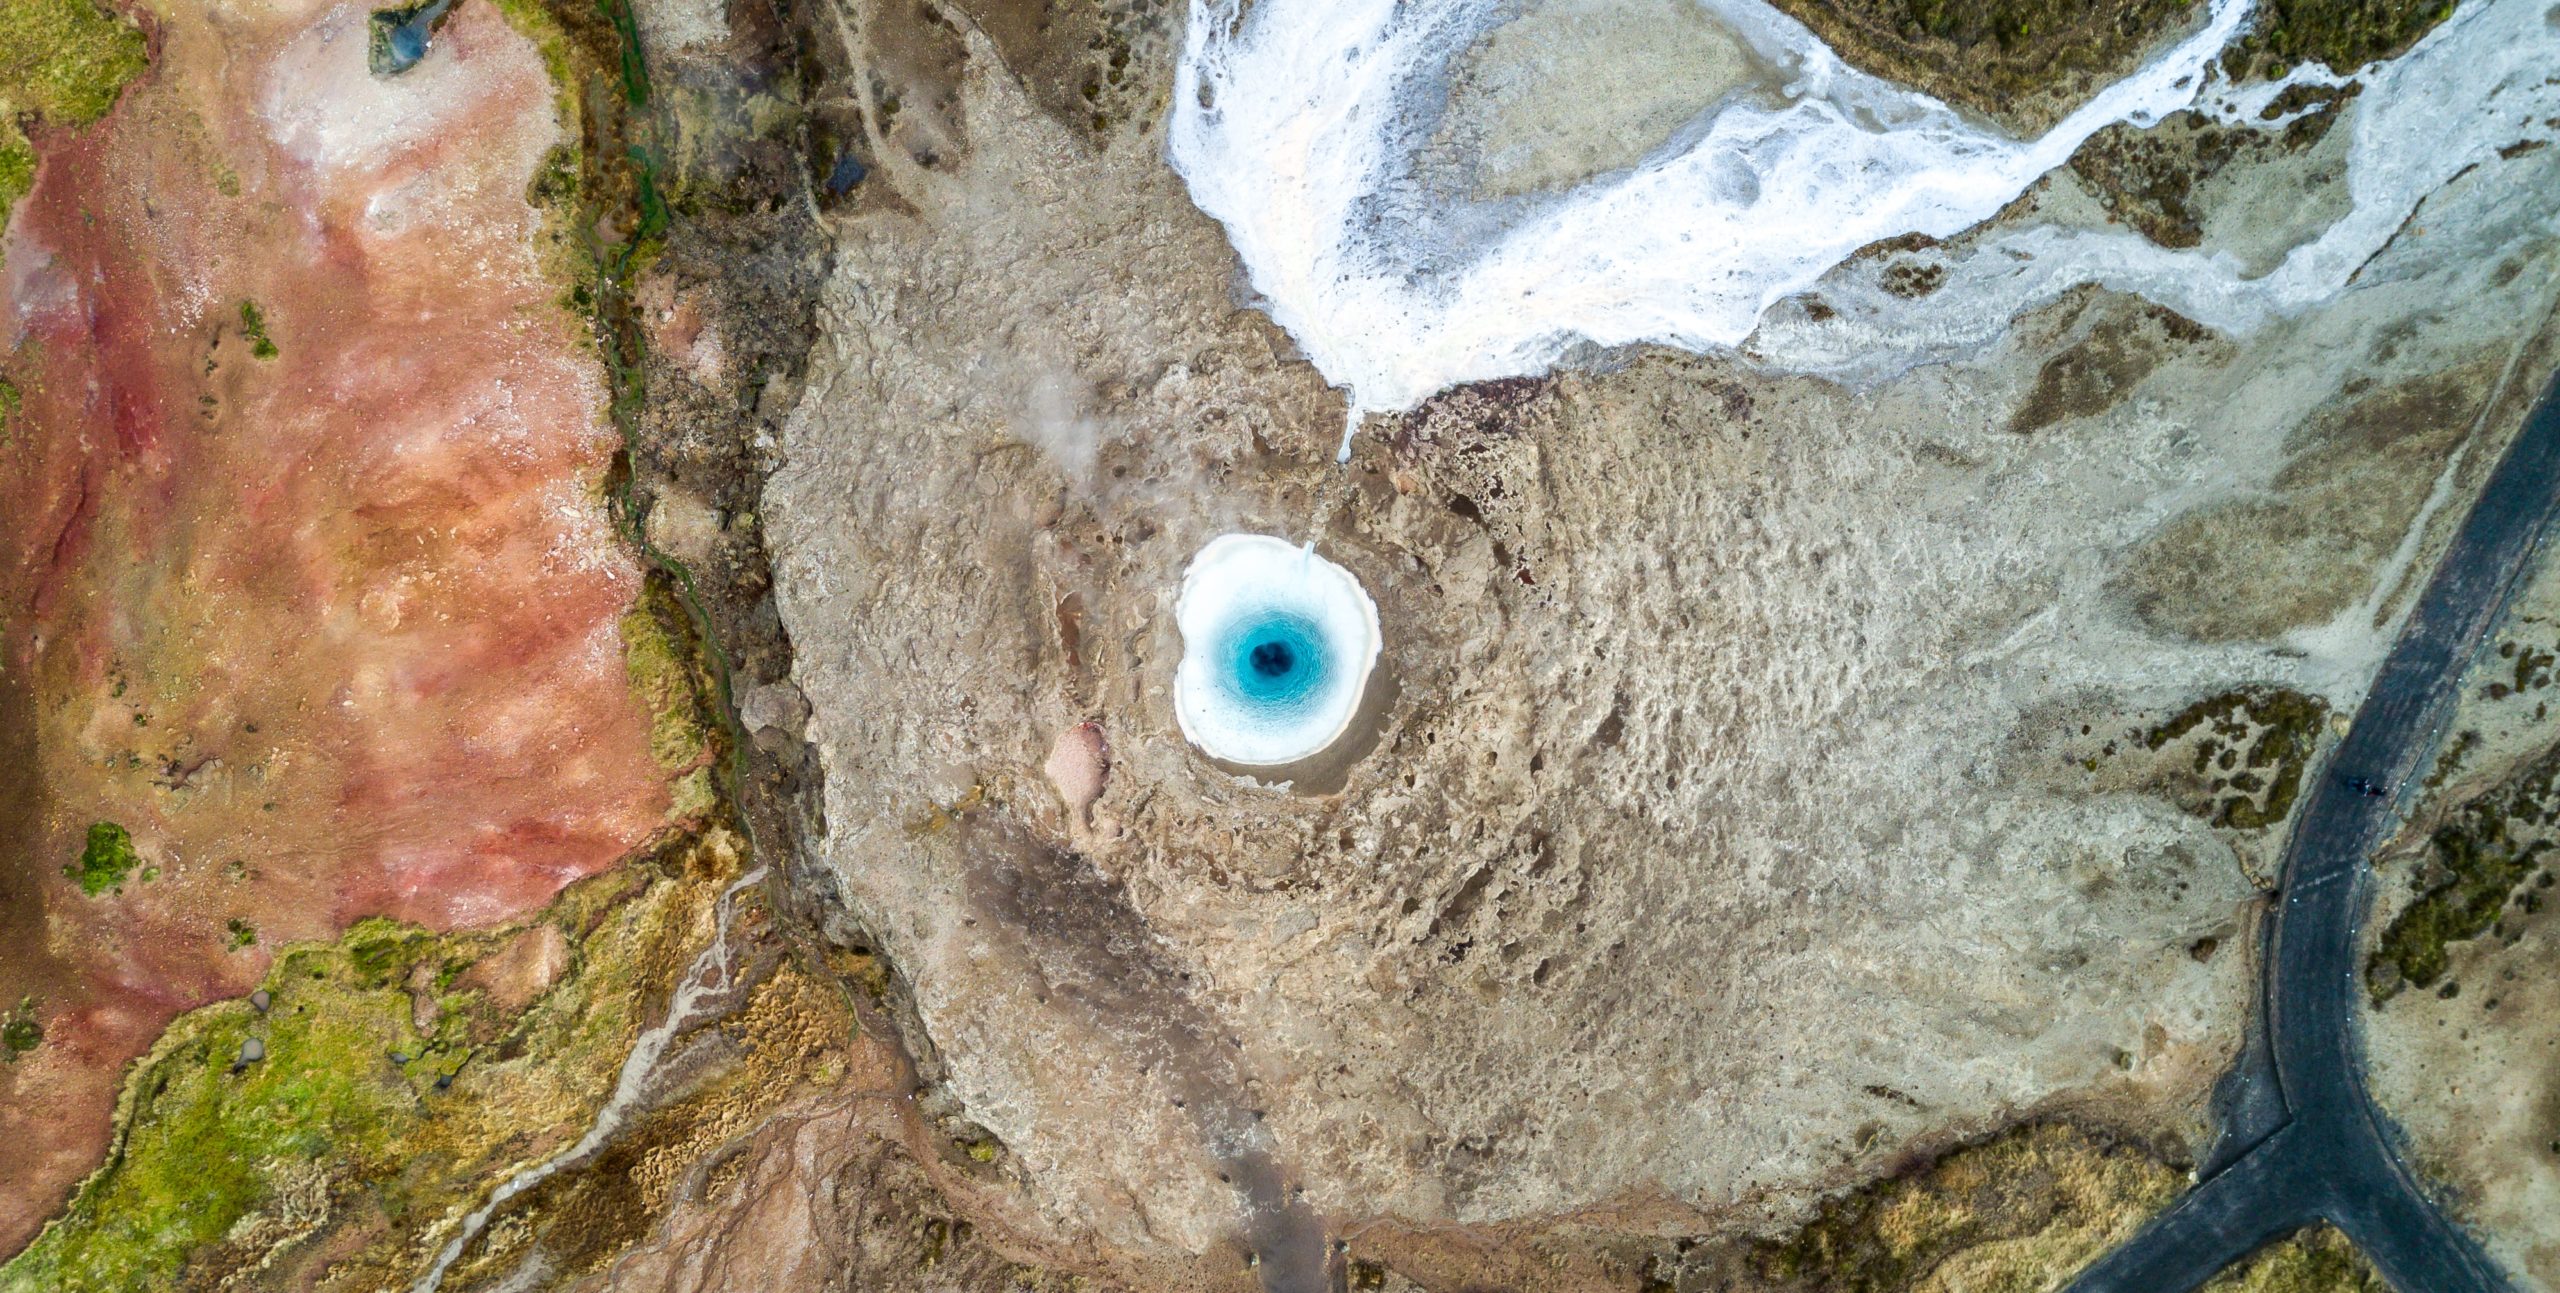
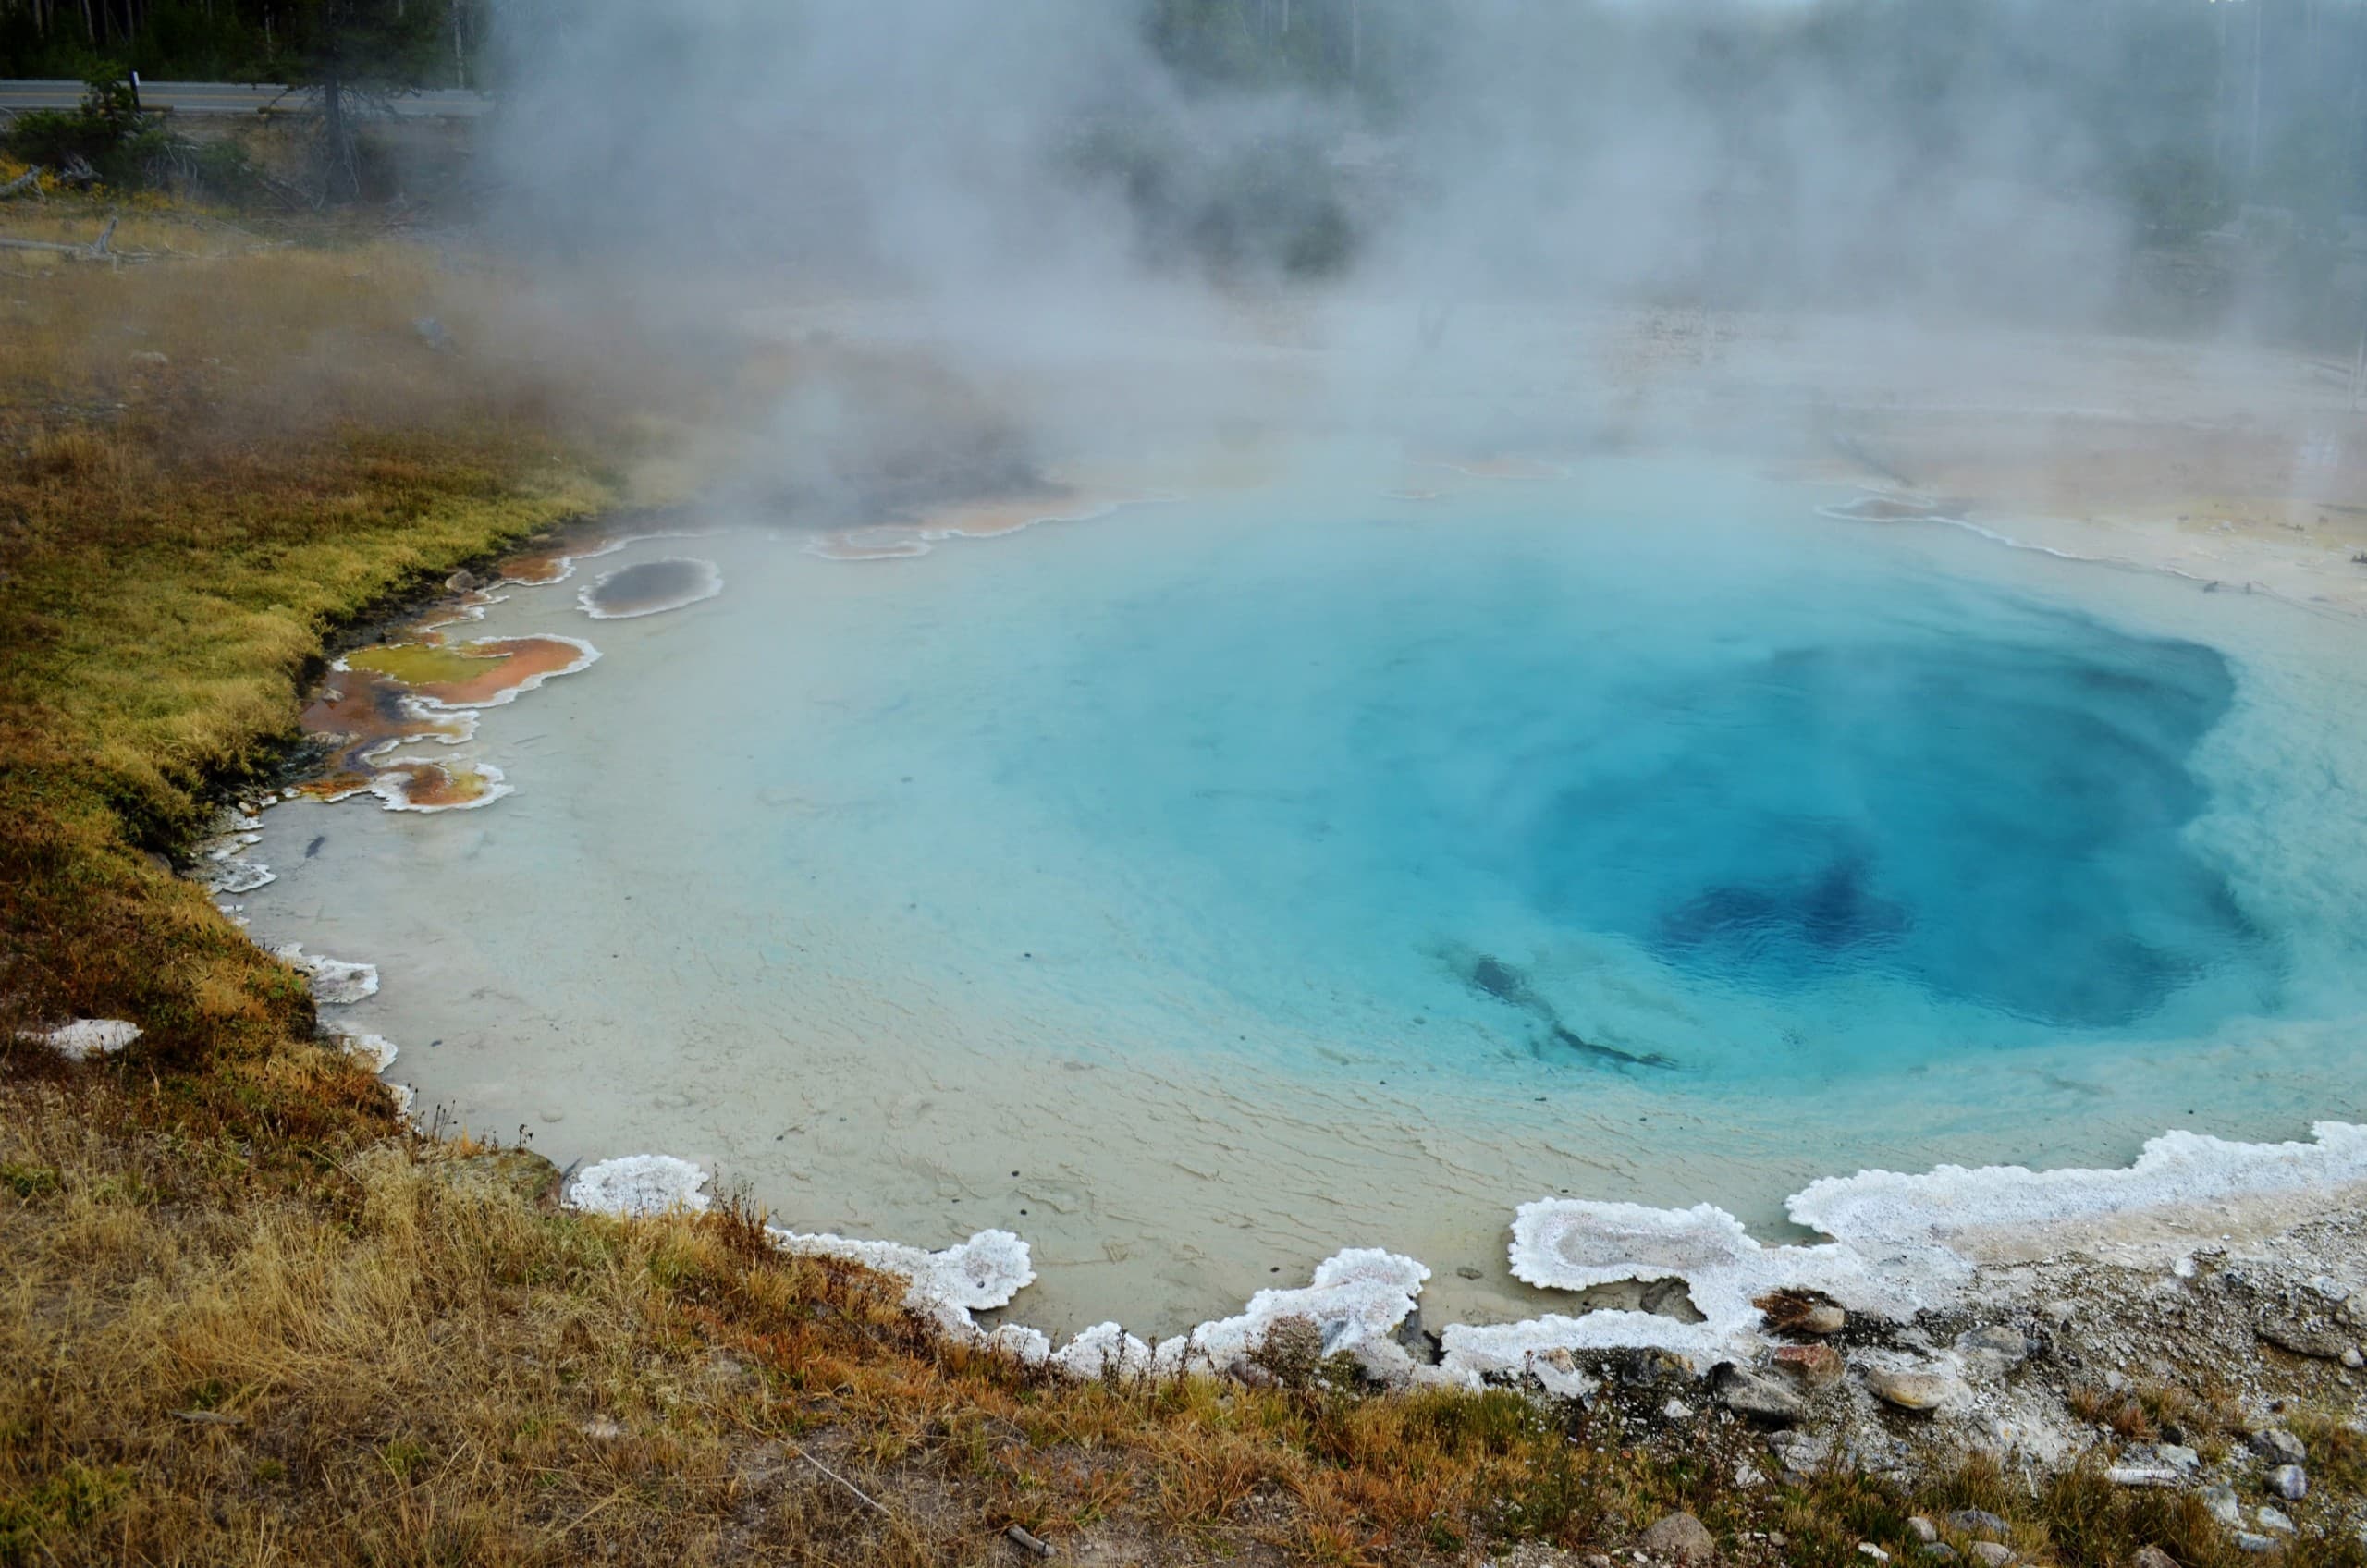
Nested in the Haukadalur Valley of the Golden Circle, Strokkur is surrounded by active earth. This area boasts otherworldly colors, roiling fumaroles, bubbling geothermal mud pits, and hot springs straight from the magma-hot depths of the island. And though Geysir mostly slumbers these days, Strokkur is not alone! Accompanied by multiple smaller geysers and electric blue pools of heated water, Strokkur is currently the biggest performer in the area, reaching nearly 30-40m. (100-131ft.) into the air!
How long should you spend there?
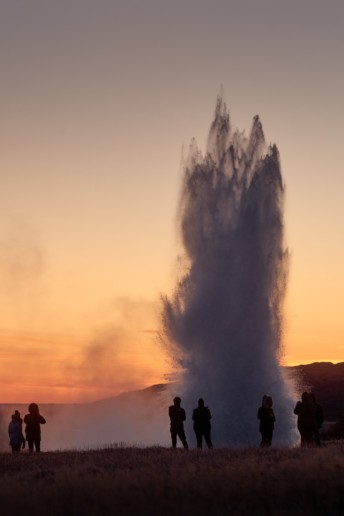
Eruption intervals for Strokkur vary from 5-10 minutes, but at this time it is certainly possible to catch an eruption if you have about fifteen minutes to spare with this powerful giant.
If you’re taking a more leisurely approach to the Golden Circle, we highly recommend grabbing a coffee at the nearby cafe, and cozying up on one of the benches for a front seat! Taking in a few episodes of Strokkur’s dramatic effluence is both a historic and natural wonder to behold.
Take care to stay on the paths during your visit, as much of the tempting water can reach around 80-100°C (176-212°F) on the surface- and is even hotter underground!
How to get to Geysir and Strokkur
Nearly 100km from Reykjavik, Geysir and Strokkur are easy to visit. Accessible from Reykjavik via routes 37 and 35, the geysers are one of the many jewels of the Golden Circle area.This area is wheelchair accessible and outfitted with a car park, walking paths, and intermittent bench seating throughout the zone. There is a restaurant and facilities nearby in the Geysir Visitor’s Center. There is no entry fee to this natural area, and you can even leave the driving to us, on our Golden Circle tour.
Fun geyser fact!
Have you ever used a Bunsen burner? When you watch the geysers- know that you’re standing in nearly the same spot as German scientist Robert Bunsen, who came to witness the spectacle of Iceland’s steam giants in 1846. His descriptions, data, and experimental insertion of a thermometer into the geyser itself formed the foundation for some of our earliest explanations for how geysers work.
When he visited, he was actually watching the eruptions of the geyser we now call “Litli Geysir”, as that was the active system at the time. Over time Litli Geysir became dormant, and is no longer creating the same kind of massive spouting as its now regular sibling Strokkur.
It is not known exactly when this change occurred, but Icelandic physicist Þorkell Þorkelsson noted that Litli Geysir was only just bubbling by 1896, as it continues to do so today. These changes are not infrequent or irreversible, and perhaps in the future- even Strokkur will lay down the mantle in favor of a young upstart as well.
Like many things in Iceland- the geysers tell a long and winding story of an evolving Earth, and their ephemeral gift is a chapter of time that belongs only to the generations that lived among them. Don’t miss this sight! As Þorkelsson could have told you- you never know when it will be reduced to bubbles.
PLAN YOUR JOURNEY
Travelling to Iceland?
Check our overnight tours with a driver guide that includes a one night stay in a bubble.
*Starting from ISK 59.900 per person
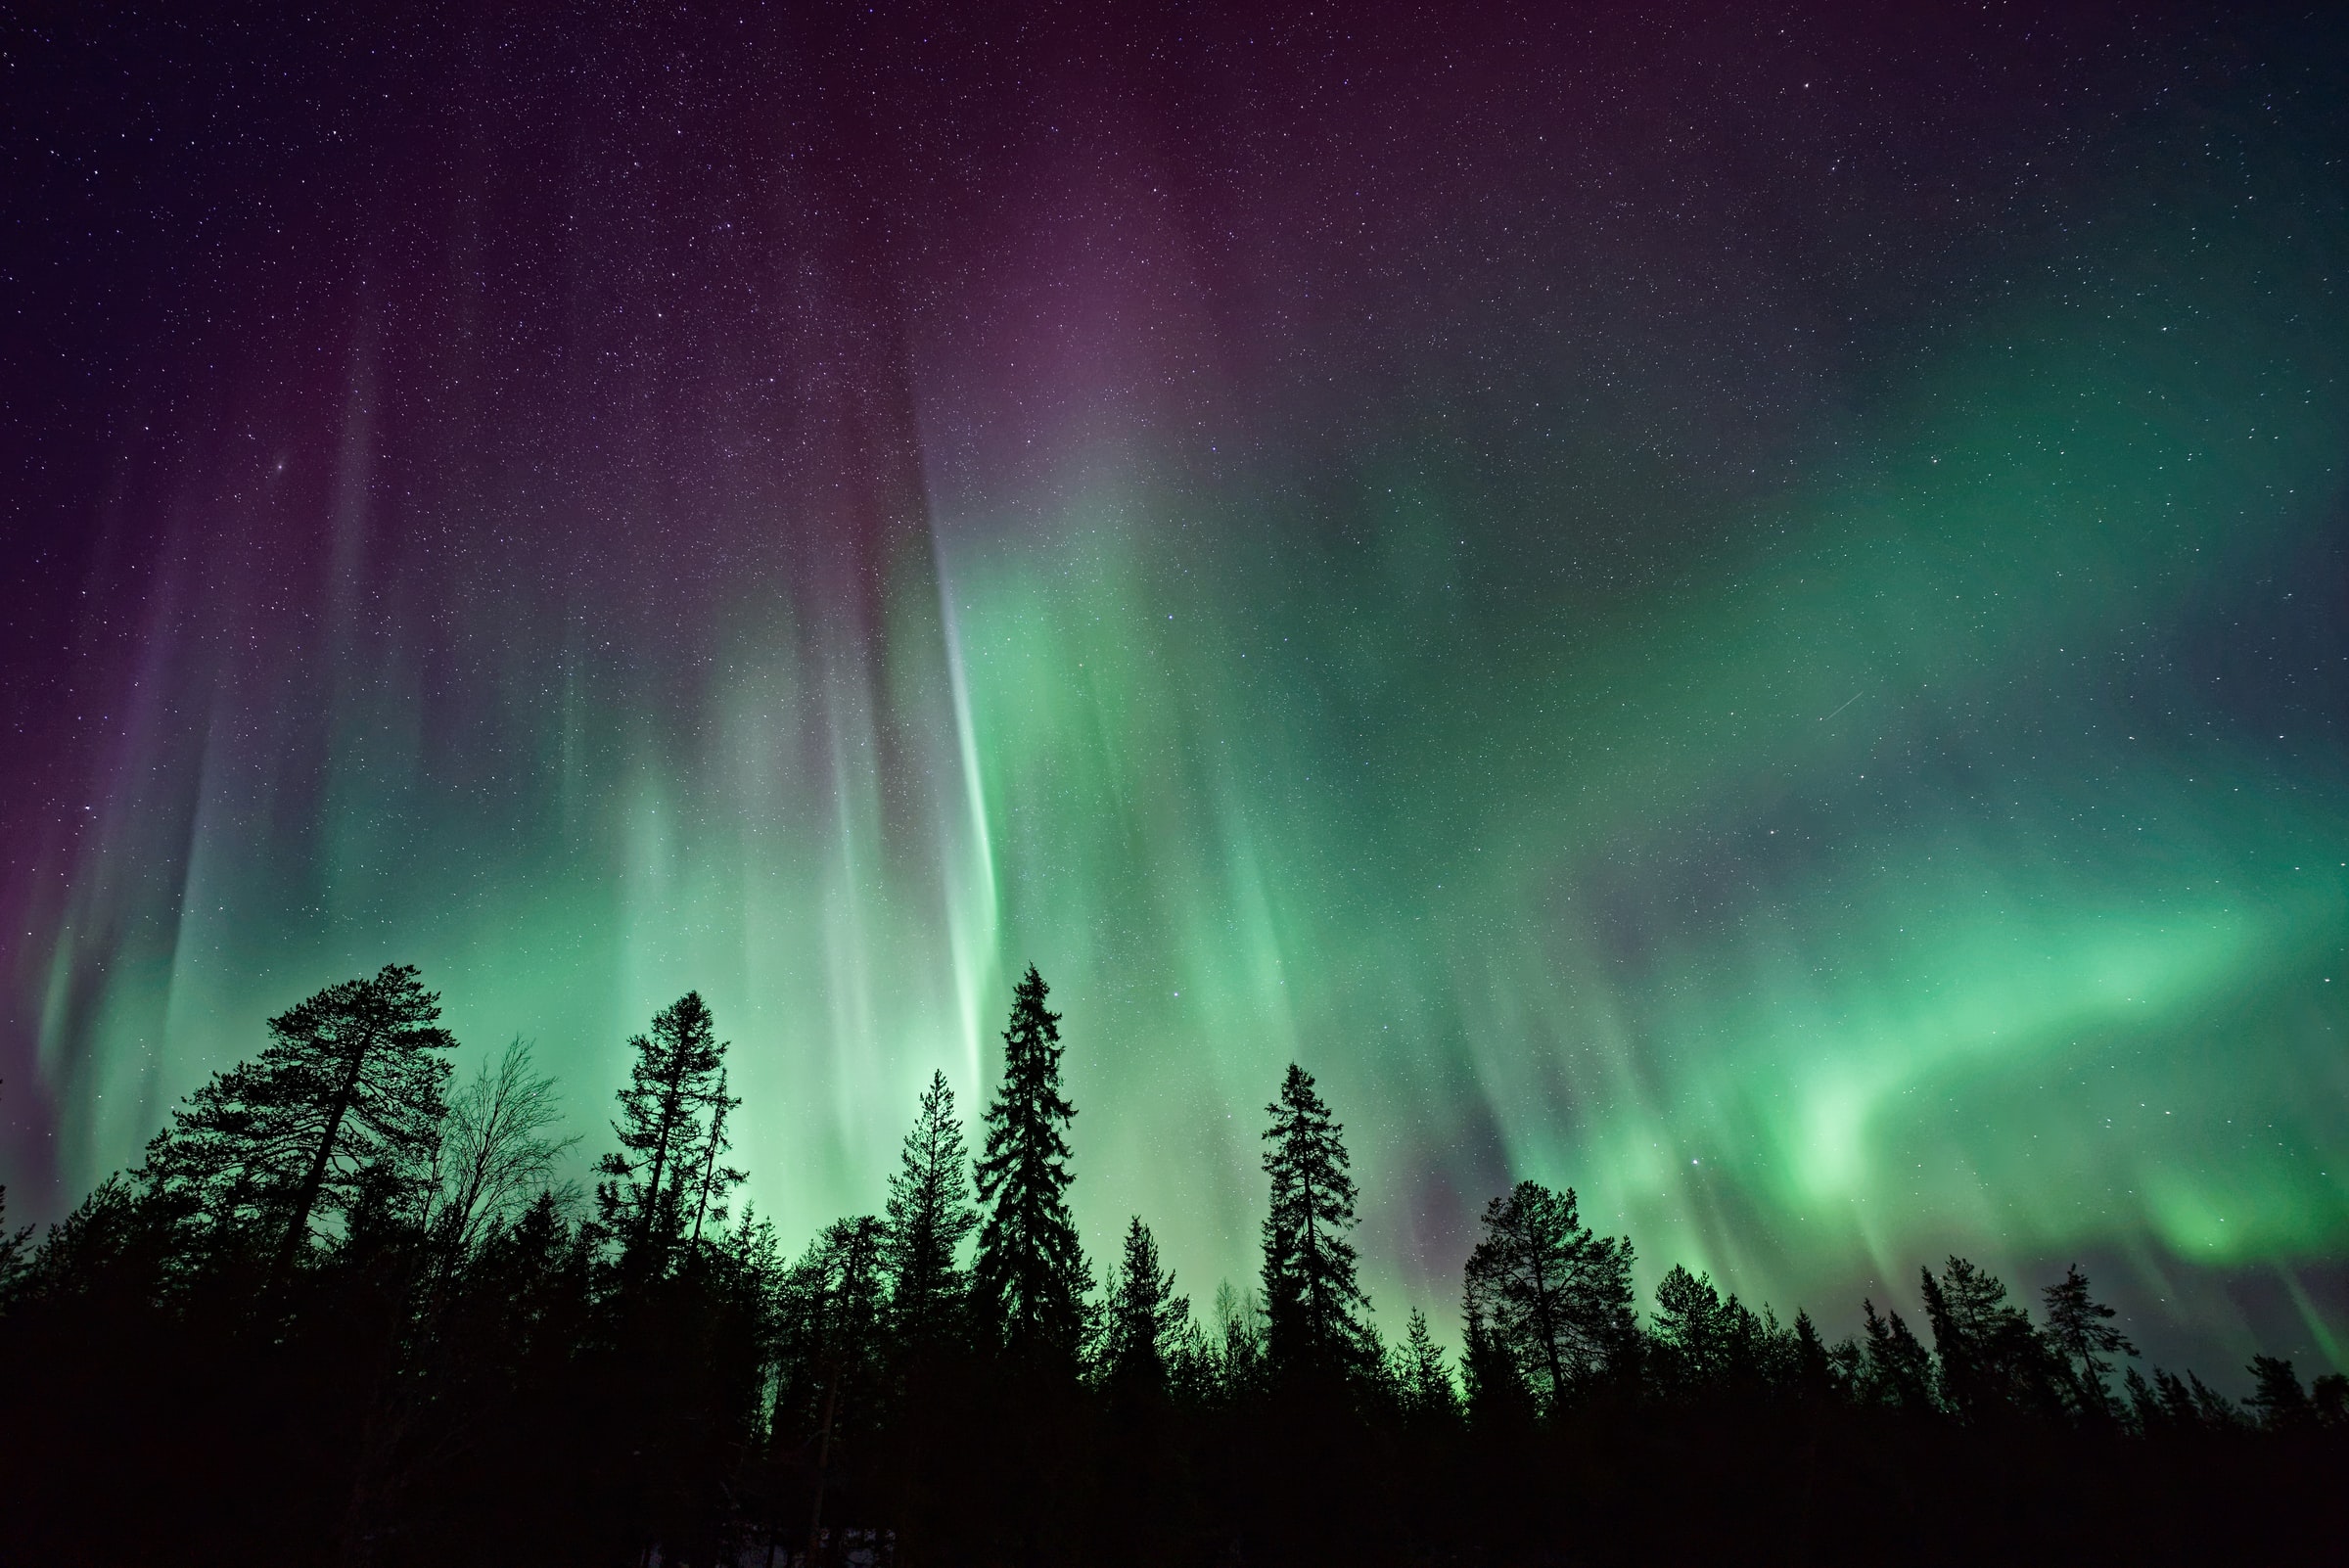
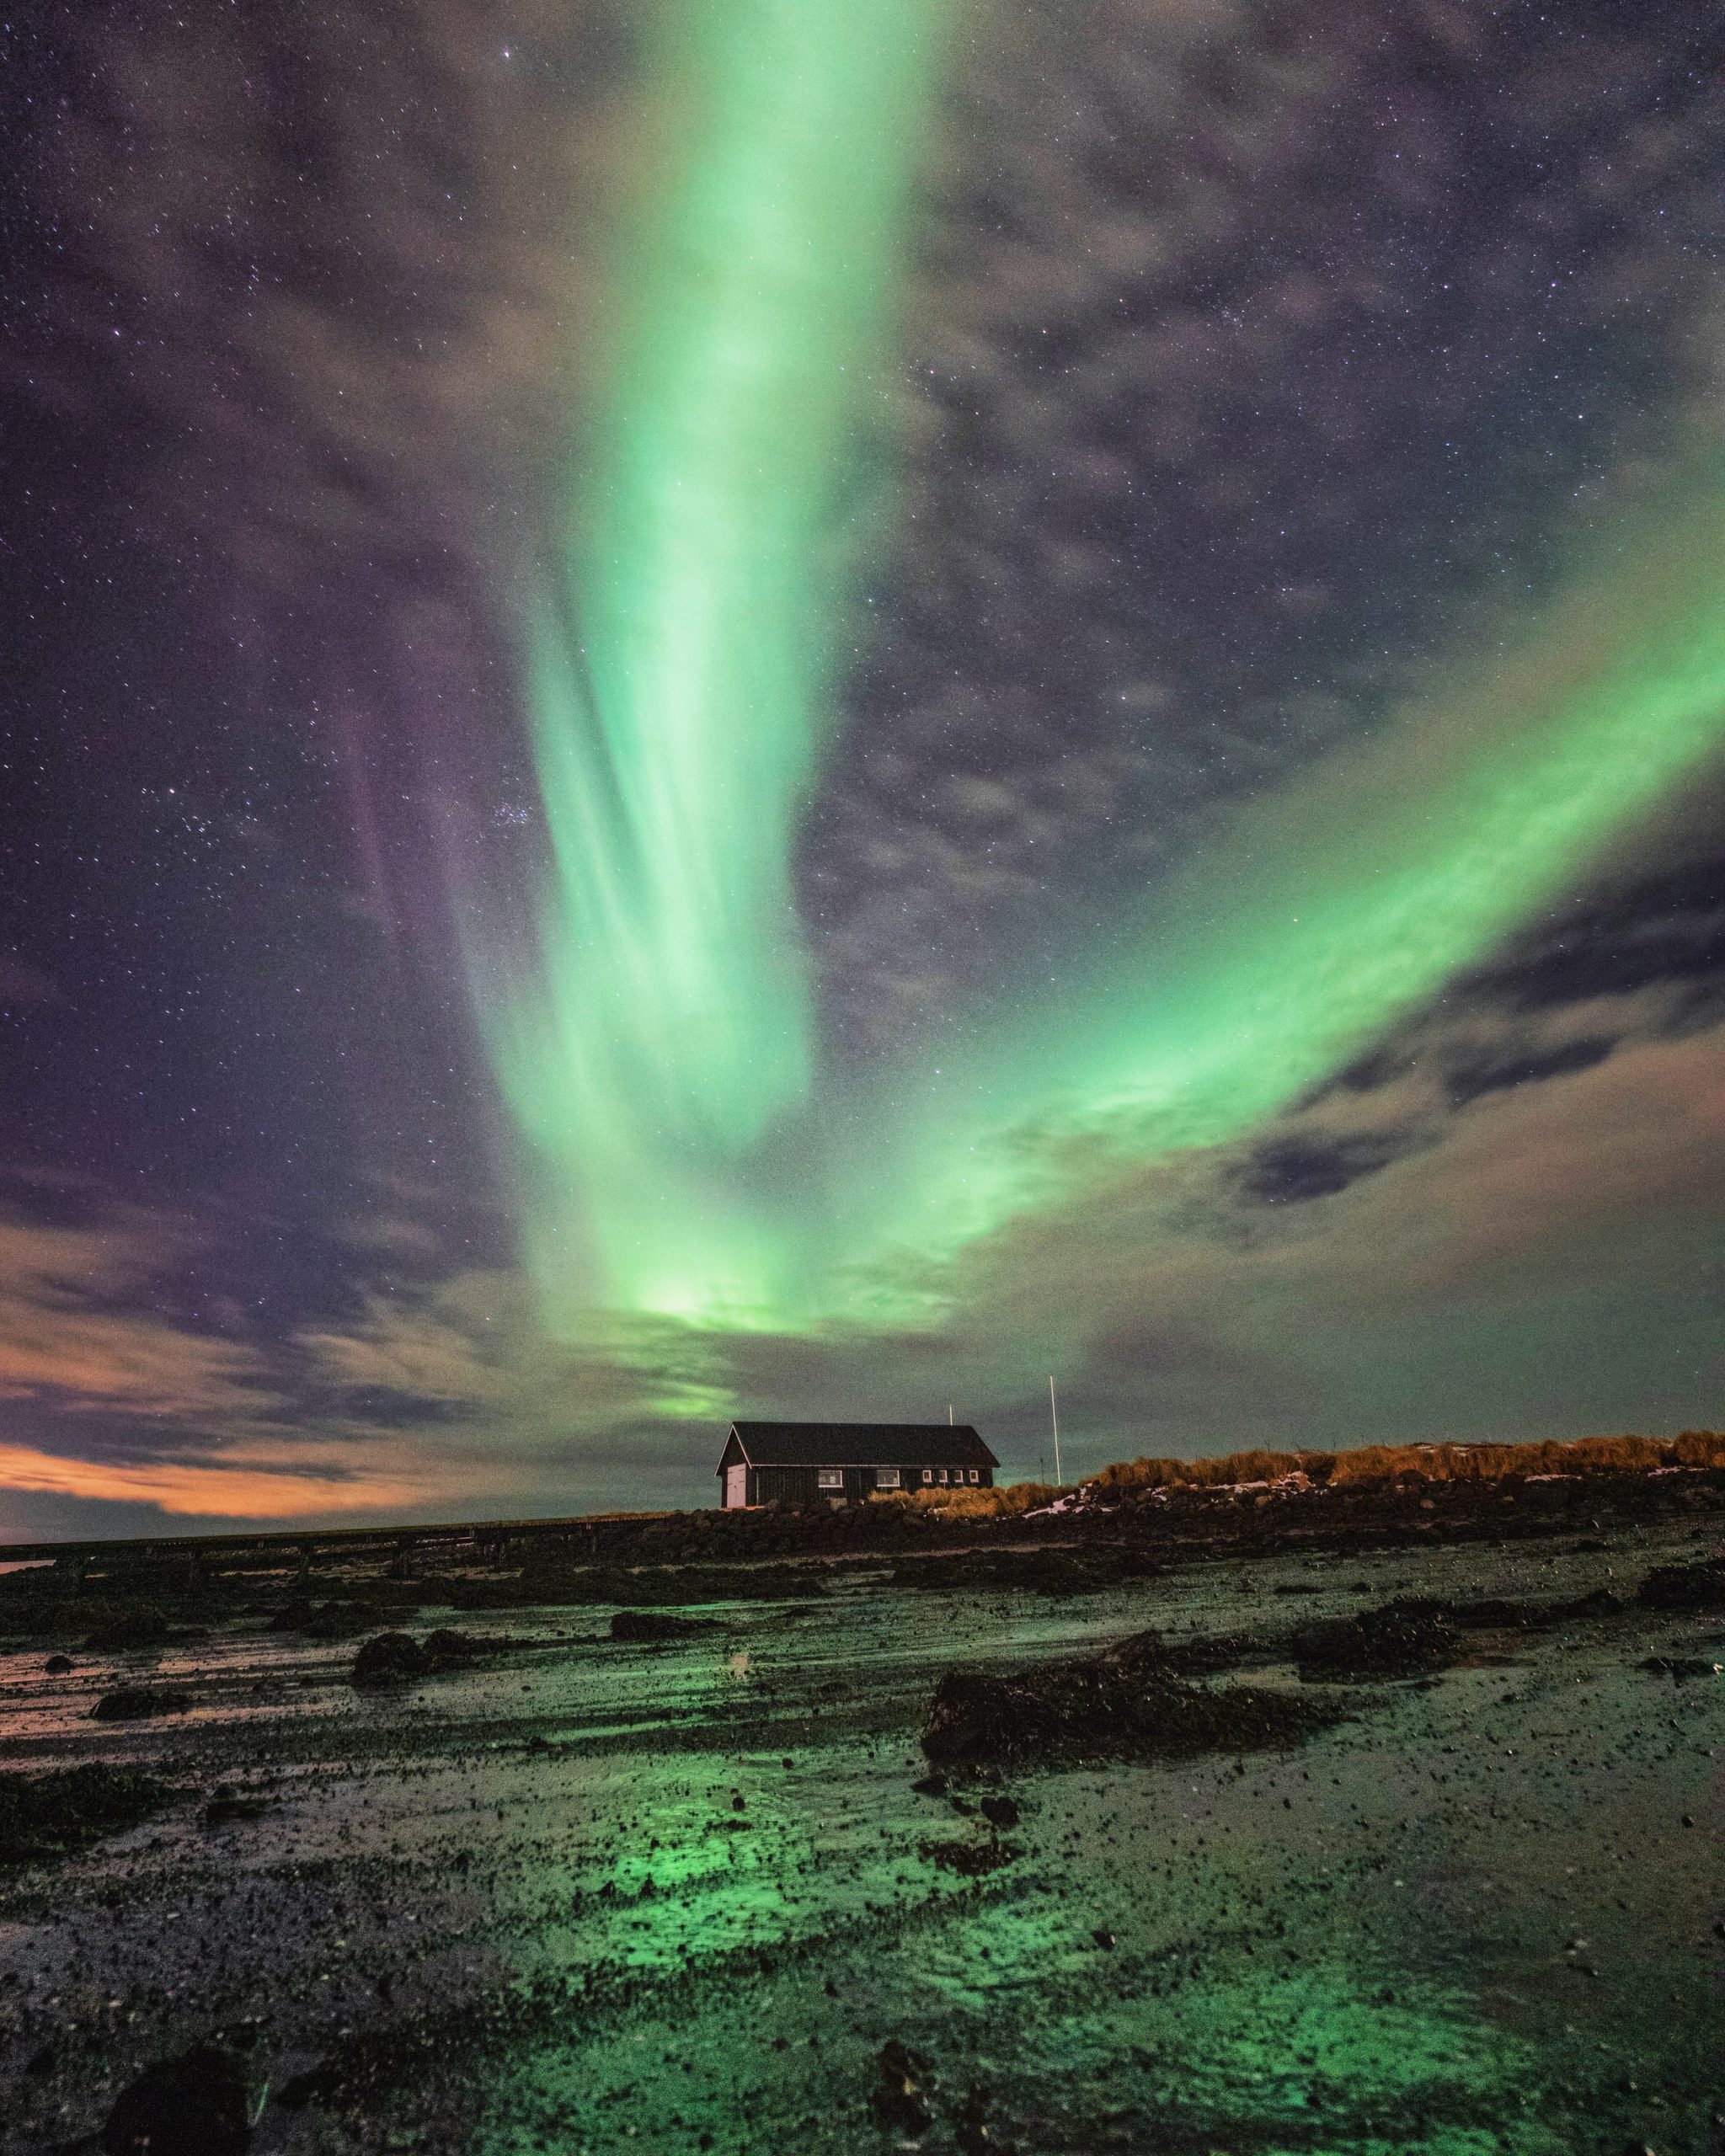
Photographing the Northern Lights in Iceland
Photographing the Northern Lights in Iceland
Photographing the Northern Lights in Iceland is a dream of many artists, amateur and professional alike. Find out how to capture the magic.
Photographing the Northern Lights in Iceland
Photographing the Northern Lights in Iceland is a dream of many artists, amateur and professional alike. Find out how to capture the magic.
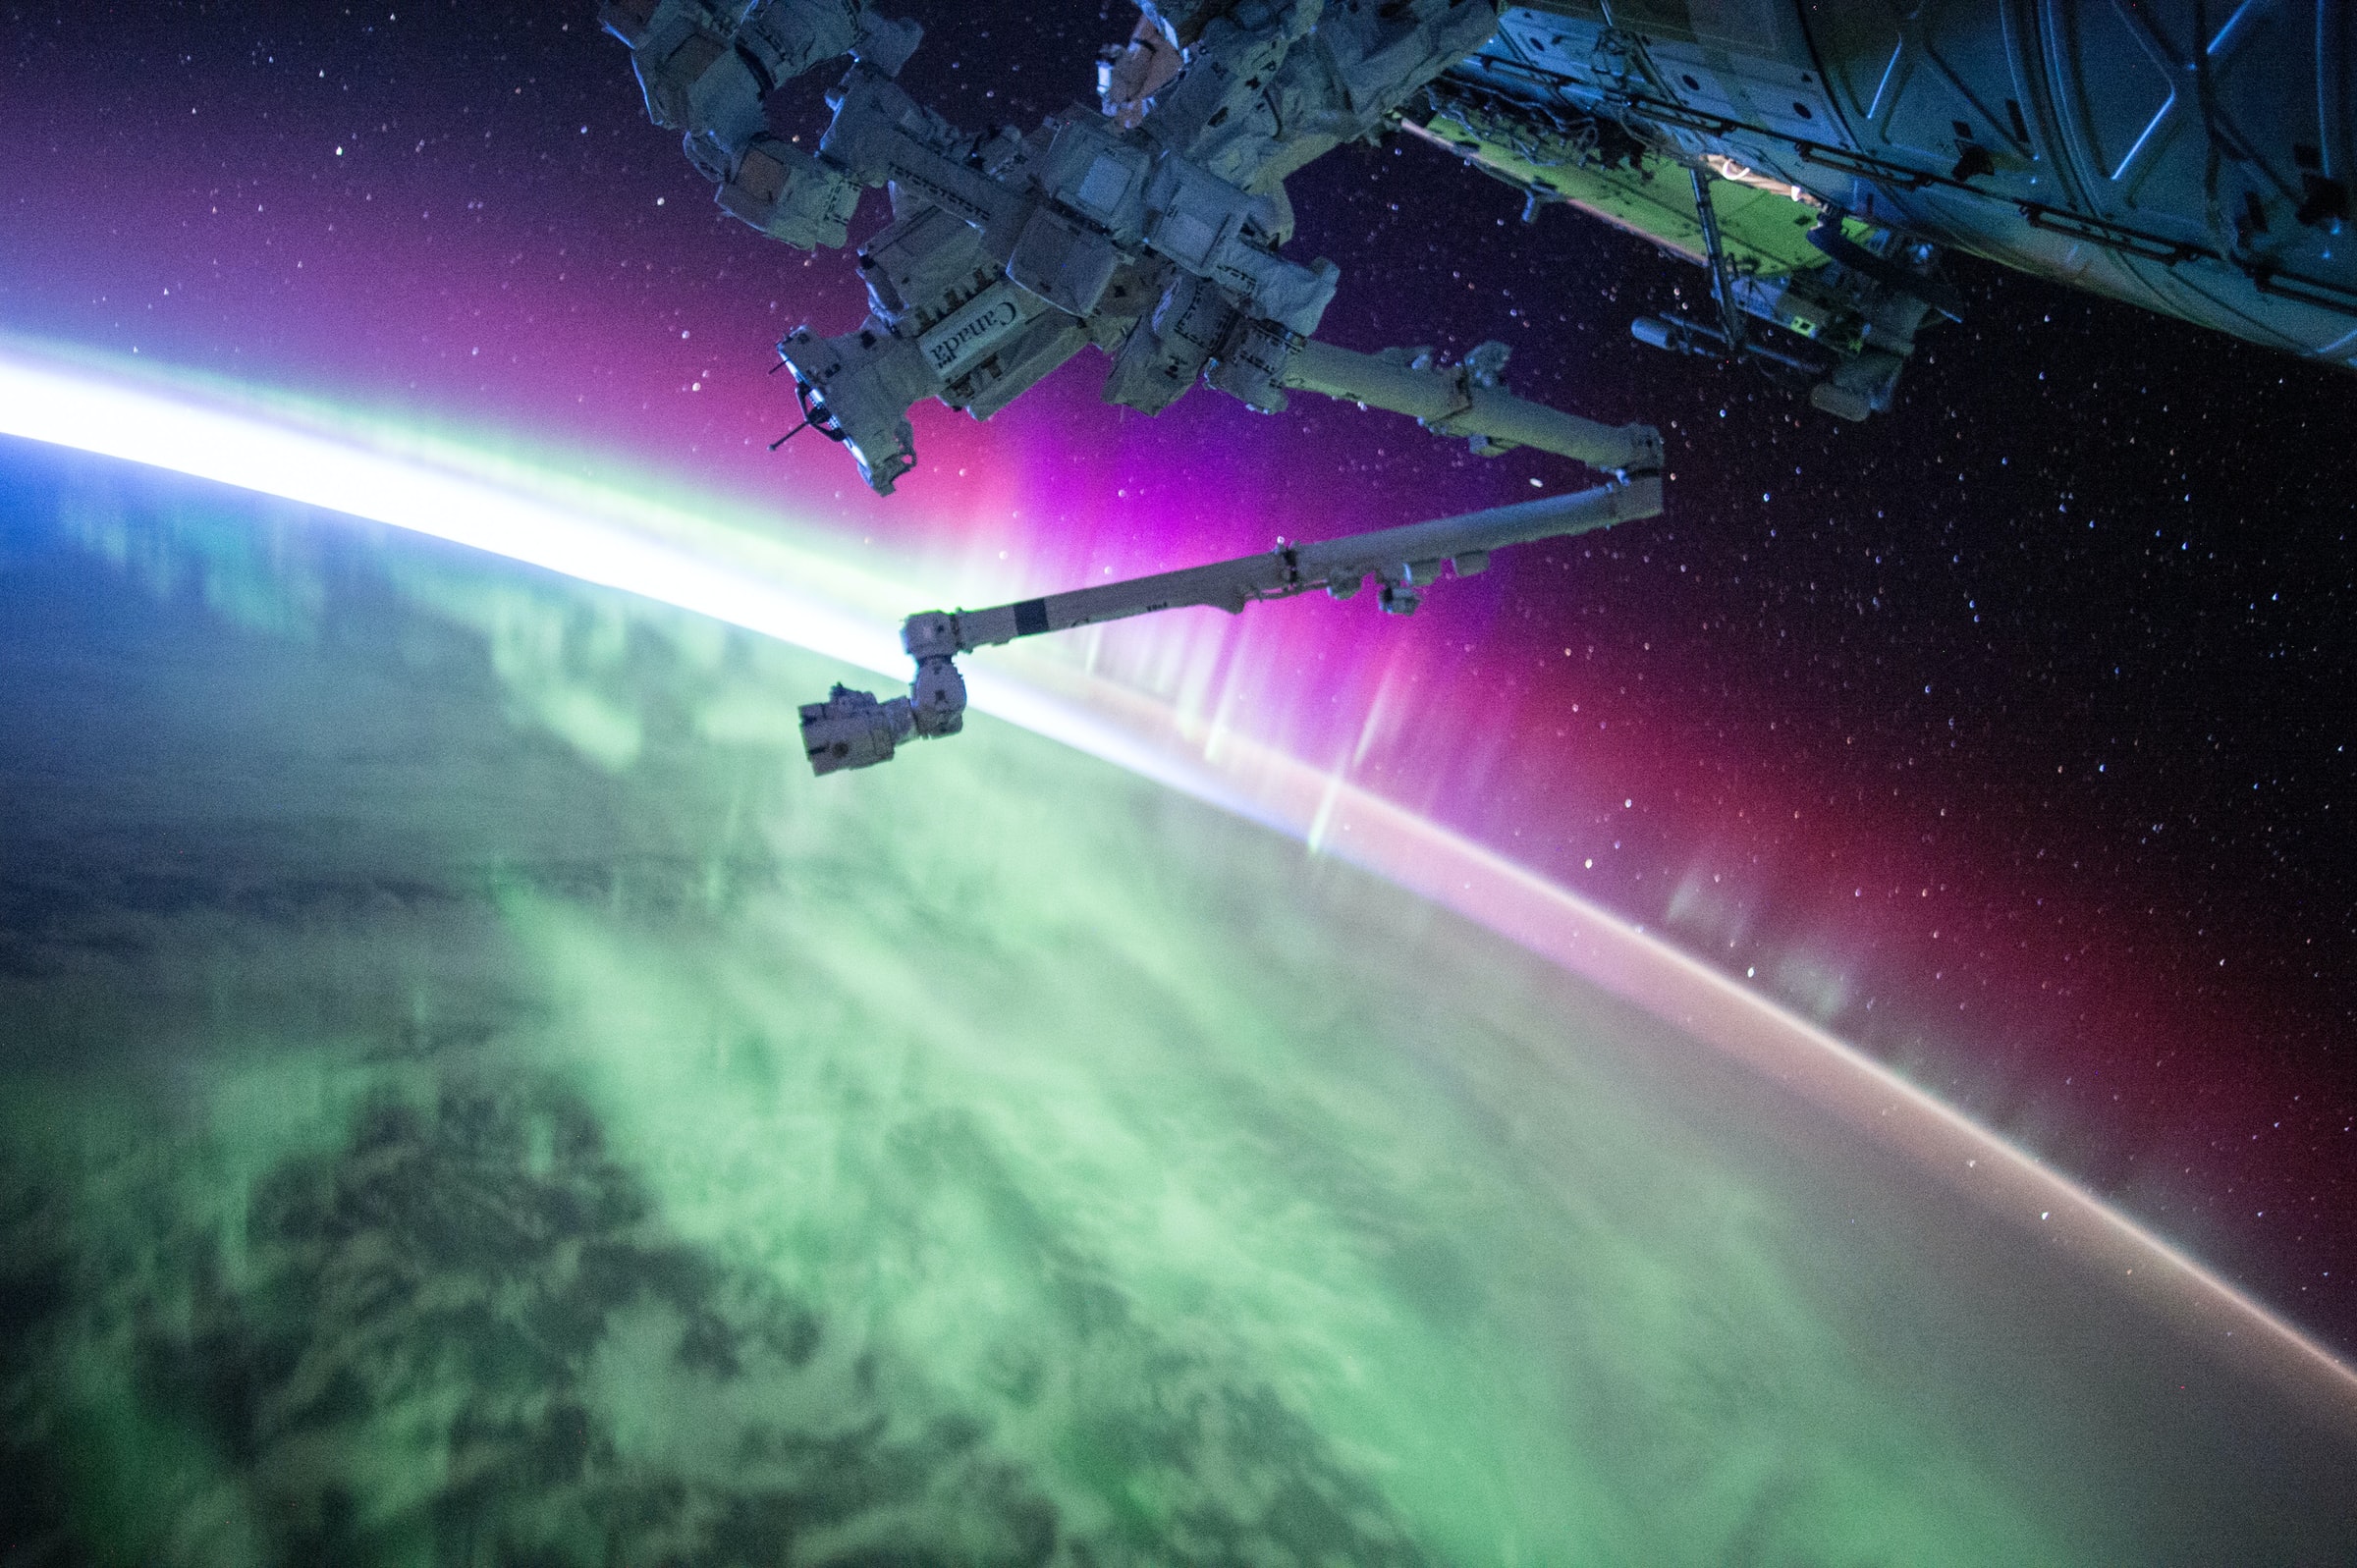
Few natural treasures are as magical and otherworldly as the Aurora Borealis.
Photographing the Northern Lights in Iceland is an activity that many would love to attempt. Very much like its subject, however, Aurora Borealis photography occurs under very specific circumstances that must be recreated in order to function. Key to this process- it is important to know that nighttime photography includes a bit more legwork than typical daylight photography, especially if you are primarily used to using an automatic setting on your camera, or device.
First things first: Preparing yourself for the aurora hunt
In previous posts, we talked about when you can see the Northern Lights in Iceland, and the best places to see them while you are here. It is a good idea to get your planning sorted before going out. Is your gear together? Are your batteries all charged up? Have you checked the auroral and weather forecasts? If there is some solar activity, and an area of clarity that you can reach, it is probable that you can find auroral activity. Despite their reputation of rarity, Northern Lights do happen fairly often within the correct season. (It is just up to the cloud cover and the strength of the occurrence on whether or not we can view them.)
Northern Lights occur well above our weather system (the troposphere layer of the atmosphere), so while the weather does not inhibit them from happening, too much weather could get in the way of our watching.
Is it possible to view Northern Lights with the naked eye?
It is! We have all seen the almost neon photos of auroras stretching across the sky- but do they really appear that way to the regular viewer? The truth is that they do vary by person, occurrence, and who, or what, is looking.
What we mean by this is that auroral light that appears colored can be perceived differently by multiple people, even if they are watching at the same time. Depending on your own vision and your color-processing ability, you may view a different shade than the person next to you, and unless you compare notes- you wouldn’t even know it! This is not likely to be a huge differential, but, don’t forget to check with your fellow hunters, for fun.
And of course, the big note- who or what is watching. (Yes, what!) When we watch the lights with the naked eye, our eyes are doing the best that they can in the darkness, to view a dimly lit source of moving light. As I’m sure you know, we don’t view this type of thing very often in our everyday lives, and so we are not entirely designed for this. The difficulty here is how our eyes are made, and how they work.
Our eyes use their cone cells to process color best during the day, when there is a surplus of light to illuminate things. At nighttime however, we process less color due to the rod cells in our eyes taking over, so that the color-processing cone cells can have a break. Rod cells are not focusing on color, and so while they help us function in the dark, they don’t necessarily provide us with the wide range of color that we might have access to during the day, or in a brightly lit place.
This does not mean that we won’t see color in an auroral occurrence, but it does mean that the color may appear less saturated, and that the finer pieces of the aurora may not be as easy to pick out as they will be for a camera (the “what”!).
Cameras of course do not have this issue, as their “eye” sees without the aid of cells. They are able to employ the use of long exposures and heightened ISO functions in order to capture what is going on. These settings belong to the manual workings of all cameras, and in order to take Northern Light photographs, we manipulate them to “see” in the dark. When you’re out aurora hunting, your camera is your very best set of eyes.
This is an important thing to be informed about, as auroral activity can be varied and unpredictable, and it can be challenging to always know whether you’ll see an occurrence that manifests with great vibrancy, or a weaker occurrence that will take more aid to see clearly. The forecast helps us predict this, but it is still very much a developing tool.
The camera helps us see far beyond what our eyes are capable of- and it can be exciting to know that on nights when it is hard to pick out, sometimes the lens can still do it for us- so always check first with a test shot if you’re not sure!
There have been many nights where a wispy looking dark cloud or a greenish smoke on the horizon actually turned out to be a small aurora, magnified under the lens of a correctly set camera. A guide that has seen many of these sneakier occurrences will often recognize it as such, but if you are new to this phenomenon, you may walk right by.
What kind of device can I capture Northern Lights with?
All devices are not necessarily capable of this kind of photography- so it is worth double checking before you plan a trip out.
Some of us may remember back when all cameras worked manually. Of course now we have automatic options- which can be easy to forget about, now that many of our more portable devices default to an automatic setting. Because we often photograph things in lit places, these settings are typically assuming that there is daylight, or a light source. When there isn’t, these devices employ the flash.
When creating a nighttime photo of Northern Lights, we want to always avoid flash photography. This function will illuminate the immediate foreground in front of you, but it will make it impossible to catch the actual sky. (You’ll end up with a photo of a few meters of the ground, and a flat black background.)
Instead, the ideal is to always attempt this kind of photography on the manual setting.
You will want to check that your device is capable of this, as these days, some no longer are.
DSLR and SLR cameras come with a manual mode, denoted by the “M” on your setting or mode dial. Some smartphones now also employ a manual or “pro” mode in their settings, as do some devices like GoPros, and various hand cams. At the time of writing this article, many smartphones now offer a night mode setting that is capable of catching an aurora shot of moderate strength on their own, with little to no aid!
If you plan on making aurora photos with your smartphone, know that it is increasingly more possible now than it has ever been before, but currently it will still not match the quality of a DSLR/SLR device.
Depending on the specific make of phone that you have, there will be a different process to create these images. You may have a built in manual mode in your phone settings, or, you may have to download a manual camera application, in order to access these functions.
(Tip: Many popular point-and-shoot models do not offer a full-manual mode, so make sure to check this early! You can research your camera model or check your device manual to find out, but a quick way to see is by attempting to adjust the ISO and the shutter speed.
If the camera “tethers” these two functions together and only allows one to reach a maximum level, then you may want to have a back-up device handy, in the event that you need a bit more capture help. It may still be possible to get a photo with a camera like this but it may be challenging to capture a weak auroral manifestation with it.)
The device that you are using likely requires some prior set up in order to be able to make this kind of photo, so it is important to check this out before you’re on the hunt. You never know when the aurora will spring, and it can be stressful to set your device while the show is on. (Not to mention cold and dark! The less time spent pulling gloves off, the better.)
PLAN YOUR JOURNEY
Travelling to Iceland?
Check our overnight tours with a driver guide that includes a one night stay in a bubble.
*Starting from ISK 59.900 per person
Can I film an aurora?
It is possible to film the Northern Lights, but it can be challenging. Not all video cameras are designed to capture nighttime images without the aid of a flash or additional light source. Just like with photography, you will need to apply specific manual settings so that the camera can see the low lumen of the auroral light in the darkness.
This is fairly simple to do with most cameras for photos, but not all cameras offer this option with their video mode, as the video mode is limited on most basic devices. These cameras are assuming that you will mostly be filming in lit places, and so they don’t necessarily offer you the manual settings to change that. (I suppose we don’t often need to film in the dark very often!) In order to video an aurora, you will need a device that allows that kind of manipulation. There are now cameras available for this kind of shooting, but they are not typically novice machines.
However, due to the advancing technology of many smartphones and handheld adventure cams, very strong auroral activity can sometimes be captured in varying quality on video. This quality will likely not match professional video that you have seen, but, it can now be done under the right circumstances.
If you are dreaming of aurora videos, an easier way to accomplish animation is through time lapse! Time lapse occurs when one takes multiple photos in quick succession and then puts them together like a slide show. This is a popular way to show animation of an auroral occurrence and only requires photographs to work. Time lapse photography is a hobby unto itself, so if this is a thing you would like to try- it may be prudent to read up on the process beforehand to be prepared.
Camera Settings
Onto the important information! Now you’ve charged all your devices you know about the forecast, and maybe you’ve even picked out a spot! It’s time to prepare your equipment.
If you are using a traditional DSLR/SLR camera, or a device that has a regular manual mode, the primary functions that you will be looking for are shutter speed, ISO, aperture, and, white balance. These functions all work together to make the image, so know that when you adjust one, you may need to adjust another.
Each aurora is different, and so it is best to become comfortable with the location of these settings so that you can adjust accordingly, depending on your scene. Many of them have their own buttons or dials, or can be accessed via a digital menu.
This can vary depending on the camera you have, but many of these things share similar icons. Despite pre-setting your device, as your subject changes, so must you. A bright aurora may only need a few seconds of extended shutter, while a weaker manifestation may need much more. Be ready to experiment with this, to get that ultimate shot!
(Tip: These settings all have their pros and cons with adjustment! If an aurora is moving quickly, too long of a shutter speed may create a blurrier subject than you actually saw. If the shape pattern of the aurora is very spiky and sharp, you may want to employ a shorter shutter speed in order to capture that vision, and to avoid overlapping the shapes as the camera processes.
When a long shutter is in use, the camera is essentially layering everything that it sees, so the aurora may overlap with itself as it dances, if you give the camera long enough to take the photo.)
We recommend the following settings:
Shutter Speed: Anywhere from 1-30 full seconds. (You can start with a few seconds and create a test shot, to see if you need more help or not. The higher the number here, the brighter the image. (Be careful of possible overexposure!) If you are viewing a weak aurora, you may need the assistance of a higher shutter speed.
If you are doing a time lapse, you may want a lower shutter speed and a higher ISO, so that you can capture a more seamless stream of animation.) And if you want to be IN the photo- make sure that you hold the pose! The camera will create the photo for however many seconds you set it for, so if you move during that time frame, you’ll just be a blur!
(Tip: Having trouble setting your shutter speed? Not sure why the image is over dark, or isn’t coming out right? Double check and make sure that you have set the camera to FULL seconds, and not a fraction of a second. Depending on the brand of camera, they may have a different way of showing this metric, but typically full seconds of shutter speed are denoted by a ” symbol, after the number. Ten whole seconds of shutter would then look something like this: 10″.
If your shutter speed looks like a fraction, you are employing a faster shutter than we need, even if it has a 10 in it. This is an easy mistake to make, so when you’re setting that dial, make sure you scroll all the way to the whole numbers at the end, because that is the range we’re looking for when we create nighttime photos.)
ISO: This function controls how the camera perceives light. You would use this setting to make a natural-looking photo in a darker place, like a theatre. To give you some context, a regular daytime photo has a typical ISO of around 100-200. For Northern Lights, we recommend a minimum of 800. Many cameras have a different scale of how high their ISO goes, so the maximum on your device may differ for you.
Many basic DSLR cameras stop around 6,400, which may be too high for what you will need. This setting and the shutter speed setting work together to create the image and manage how the light is perceived, so it is good to be comfortable with adjusting them both together. You can increase the ISO to brighten the image, but know that an ISO that is too high will create a grainy image, so be careful here. If you have a good showing going on, try taking a few shots with different settings, so that you have something to pick from later.
Aperture or f-stop: This function controls how much light the camera brings in. For this type of photography, we are looking for a lower f-stop, which is how aperture is measured. Depending on your lens, you may only be able to go as low as f/4. This, or lower, is acceptable, but if we can achieve a lower number, that is ideal. The lense controls the aperture that you can select, so don’t be alarmed if yours can’t reach the 1-2 range.
(Tip: Having trouble adjusting your aperture? You may be zoomed in on something! When holding down the aperture button, or however you typically change this setting on your device, you may have to manipulate a dial in order to lower or raise this number. If you know that it can go lower, but it seems stuck, try returning your lens to its regular zoomed out position, and try again.)
White Balance: This is a subjective choice, and is widely up to you. This function will change the color “temperature” of your image. This is an easy way to correct a strange colored image, so try this first if you find that your photos are too blue, or too orange. Many landscape photographers are said to prefer the daylight setting, but my favorite is tungsten/incandescent.
These can be denoted by icons, temperatures (in Kelvin), light source examples, or reference names. You may see all of these, or only a select few employed on your device. You will want to make sure that you don’t leave this function on AUTO unless you are shooting in RAW, because the camera will not be able to regulate very well on its own, in this context.
During the day, an automatic white balance can be a great tool. If you are using the RAW mode to create your images, you can adjust the white balance later in editing software.
Important extra tips:
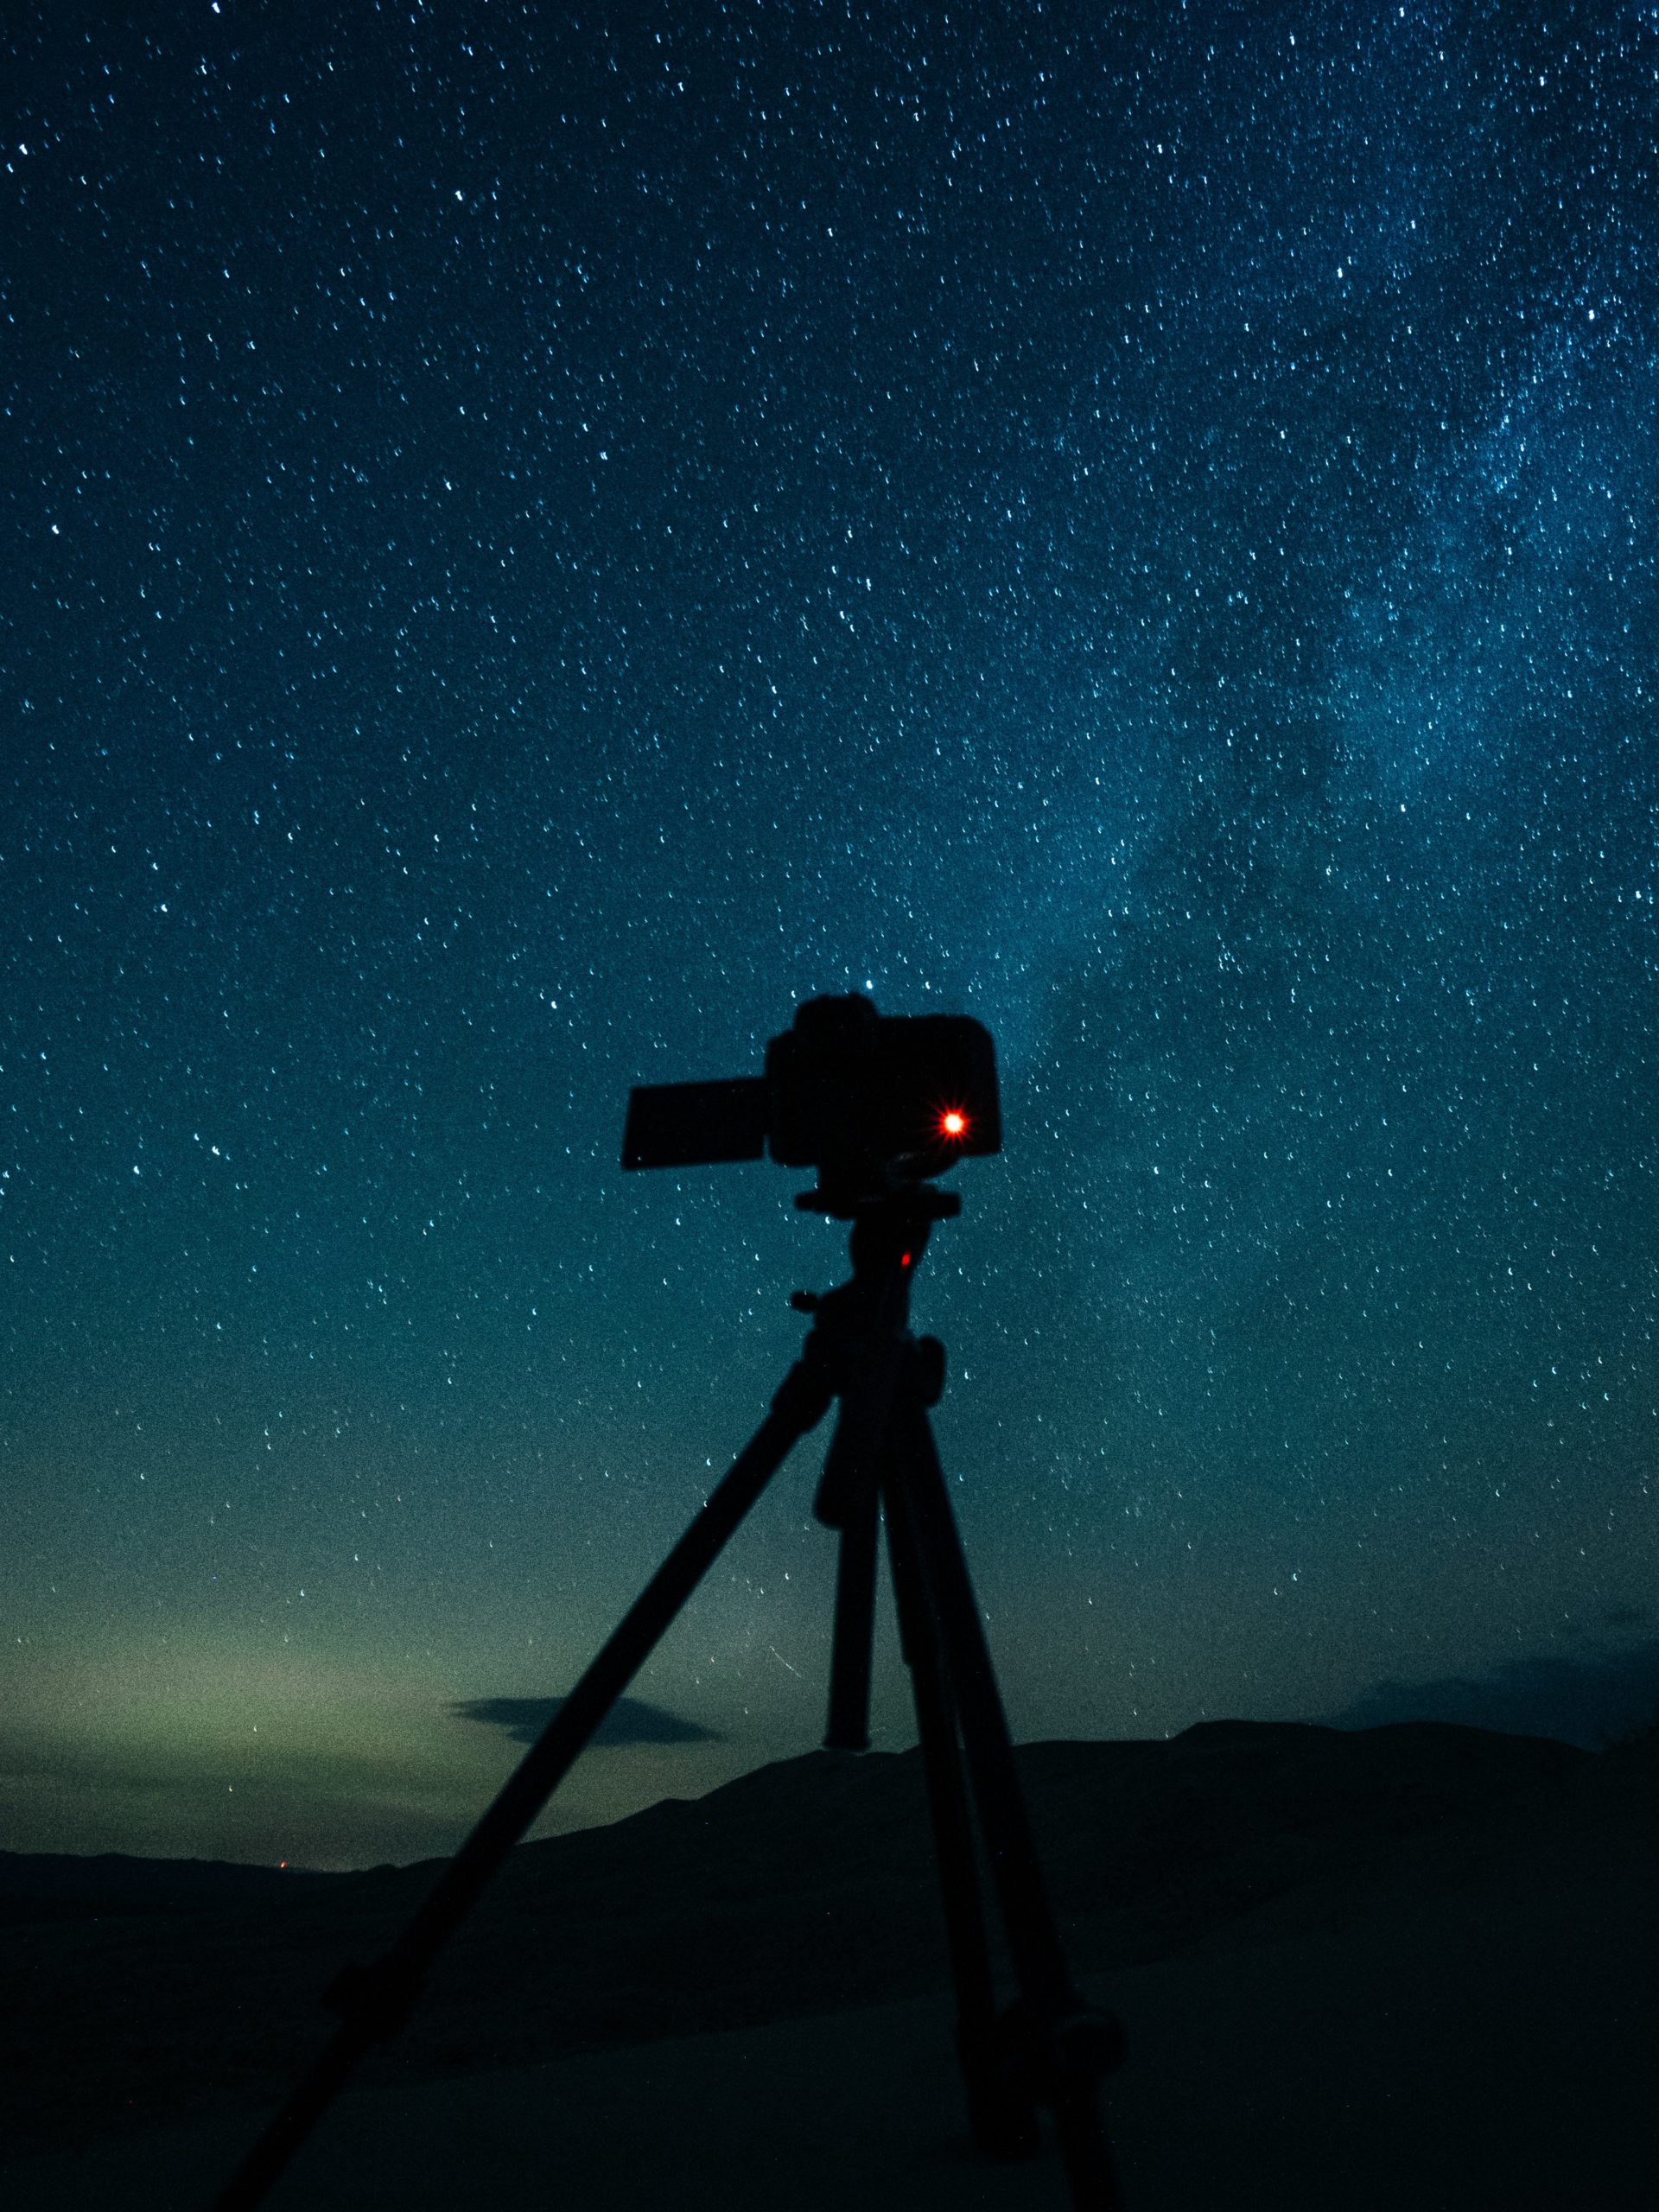
- Don’t forget your tripod! Long exposure photography requires complete stillness. If you are holding the camera for the time that it is processing the photo, your movement will blur the image, even if you think you are being still. It’s amazing how much we actually move, without even realizing it! If you don’t have access to a tripod, try bracing yourself on a surface, or setting your camera on a table. Be extremely careful of your device, tripod or not- as the wind in Iceland can be a serious force to be reckoned with! The wind has claimed many cameras on tripods, and nothing is sadder than a cracked lens on a photography trip. Stay vigilant!
- Charge your battery! The cold wears out lithium batteries, so make sure you’re setting out with a full charge. (If you think you’ll be out long, it isn’t a bad idea to have a backup.) If you find yourself losing juice at the last minute, try warming the battery in your pocket, or keeping your camera inside your jacket when you aren’t using it. And don’t forget the hand warmers! They can help in a pinch.
- Focus! We leave our lenses on AF, or automatic focus, during the day. This works great! Just like us, cameras see pretty well during the day. When shooting auroras, however, this can be a struggle, as the camera won’t immediately know what to focus on. Make sure you change your lens to MF or manual focus, when creating nighttime photos. Don’t forget that in MF you’ll have to focus yourself with the focus ring on your lens, so make sure to adjust that before you take your next photo. You can do this by focusing on a light in the distance- like the moon, a headlight, a streetlight, or a far off town. In situations of true darkness, have a friend hold up a smartphone from a distance away. You can also use infinity mode, if your device supports it. You can tell if you have this function by checking the manual for your device model, or by the infinity symbol on or near your lens.
- Self timer: Want to be in the shot? Or, just want to give your camera a few minutes to stabilize after you’ve pressed the button? Set a self timer! It has saved many shots from a quick accidental hand-knock.
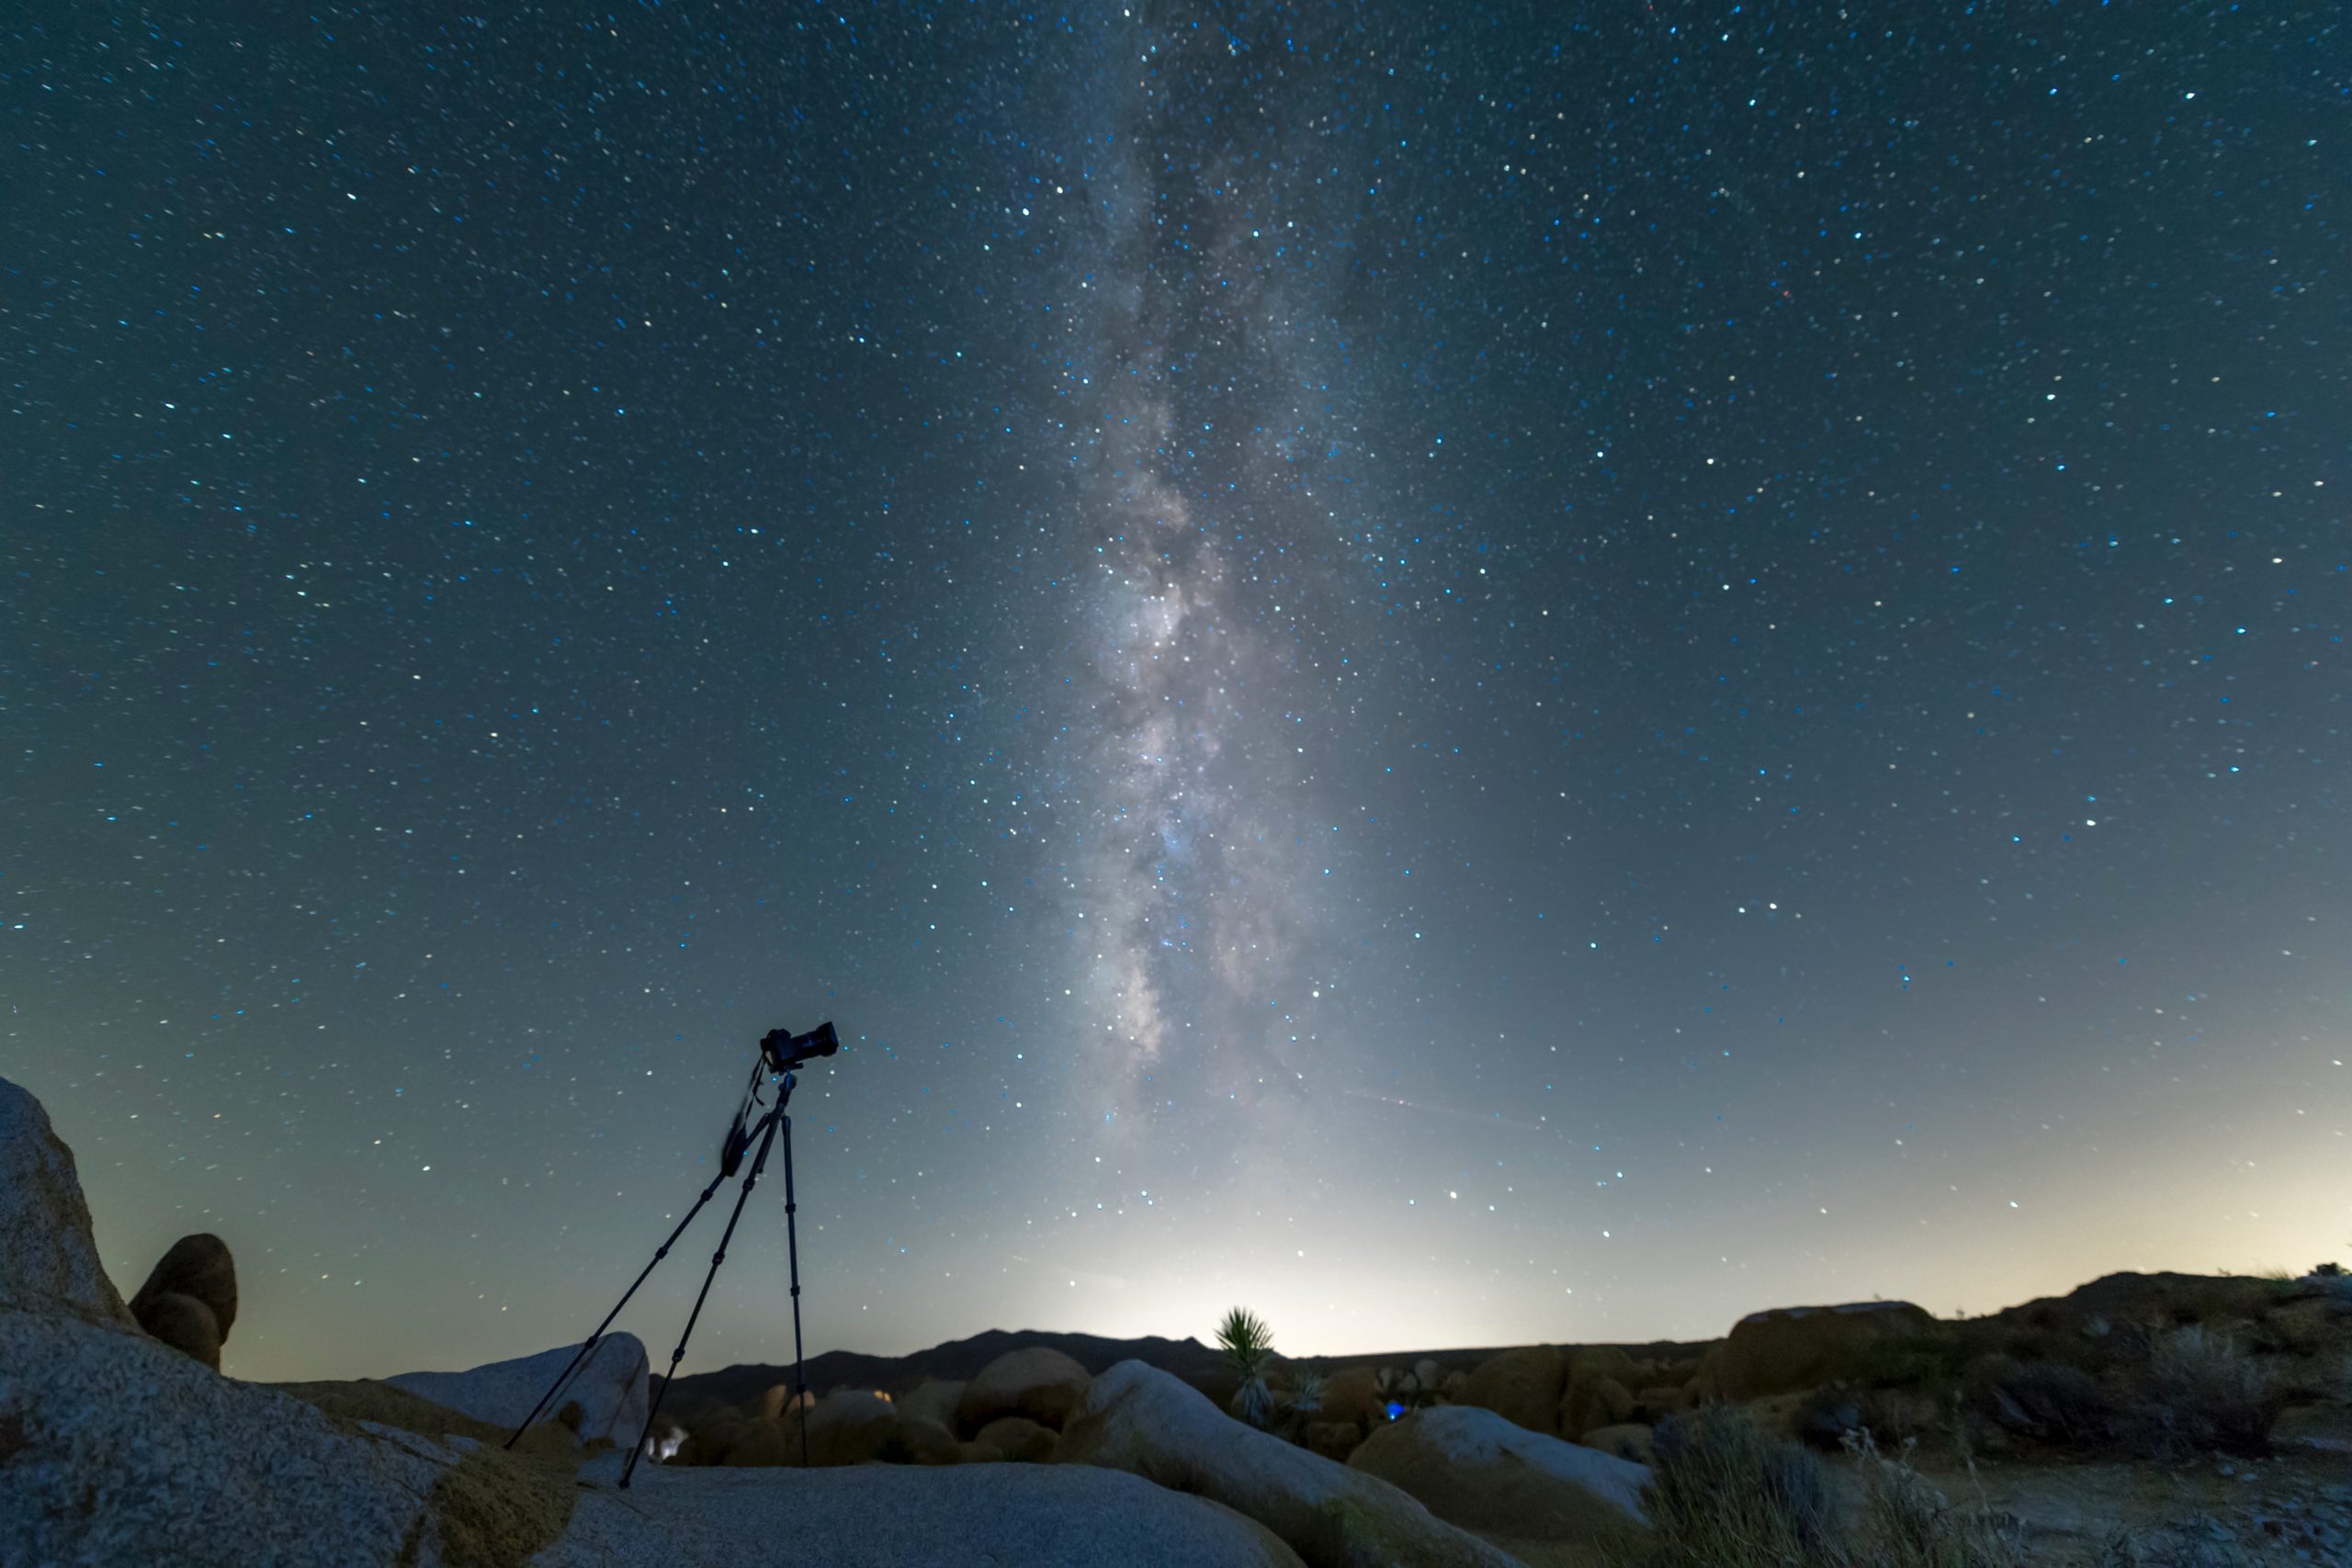
- Lenses: What kind of lens should you use? We prefer a wide angle, because auroras are BIG! 14-50mm is a favorite, but the widest angle you’ve got will do. This is not likely to be the best moment for a zoom lens. (Though- no matter what advice you’ve been given, it’s always worth trying all of your ideas. Photography is an art form, and an eternal series of experiments, so it is important to try everything. You never know what will make that once in a lifetime shot!)
- Will the moon ruin my shot? Likely not. A full moon can create a surprising amount of light, and that can complicate things- but more often than not it creates a really spectacular foreground for images. If you’re not sure what the moon phase is on the night that you’re planning a hunt, you can check here: https://www.timeanddate.com/moon/phases/
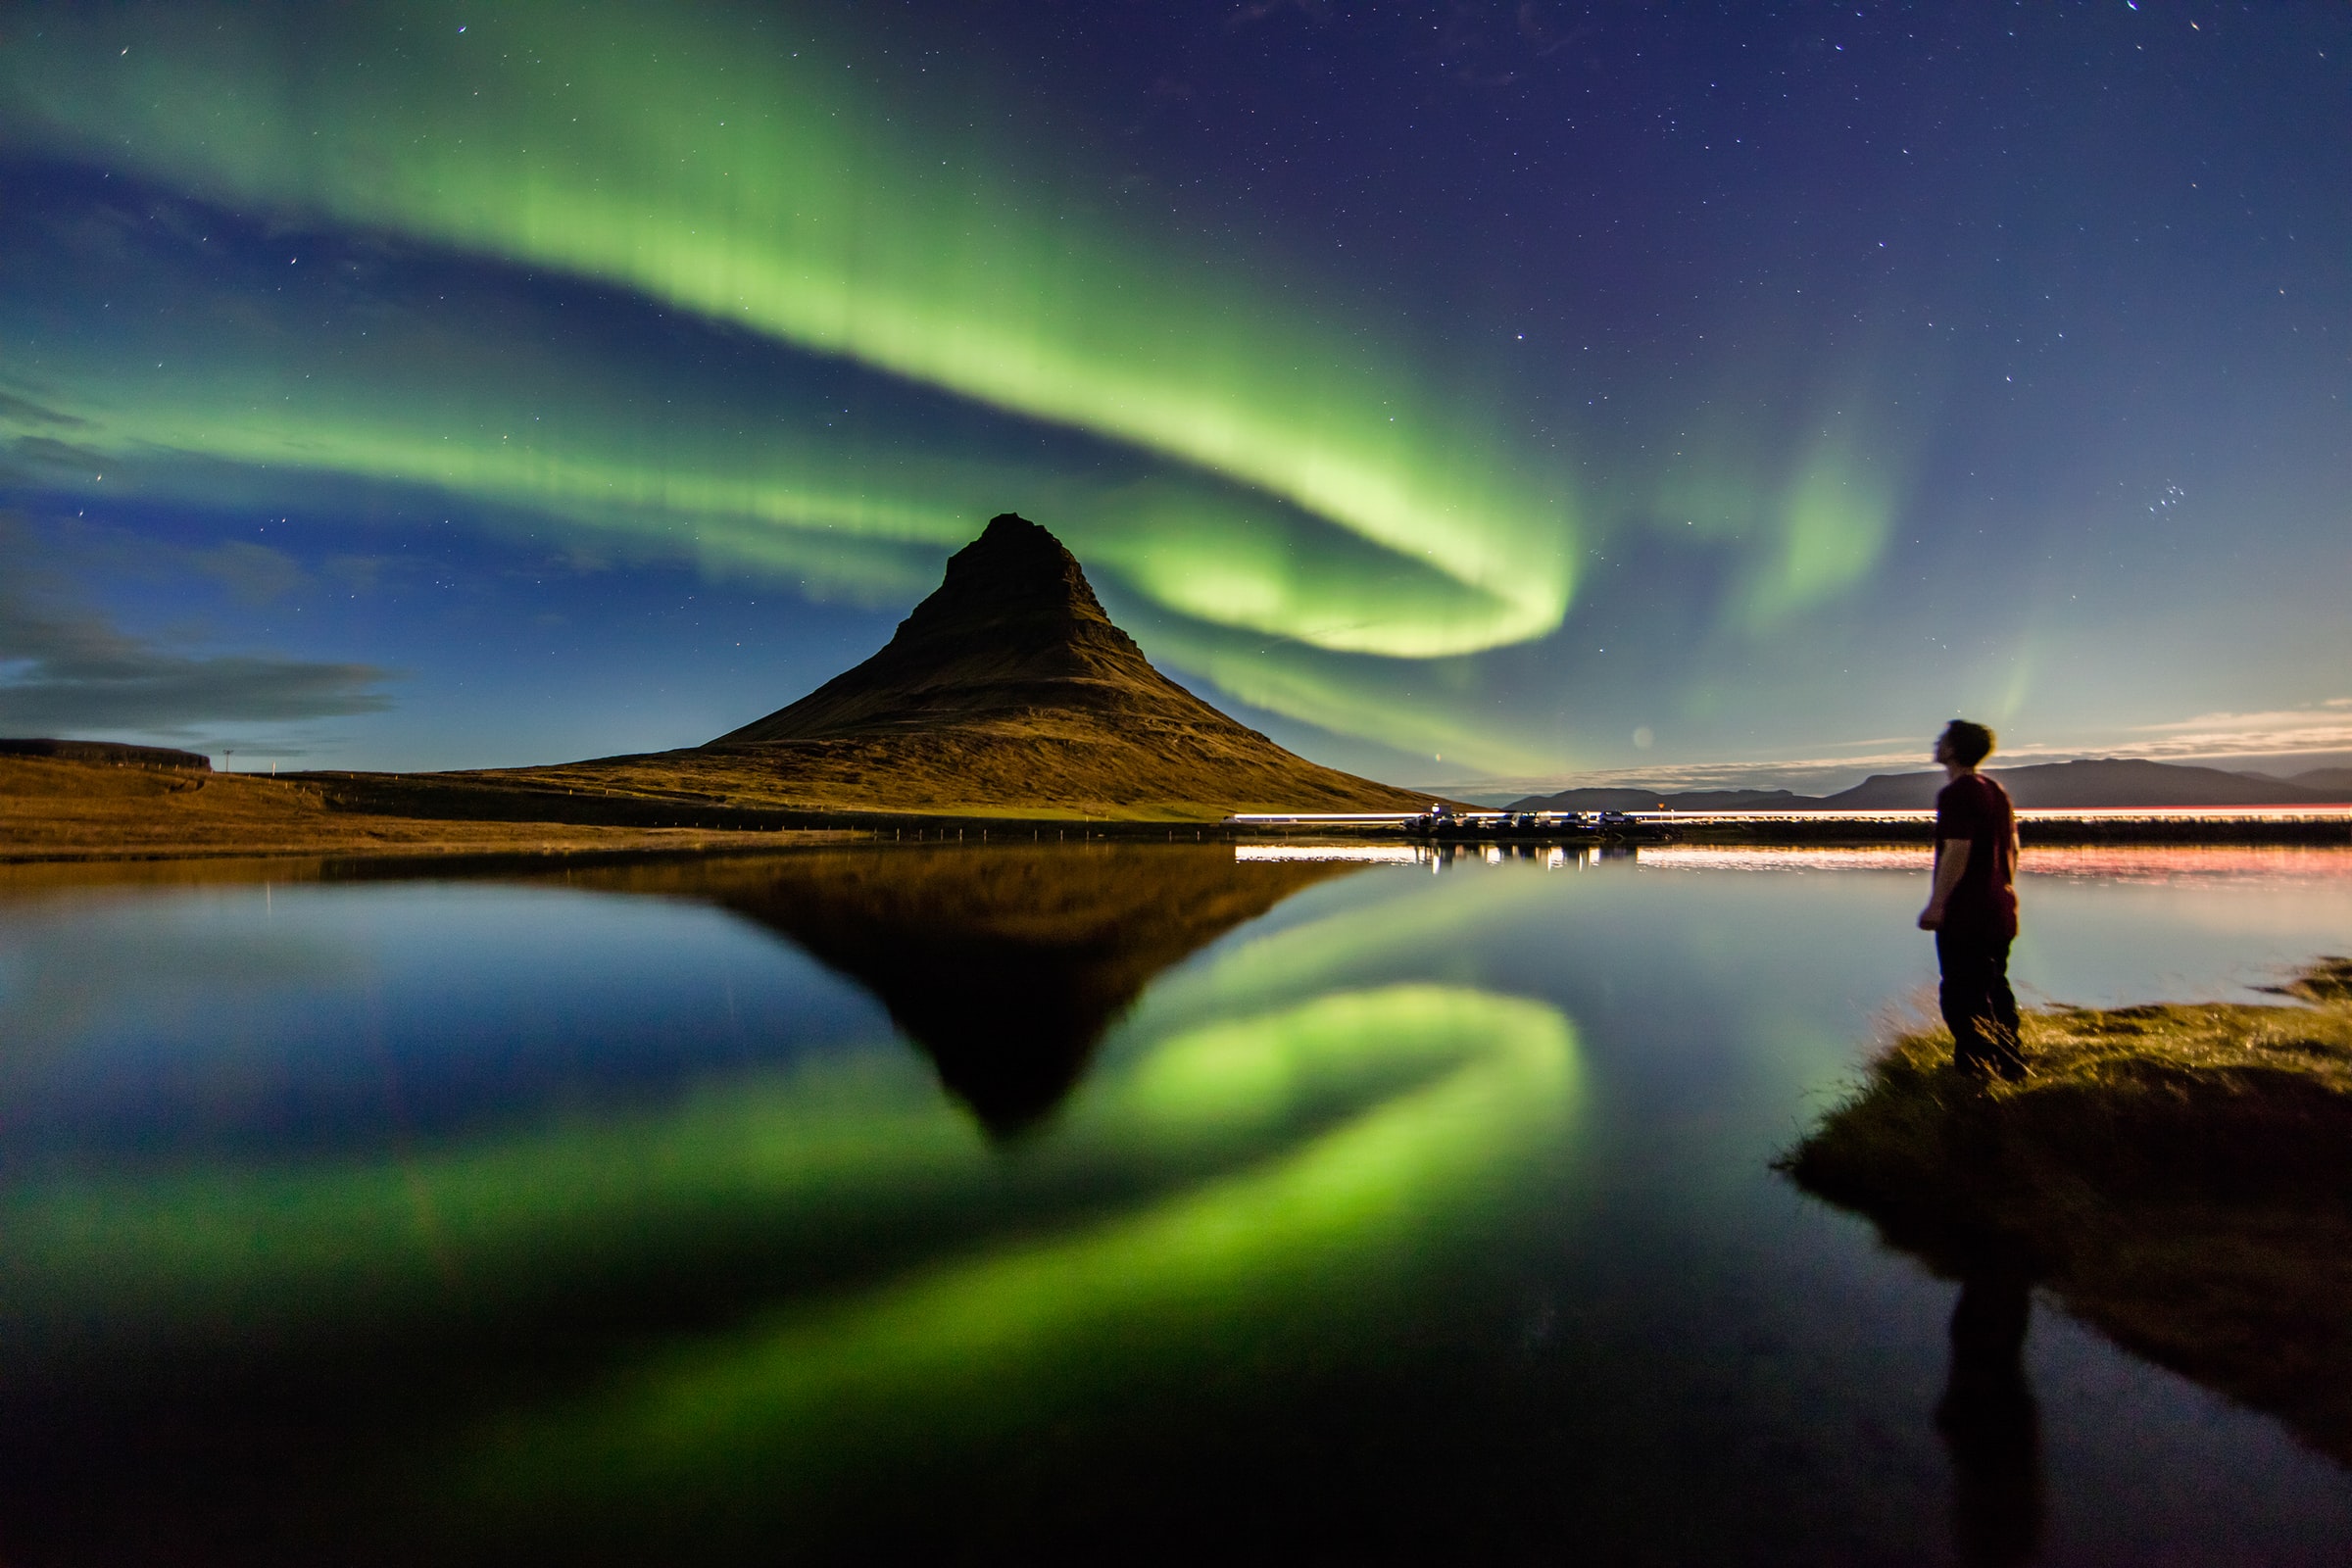
This is also a great resource for figuring out when the optimal darkness is occuring at any time of year. Iceland has a fairly extreme dark/light cycle, so this can be a great tool for making sure you’re well in the dark. - Composition tip: Try planning a visit to a lake! Still bodies of water or ice can make amazing mirrored reflection shots.
So now that the secrets are revealed, you’re ready to get out there and shoot! Make sure you’re warmly dressed, and don’t forget to share your photos with us at @bubbleiceland. And don’t forget to visit us! You can after all shoot right through the bubble, from the comfort of your own bed. Can’t beat that!
PLAN YOUR JOURNEY
Travelling to Iceland?
Check our overnight tours with a driver guide that includes a one night stay in a bubble.
*Starting from ISK 59.900 per person
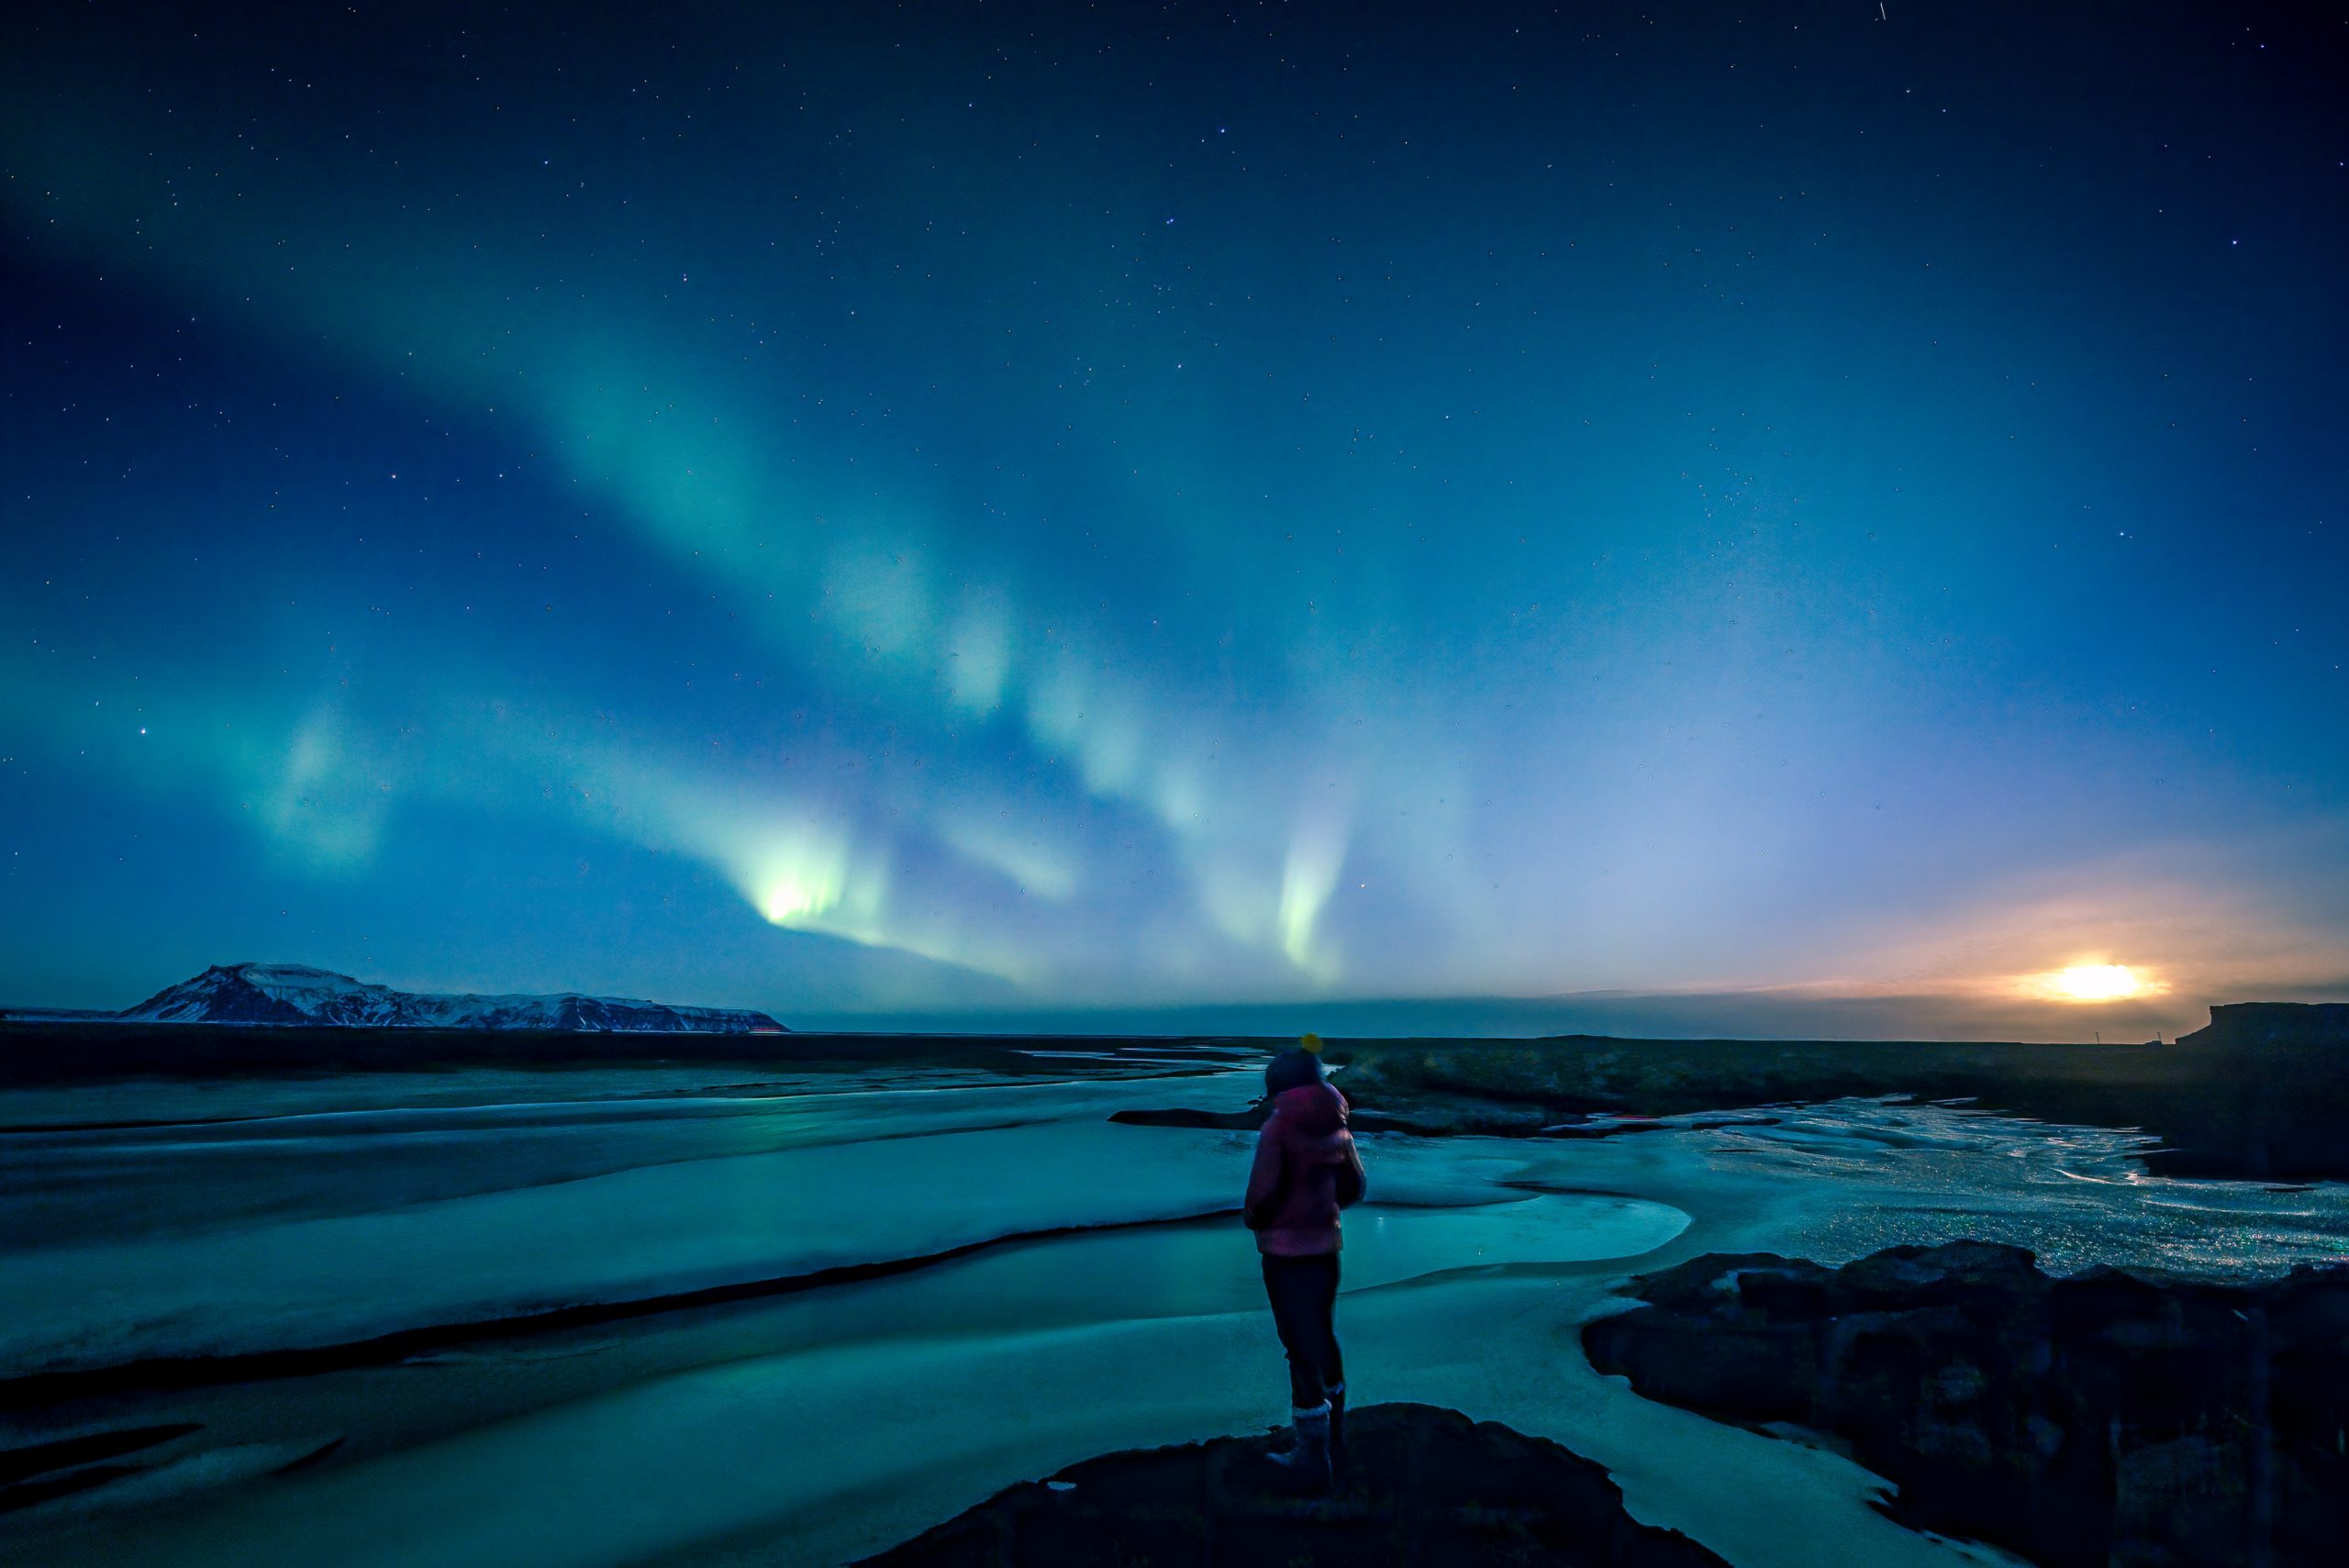
The best place to see the Northern Lights in Iceland
The Best Place to see the Northern Lights
By Taylor van Biljon
The best place to see the Northern Lights in Iceland is among the most treasured secrets. Find out where our guides go, when they seek an audience with the aurora.
The Best Place to see the Northern Lights
By Taylor van Biljon
The best place to see the Northern Lights in Iceland is among the most treasured secrets. Find out where our guides go, when they seek an audience with the aurora.
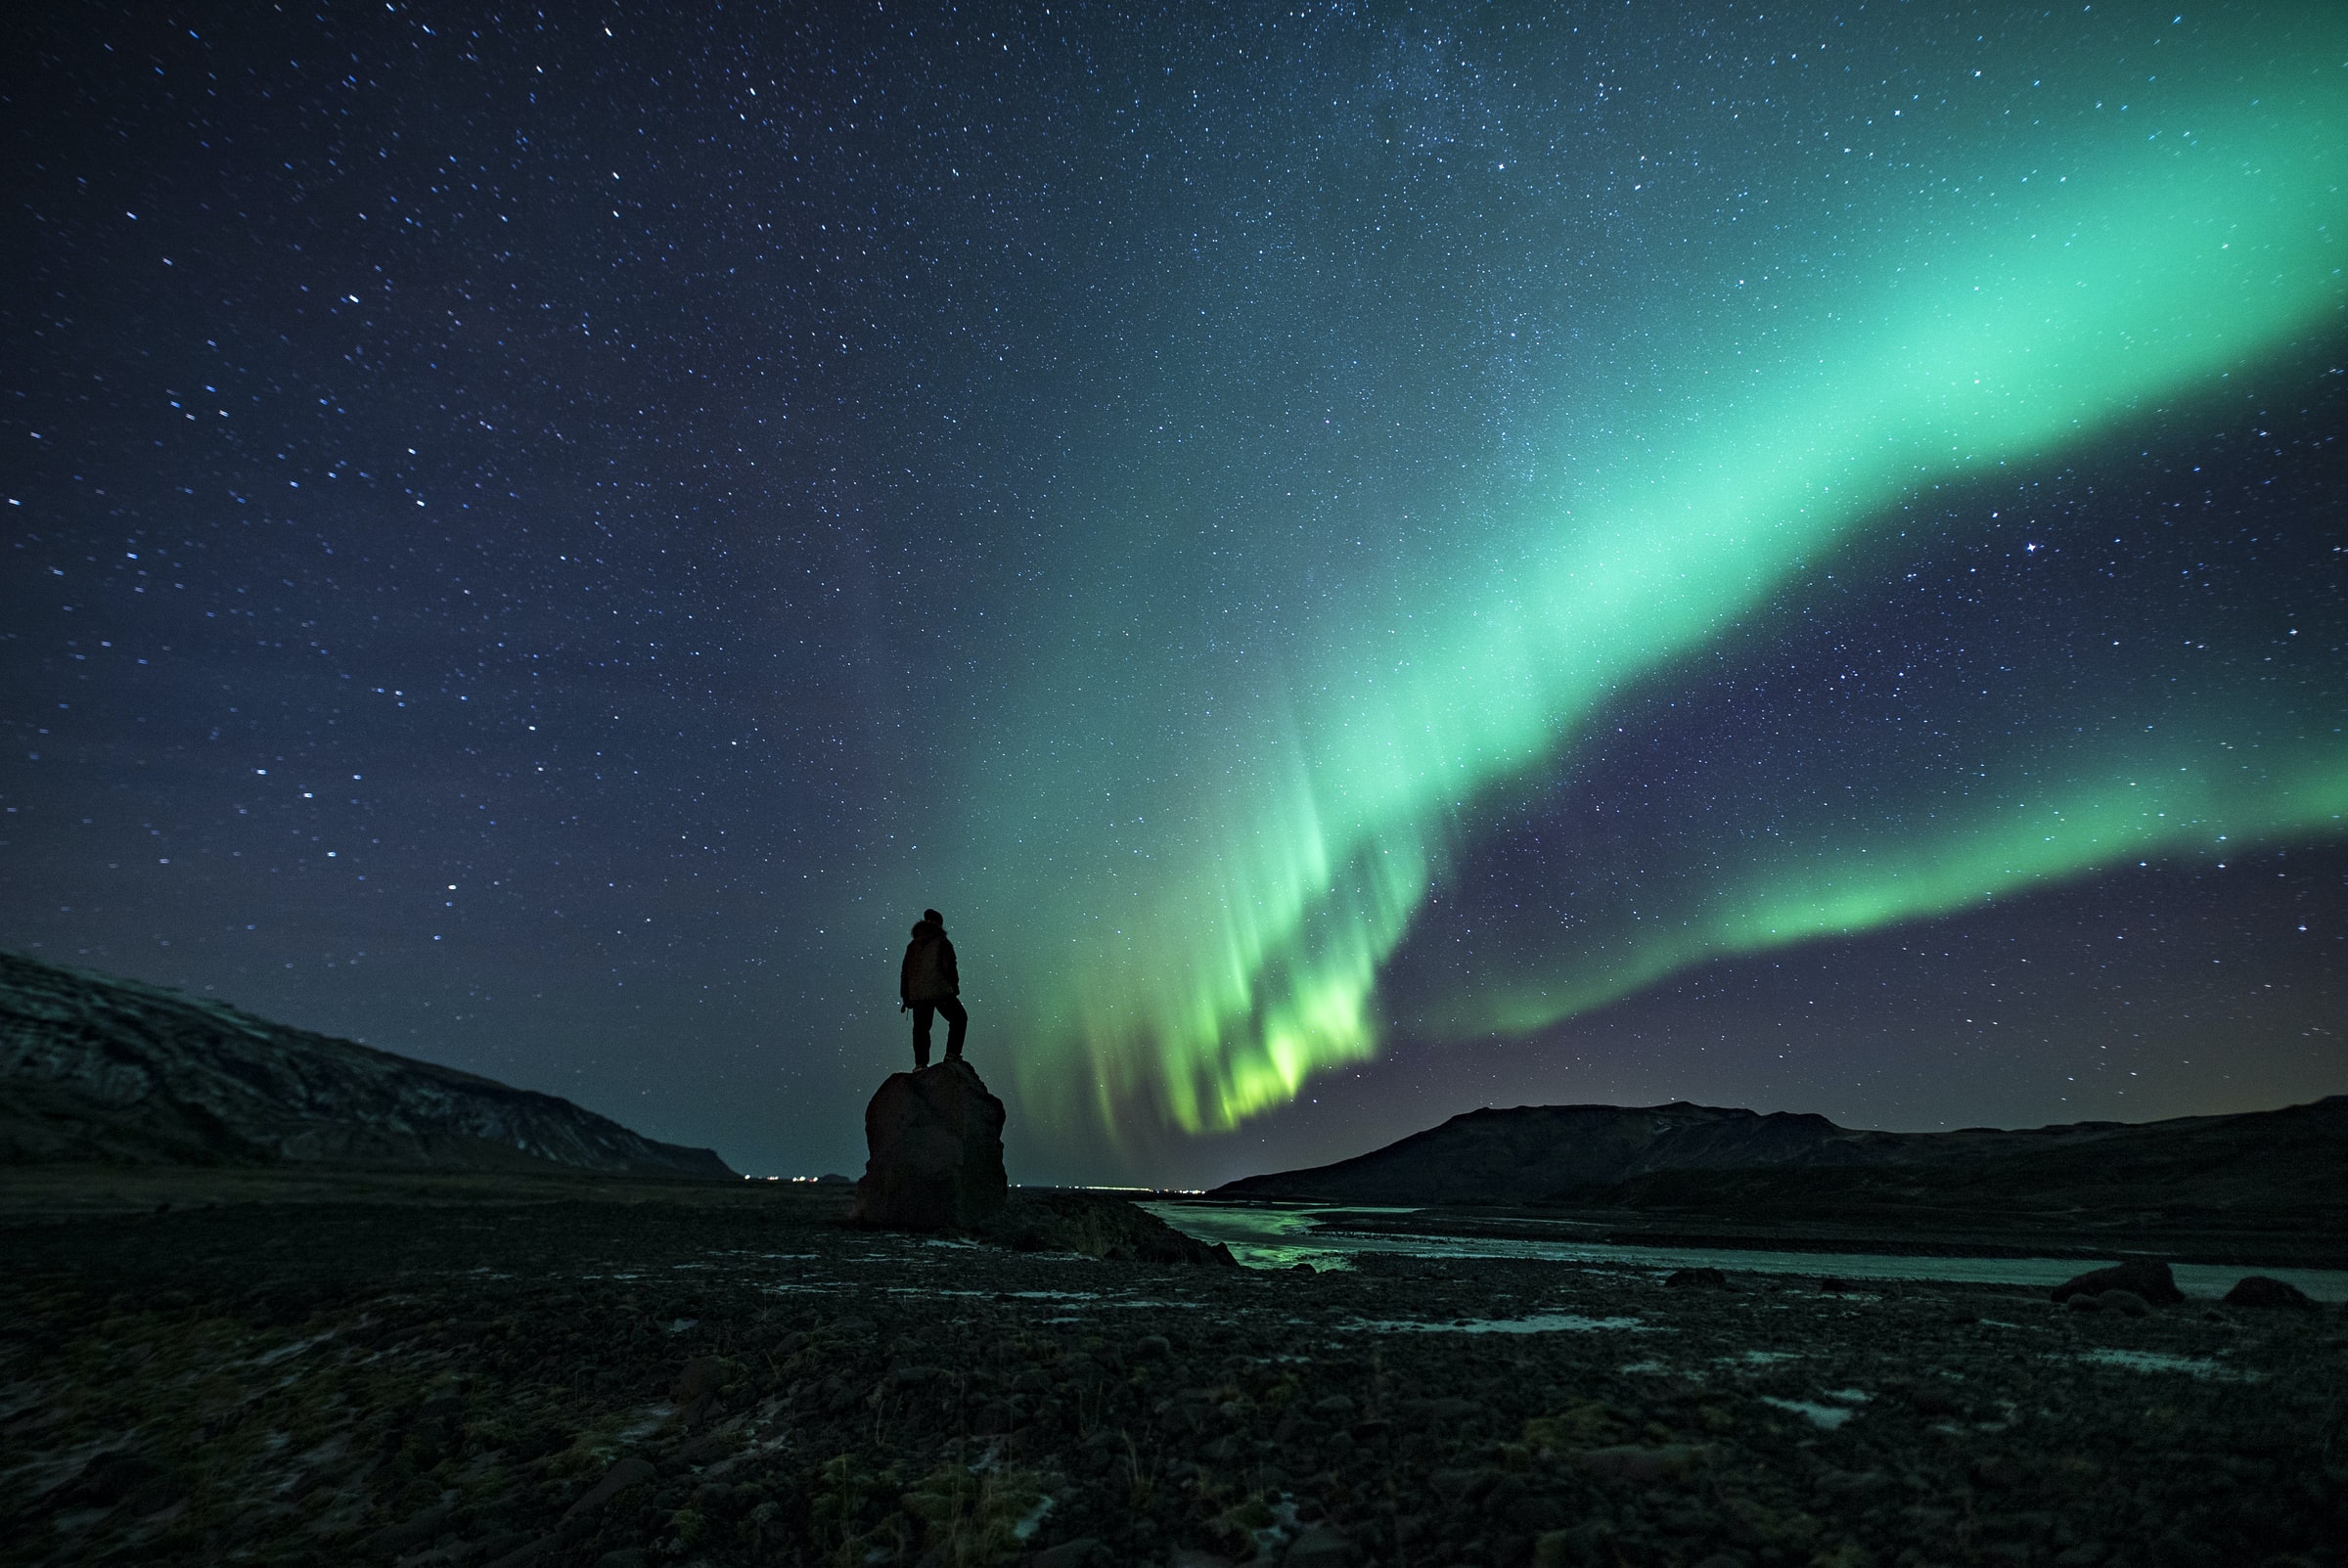
Every autumn and winter, people seek the mystery of the northern lights in Iceland.
Though this phenomenon occurs above us all year long, our chance to view it is only possible from late August, to early April. Before and after this time frame, the famous Midnight Sun obscures our ability to see auroral light.
Three things to look for before searching for Northern Lights
To find the best place to see the Northern Lights in Iceland, a few factors have to cooperate together. Chief among them are:
Clear Skies
If you’ve visited before, you’ve likely already seen a guide checking a weather map before deciding the likelihood of success, or before charting a course for a hunt. What they are looking for is clarity in the sky, or for windows of visibility on a cloud map. You can view these maps as well, and should, before setting out on your own. They are a huge aid in picking out a spot, and are not much different from your typical weather forecasts.
You will notice that these maps are often split into levels of altitude. Different types of clouds occur in different sections of the sky, and some of these clouds affect visibility more than others. Knowing what kind of cloud cover you’re facing can help with understanding the probability of your visibility chances that night.
Clouds are a surprise heavy-lifter in aurora viewing, because regardless of if the lights are out or not- if the clouds are between us, we miss out on the show. Knowing how to navigate this information can save you a lot of time on your hunt, and can be a great way to know when to head in for the night, or even when to wake up!
If you do see clouds in the forecast, hope is not lost! Weather systems can move quickly in Iceland, and some clouds in the foreground can add great texture to that ultimate dream photo. They can also help you orient yourself visually, while you watch. Nighttime viewing can be a lot of work on the human eye- and user mileage may vary.
Forecasts like this can be new to many- so don’t hesitate to share your questions with our experienced guides on your personal tour. Our staff are happy to help.
Solar Activity
Of course, clear skies can’t run the whole show! There has to be something playing as well, for us to have anything to see. Auroras occur because super charged particles from the Sun interact with the Earth’s atmosphere.
The solar wind is always carrying this energy, but the amount that is sent can fluctuate. When viewing an auroral forecast, you’ll often notice a 0-9 number accompanying the cloud map. This is the KP-index, and it’s telling us the extent of disturbance in the solar wind surrounding our planet. 0 can indicate a quiet night, while 9 typically would indicate that a solar storm or high activity is occurring.
It is important to note that we use the word ‘can’ here, because like all data, this number is subject to many changes and factors as well. Sometimes our own Earth weather forecasts surprise us- so imagine how surprising the space weather forecast can turn out to be!
It has happened many times over that we have had a low number on the forecast, and were still surprised by a brilliant show. When in Iceland, it pays to keep an eye on the sky! The gift of the aurora is a once in a lifetime wonder.
Solid Darkness
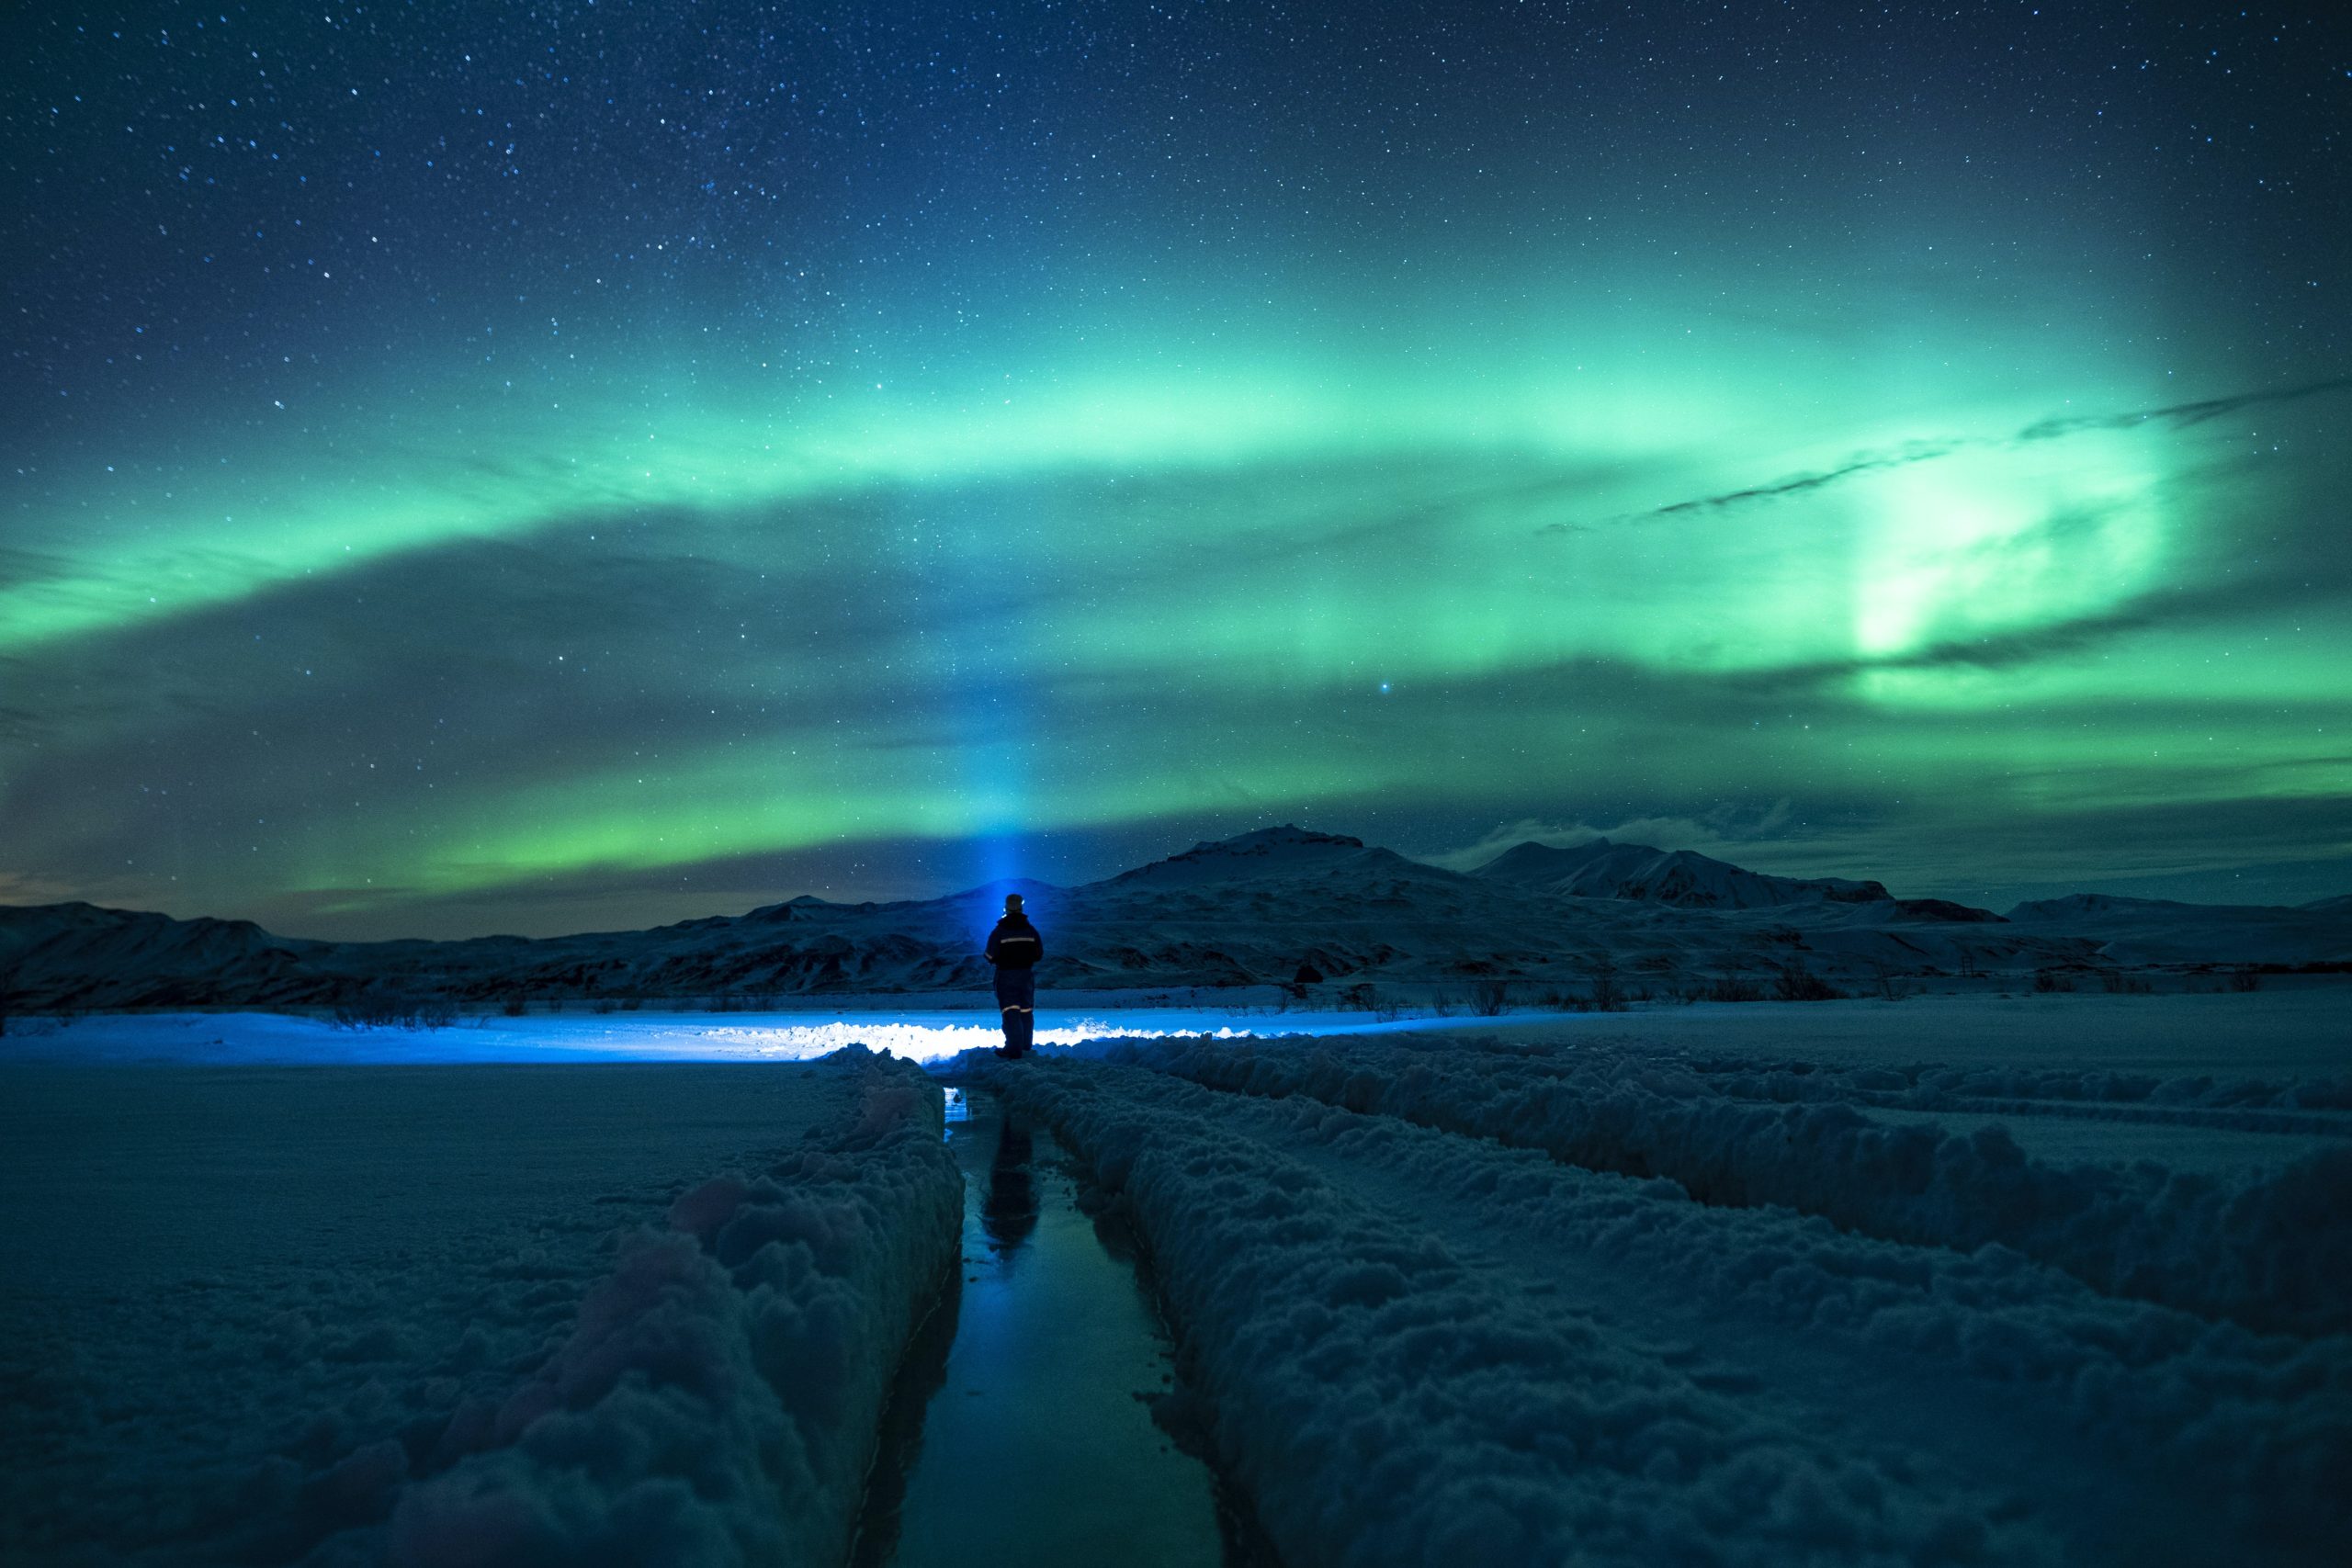
Key to this equation, darkness is required for the best Northern Light viewing conditions. This is why Iceland’s aurora season coincides with the darker half of our year.
Auroral light occurs at a low lumen, and it is not a type of light that the human eye is used to viewing. In order to give yourself a good shot at catching a glimpse, it helps to remove yourself from any light pollution. This could include something as large as city light, or something as small as the headlights of your vehicle- which may make it hard for your eyes to adjust. A strong showing will still be visible over these things, but it never hurts to give yourself a head start.
The more comfortable your eyes are in the darkness, the better. (This is our favorite thing about the Bubbles, as you can sit inside our transparent domes all night- without being subject to harsh conditions. Waiting outside on the Northern Lights has never been warmer, or more luxurious!)
Now that you know the process, all you need is the best spot! Here are some of our favorites, based on region, visual impact, and ease of access.
Reykjavik Area
City life in Iceland is bright, but we still get our fair share of Northern Lights. On a good night, you can see many aspiring photographers setting up their tripods for the night’s performance. If you’re out late, they can be a good indicator that something might be headed our way.
PLAN YOUR JOURNEY
Travelling to Iceland?
Check our overnight tours with a driver guide that includes a one night stay in a bubble.
*Starting from ISK 59.900 per person
Grótta
If you’re visiting the capital and you ask for a great viewing spot- many locals will point you towards Grótta, a lighthouse and island at the very tip of Reykjavik’s Seltjarnarnes peninsula. After the walk down, you can even dip your feet in a tiny geothermally heated pool while you wait. Be mindful of the tide while you visit, as the very end of Grótta becomes inaccessible during high tide.
Sólfar on the Sæbraut walking path
Grótta is a popular spot, but even closer to downtown is the Sæbraut walking path along the waterfront. This vantage point puts most of the city light behind you, and gives you an unobstructed view north towards the mountain Esjan. Keep an eye out for photographers on the rocks, a Northern Lights show with Sólfar (The Sun Voyager) in the foreground is a special sight to behold indeed!
Rauðhólar
Tucked away on the outskirts of town in the Heiðmörk reserve, Rauðhólar is right off of the main road, and might as well be another planet. Named for its waves of red lava, this is a popular recreation area that is often overlooked for aurora viewing, and very much worth a stroll.
Heading North
If your travels for the evening take you towards the north, you’re in luck. There are countless hidden spots here that are not popularly frequented by crowds, that provide great vistas for a night of light watching.
Borgarnes
Cross one of the longest bridges in Iceland on your northward trek, to enter the town of Borgarnes. Close to Reykjavik and bordered by gorgeous snowy mountains, this can be a great location to grab a dinner or snack beforehand, while also being out of the larger glow of the city. No aurora hunt is complete without a bag of fresh Icelandic doughnuts, or, kleinur.
Snæfellsnes
Borgarnes opens up into the Snæfellsnes peninsula. Often described as the whole of Iceland in a day, this region boasts endless stretches of black sand beaches, and one of our most famous mountain vistas, Kirkjufell. Snæfellsnes has stood in for many fantastical places from popular fiction- from Jules Verne’s Journey to the Center of the Earth, to “Beyond the Wall” in the popular Game of Thrones television series, it is no wonder that Snæfellsnes has caught so many eyes. What is still very much a wonder, is how much of it you will have to yourself on a Northern Lights hunt.
The Reykjanes Peninsula
The Reykjanes peninsula is just in our backyard, and is home to some of the most exciting geothermal spots in the region. Easy to drive and dotted with observation points- Reykjanes is a favorite route for auroral viewing.
Blue Lagoon
We would be hard pressed not to mention the nearly neon waters of the Blue Lagoon, or, Bláa Lónið. While it is magical to watch the skies from the lagoon itself- did you know that you can also hike nearby? Located in a A UNESCO Global Geopark, the lava fields surrounding this gem are nearly 2000 years old, and filled with recognized hiking paths. These paths are mostly flat, and boast some of the easiest hiking in the area. Great for people who are keeping their eyes on the sky!
Kleifarvatn
The largest lake on the peninsula, Kleifarvatn is situated in a steaming geothermal zone, and was once rumored to be the home of a mysterious monster the size of a whale! Whether that is true or not we cannot say- but we can tell you that the still surface of the lake can be a phenomenal mirror for an aurora reflection.
Brimketill
Named for the giantess Oddný who liked to bathe here, Brimketill is a small natural rock pool just protruding from the edge of the land into the ocean. Now outfitted with a viewing platform, it’s a great spot to watch the occasional stillness of the pool, next to the great movement of the wild sea.
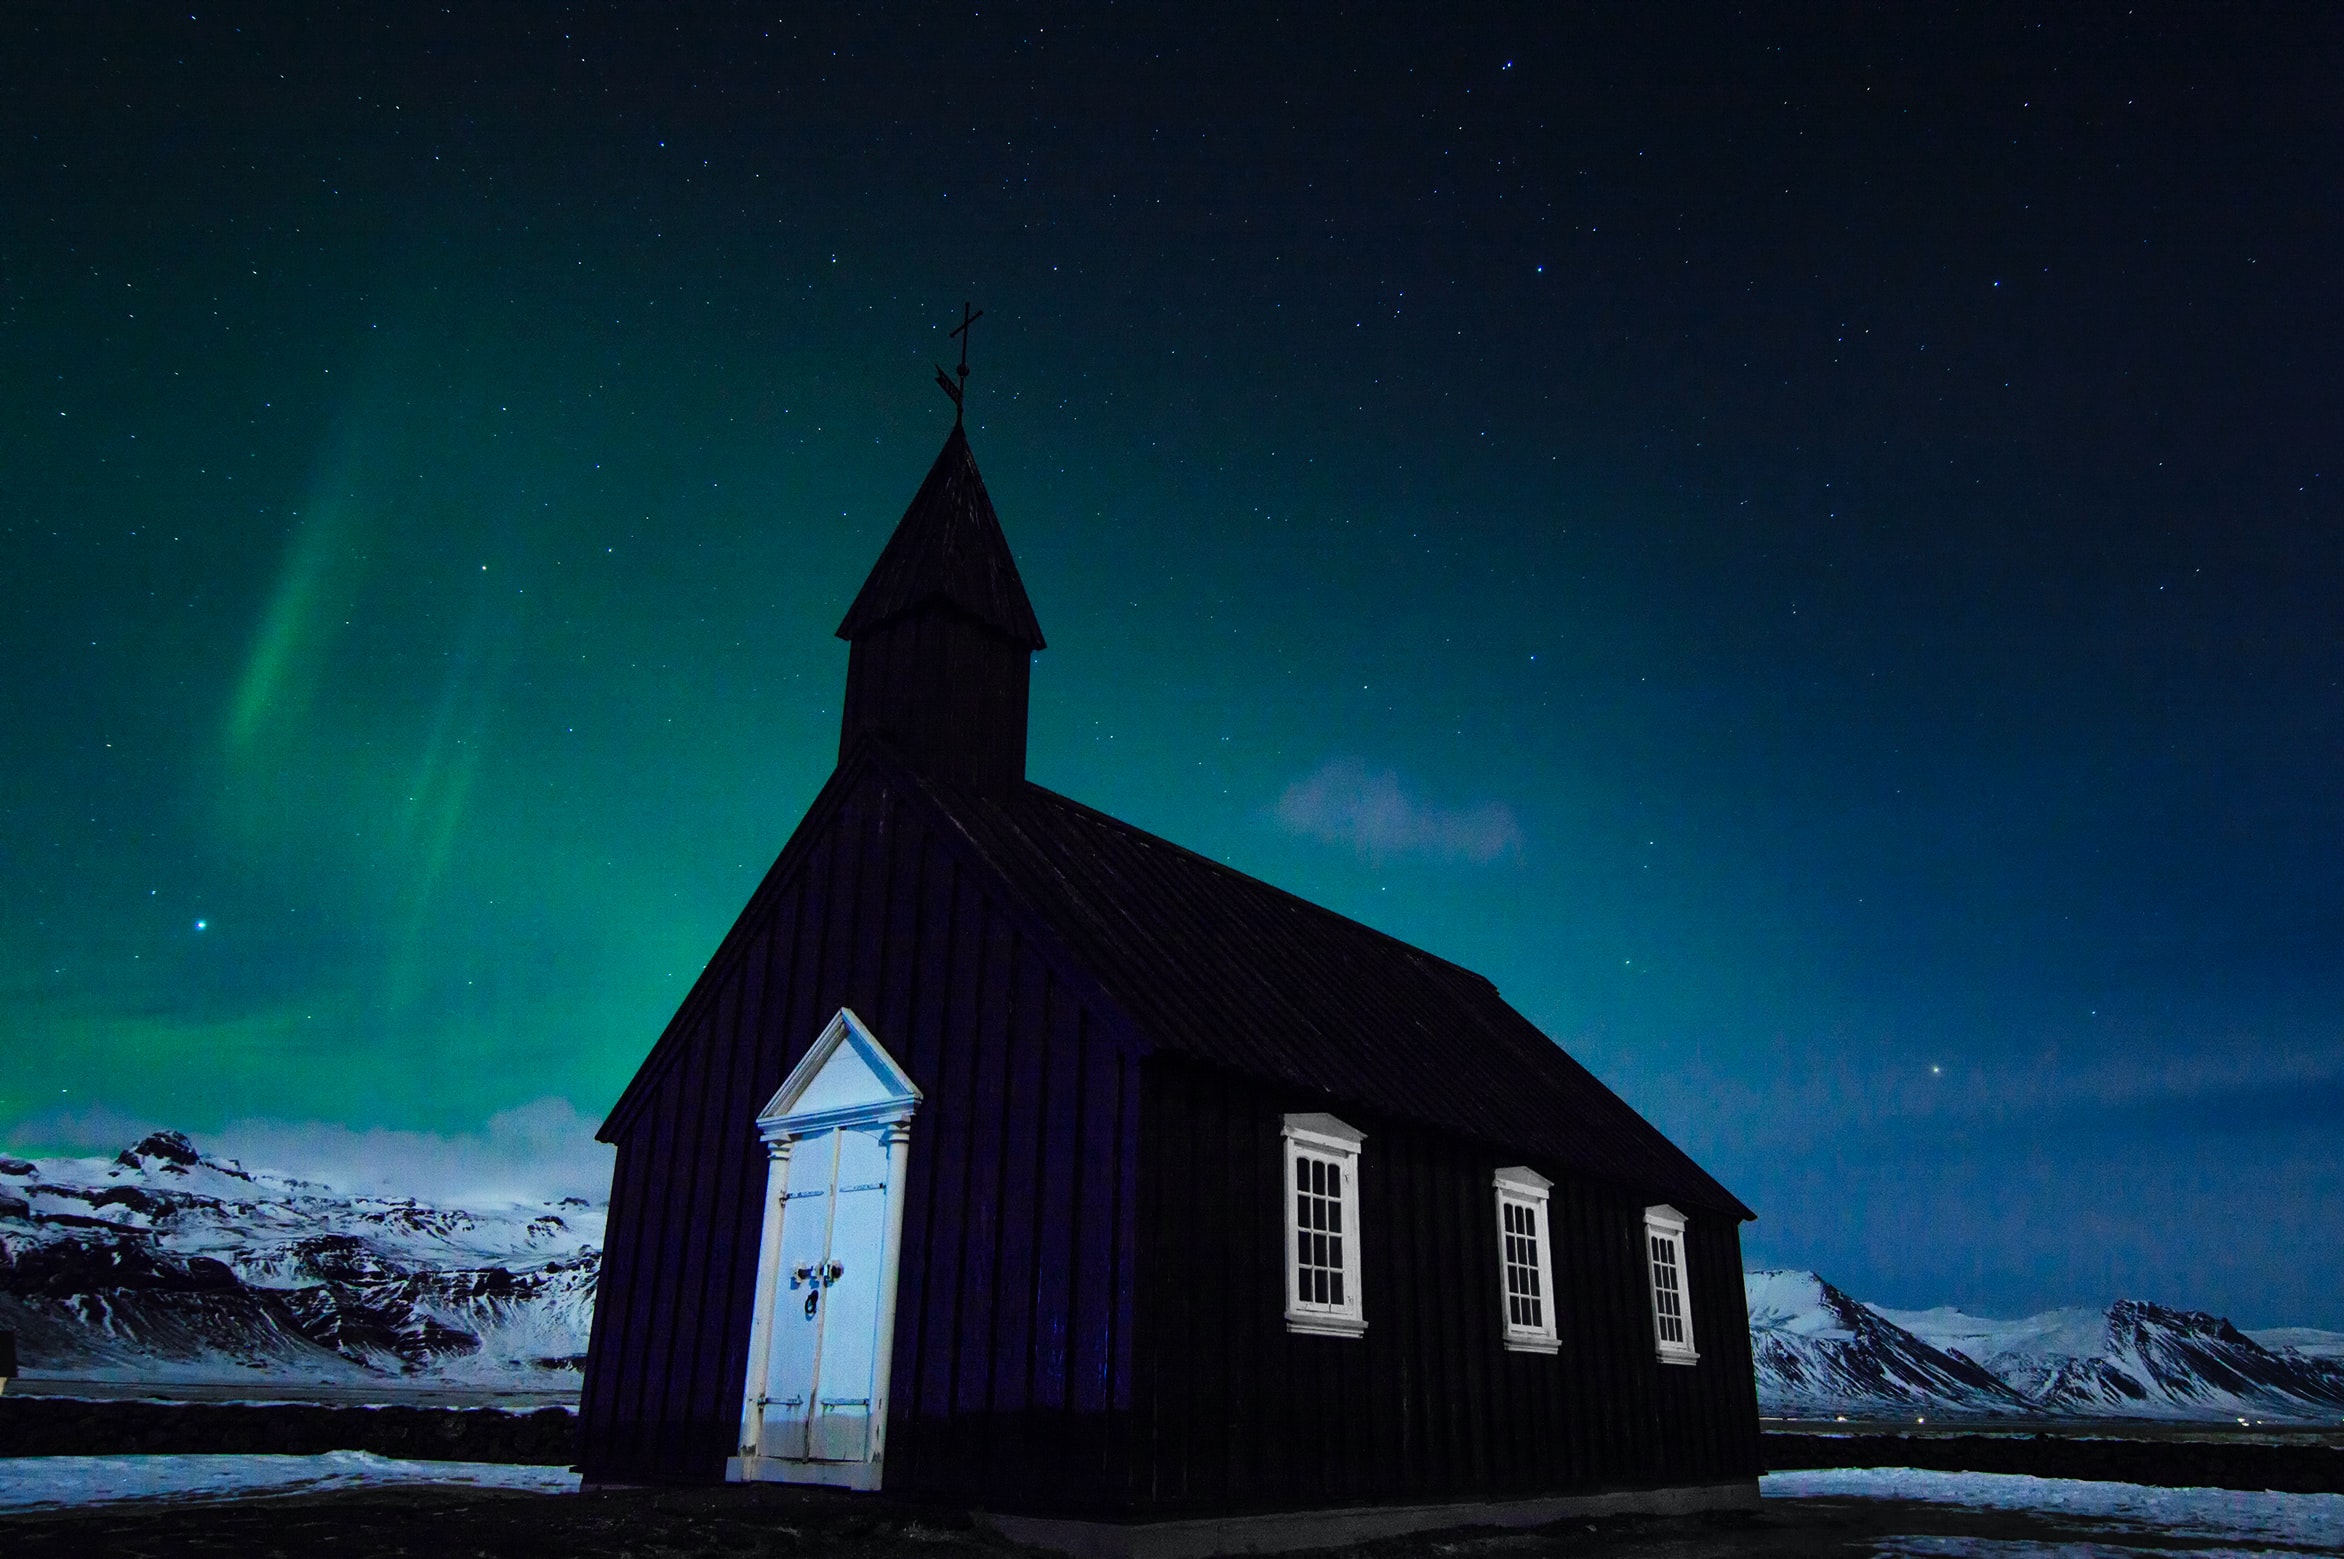
The Golden Circle Area
Home to the original gathering spot for the Icelandic parliament (Alþingi), people have been viewing the lights from this region for nearly as long as the world’s longest running parliament has been around! Like them, now you too can add to the ancient chain of amazed eyes on the dancing skies.
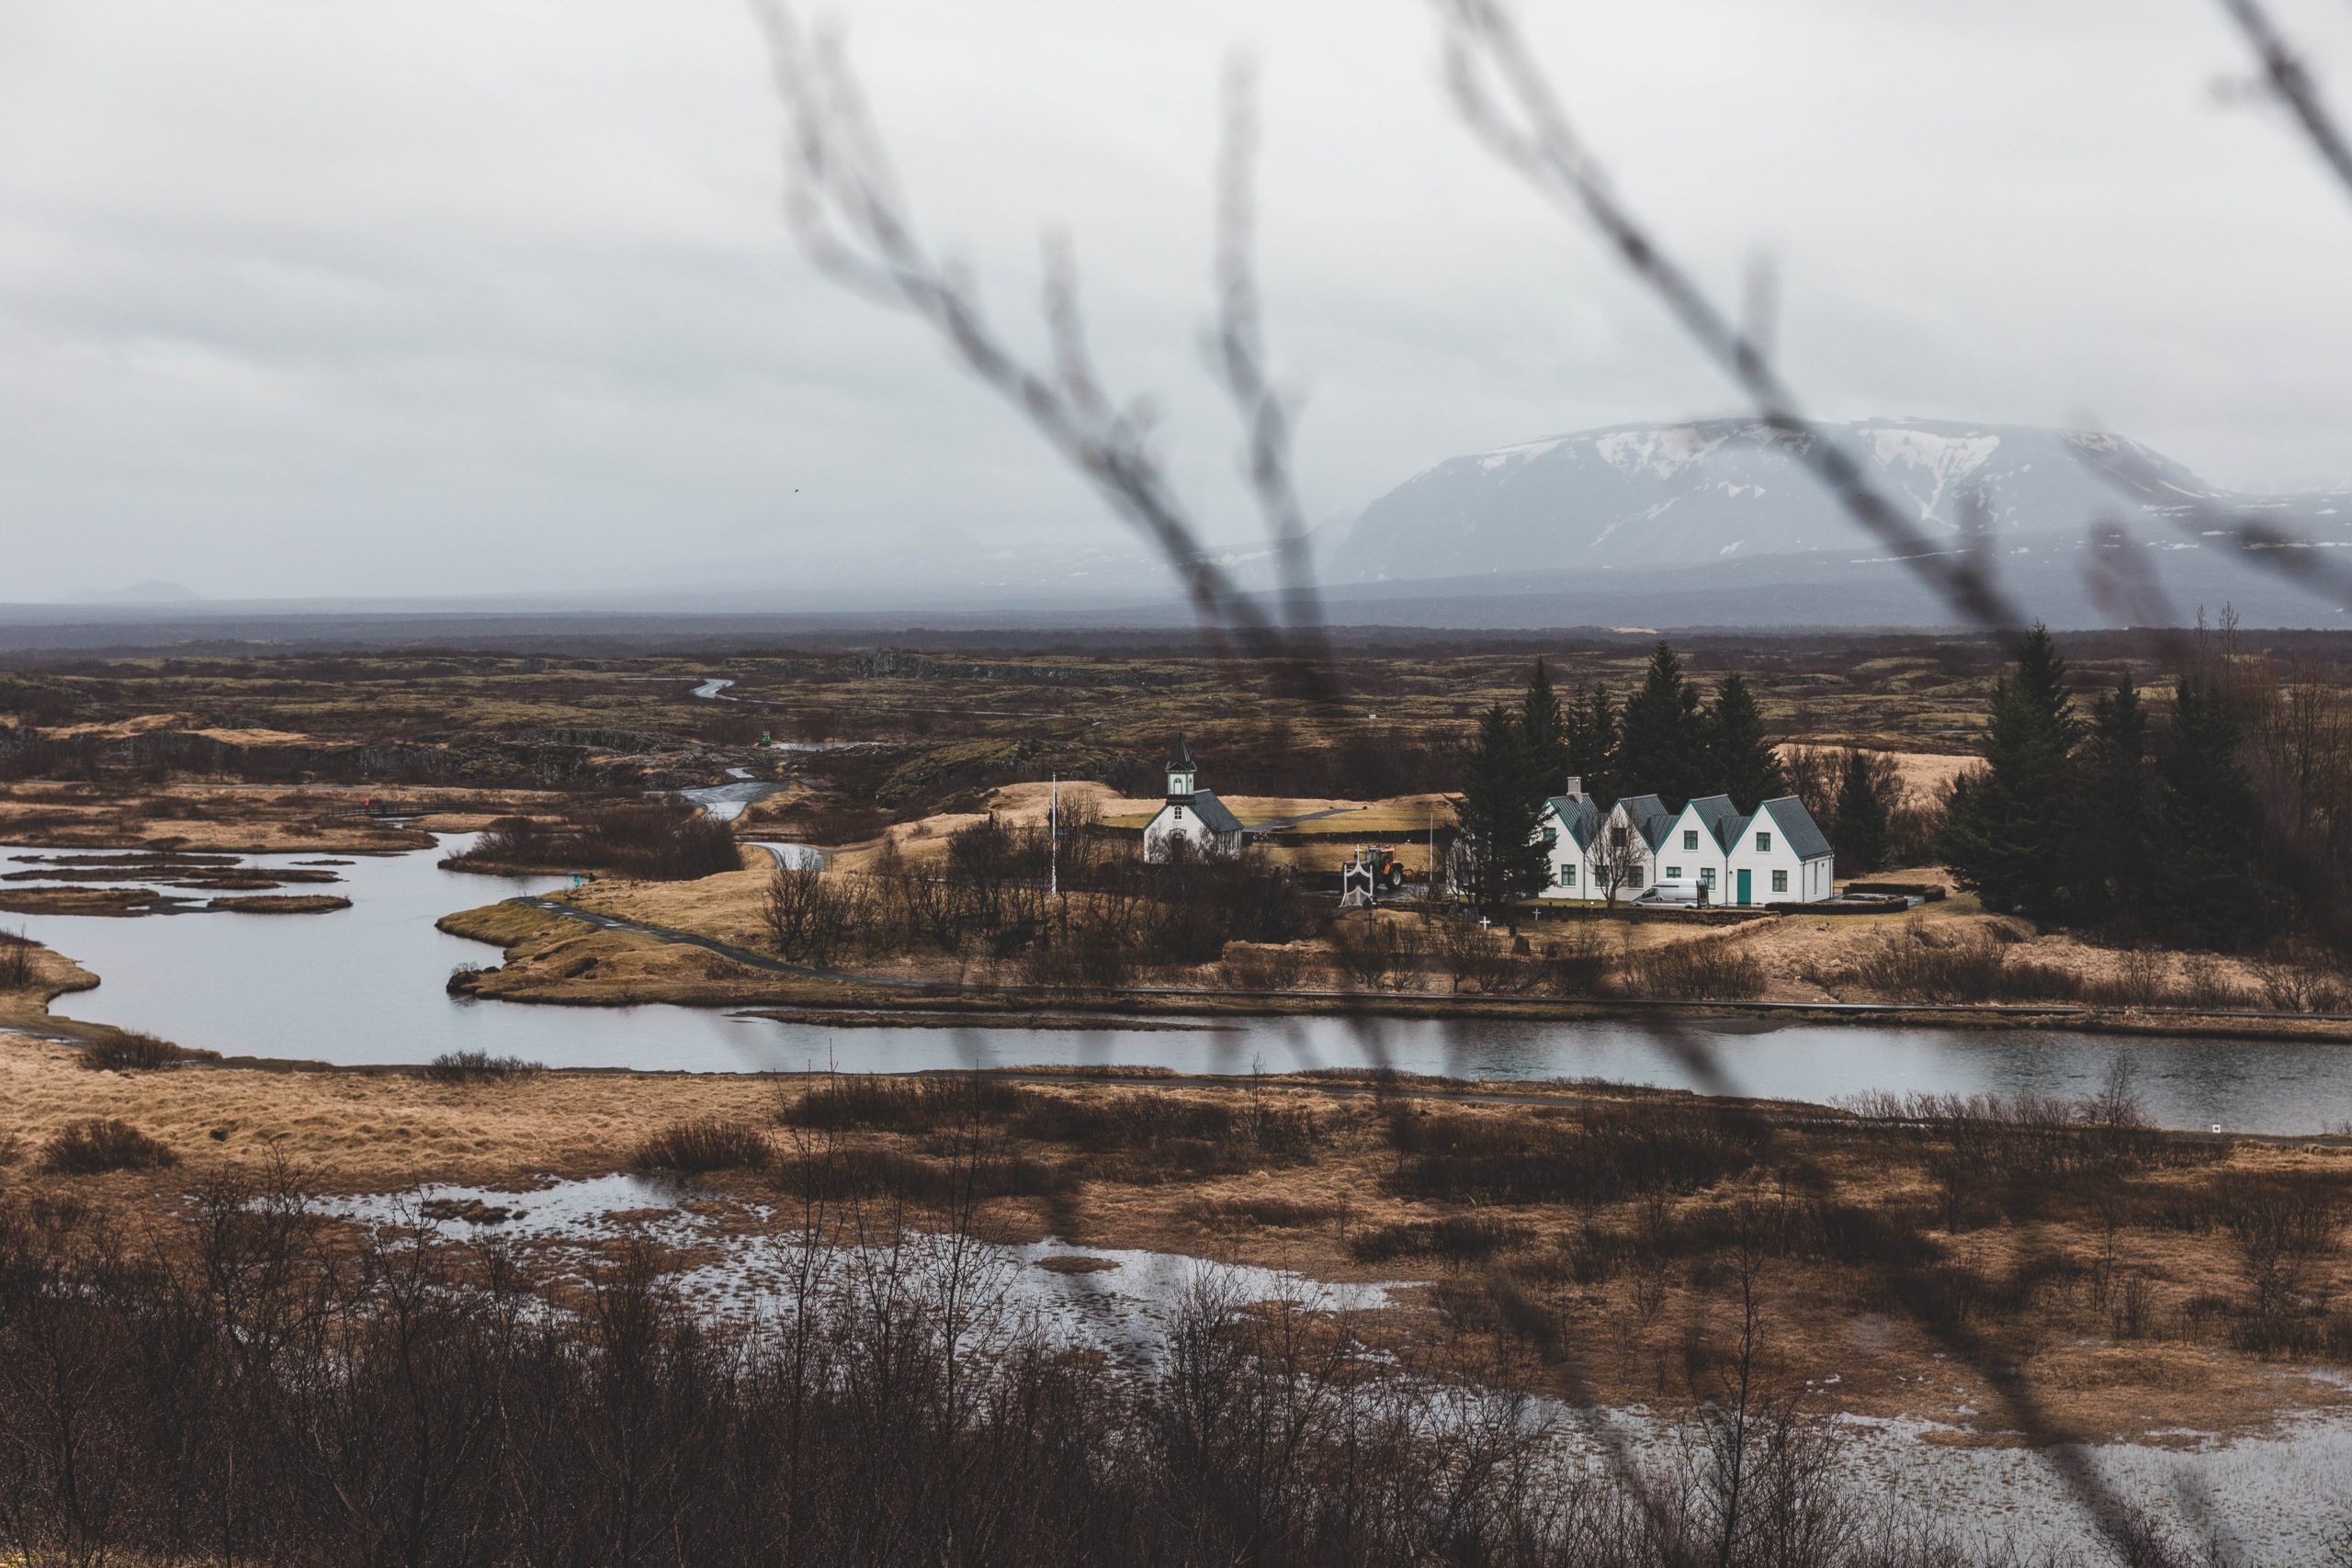
Þingvellir/Thingvellir National Park
Easily accessible from Reykjavik, Þingvellir is named for its role as the assembly place for the early Icelandic parliament. Today, it remains a favorite gathering place of nature and culture enthusiasts alike. Detached from the major sources of light pollution, and populated by many observation points; Þingvellir is ideal for safely parking a vehicle to watch from, and has proximity to restroom facilities.
On a long night out, these things can’t be beat! (If the restroom detail is important to your plans, check with the Visitor’s Center for additional information about service hours and availability. Winter is a quiet season for much of Iceland, and these schedules can change based on seasonal volume and maintenance.)
Kerið
Near the southern end of the Golden Circle route, Kerið is a volcanic crater lake that boasts some of the greatest colors and easiest hikes in the region. Believed to be nearly 3,000 years old, Kerið can be viewed via a short walk from the parking lot, or entered from a small built path.
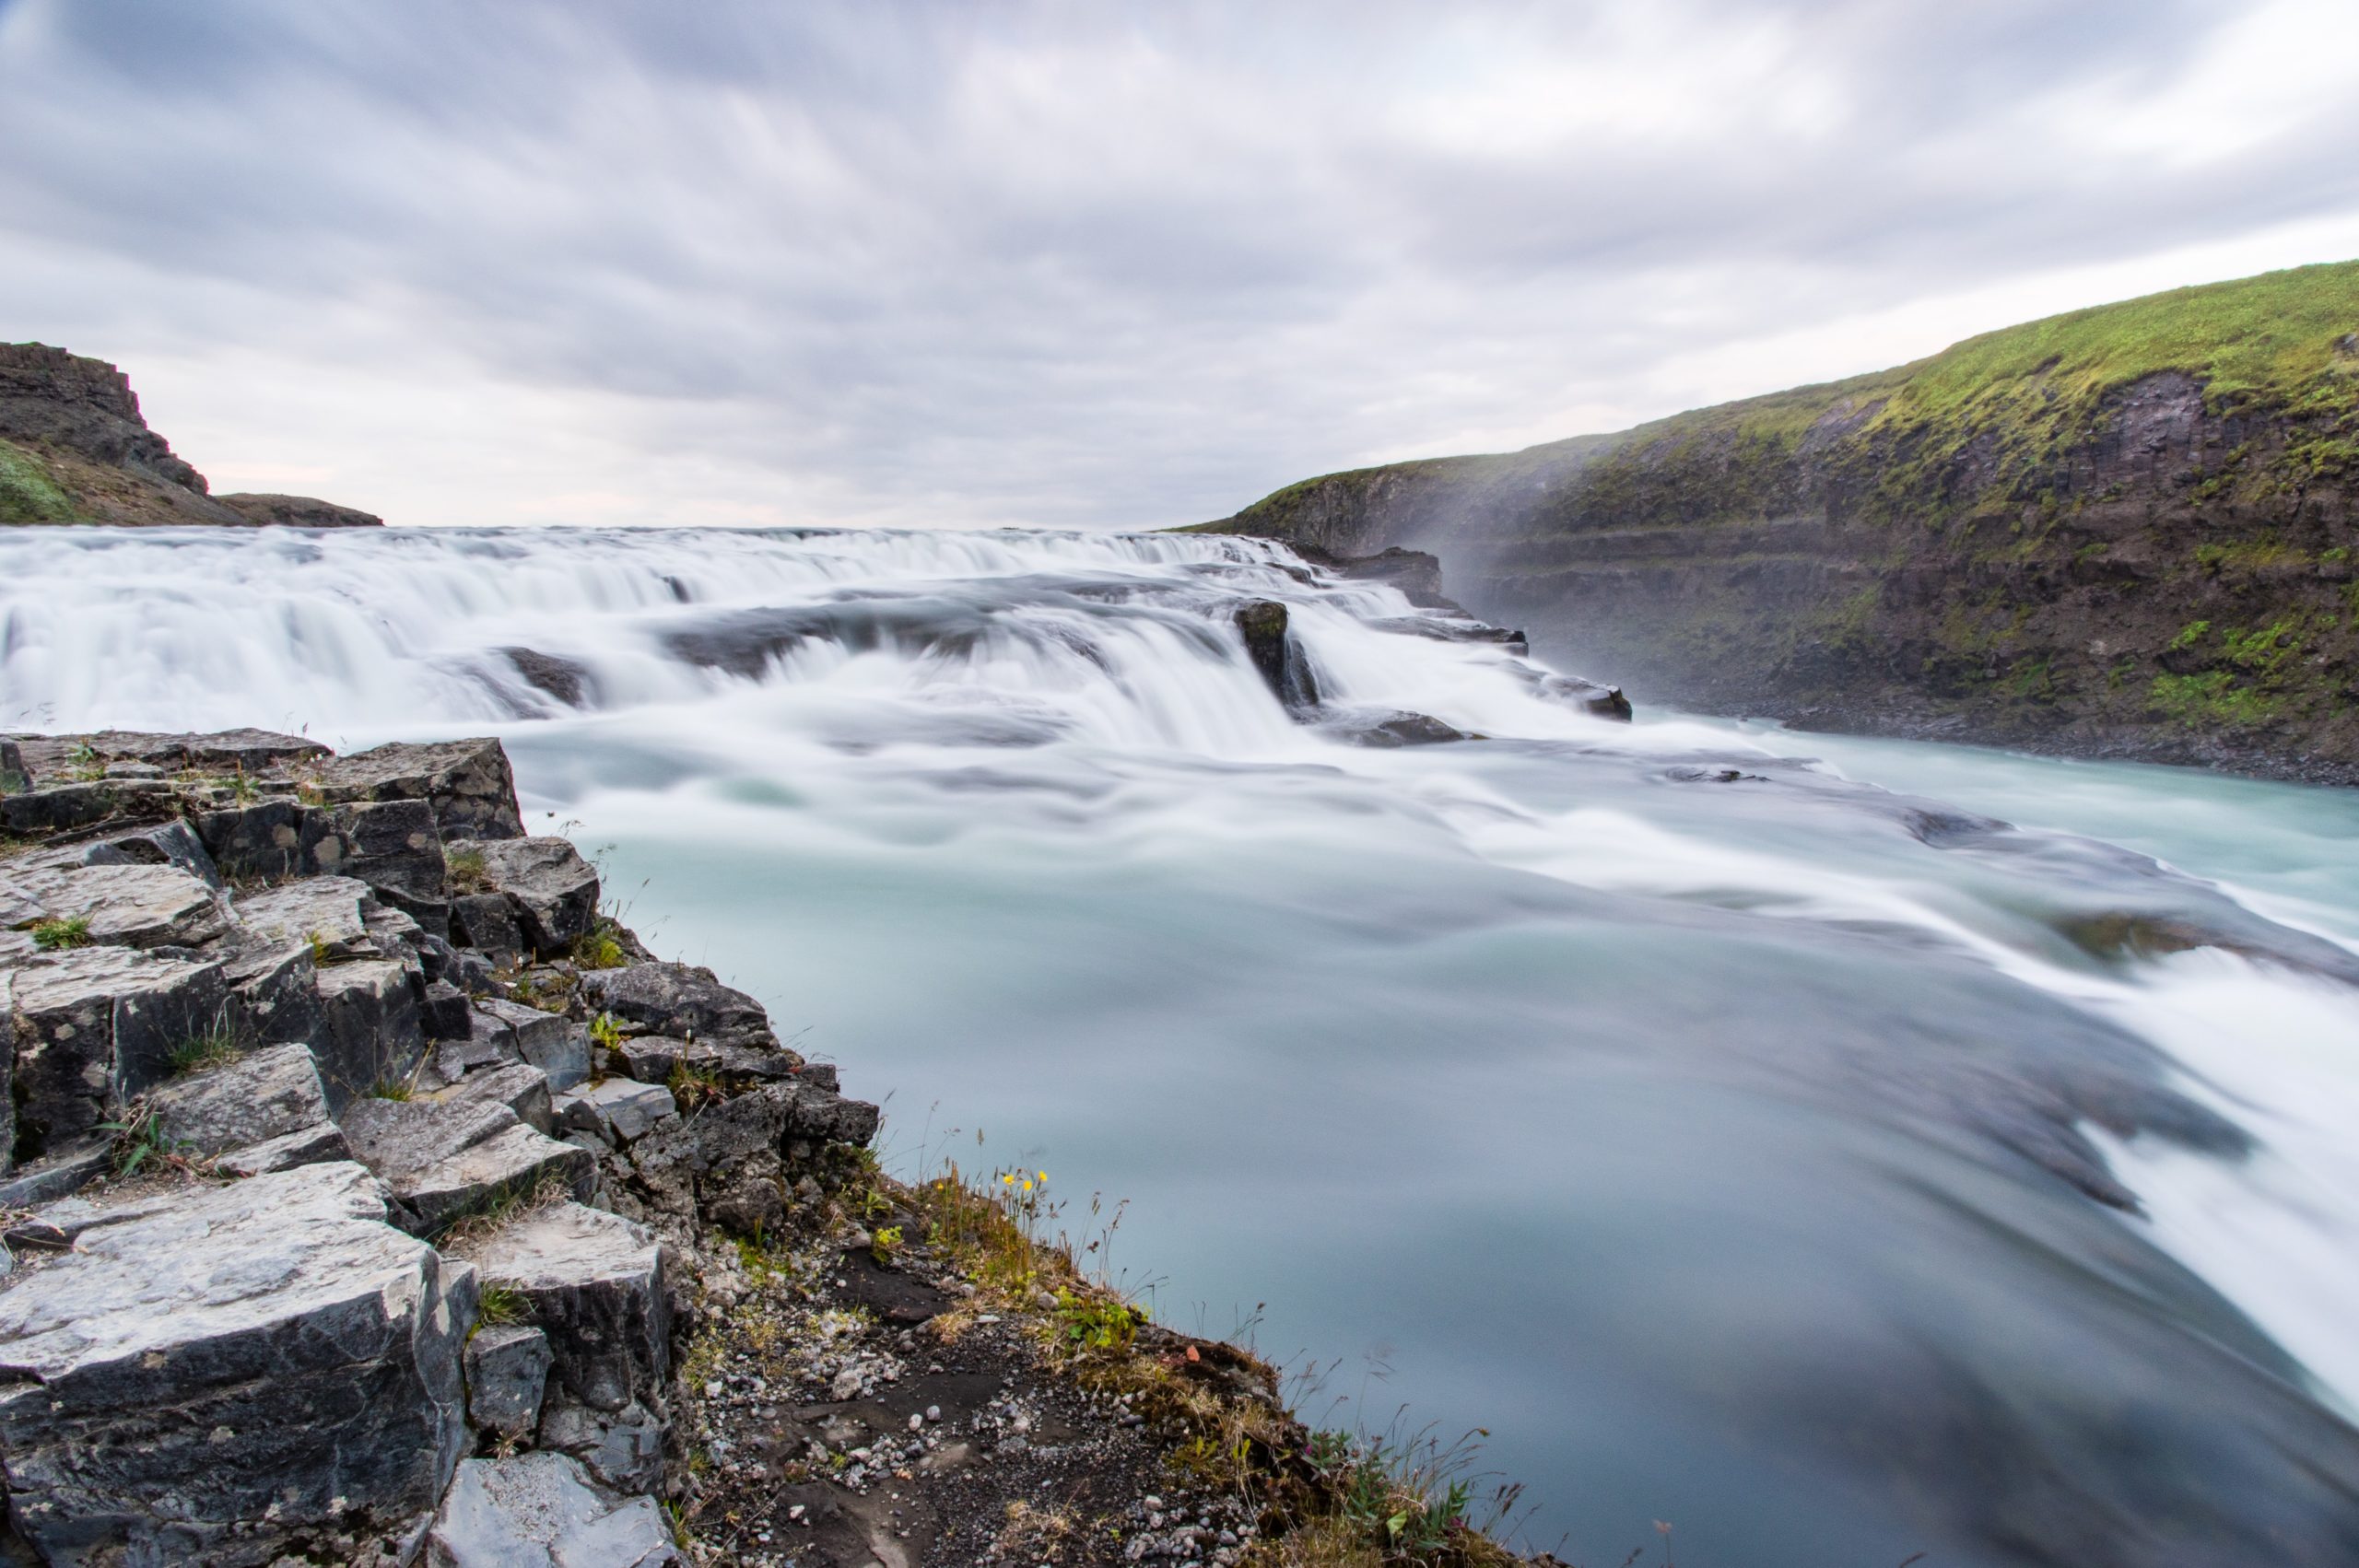
Brúarfoss
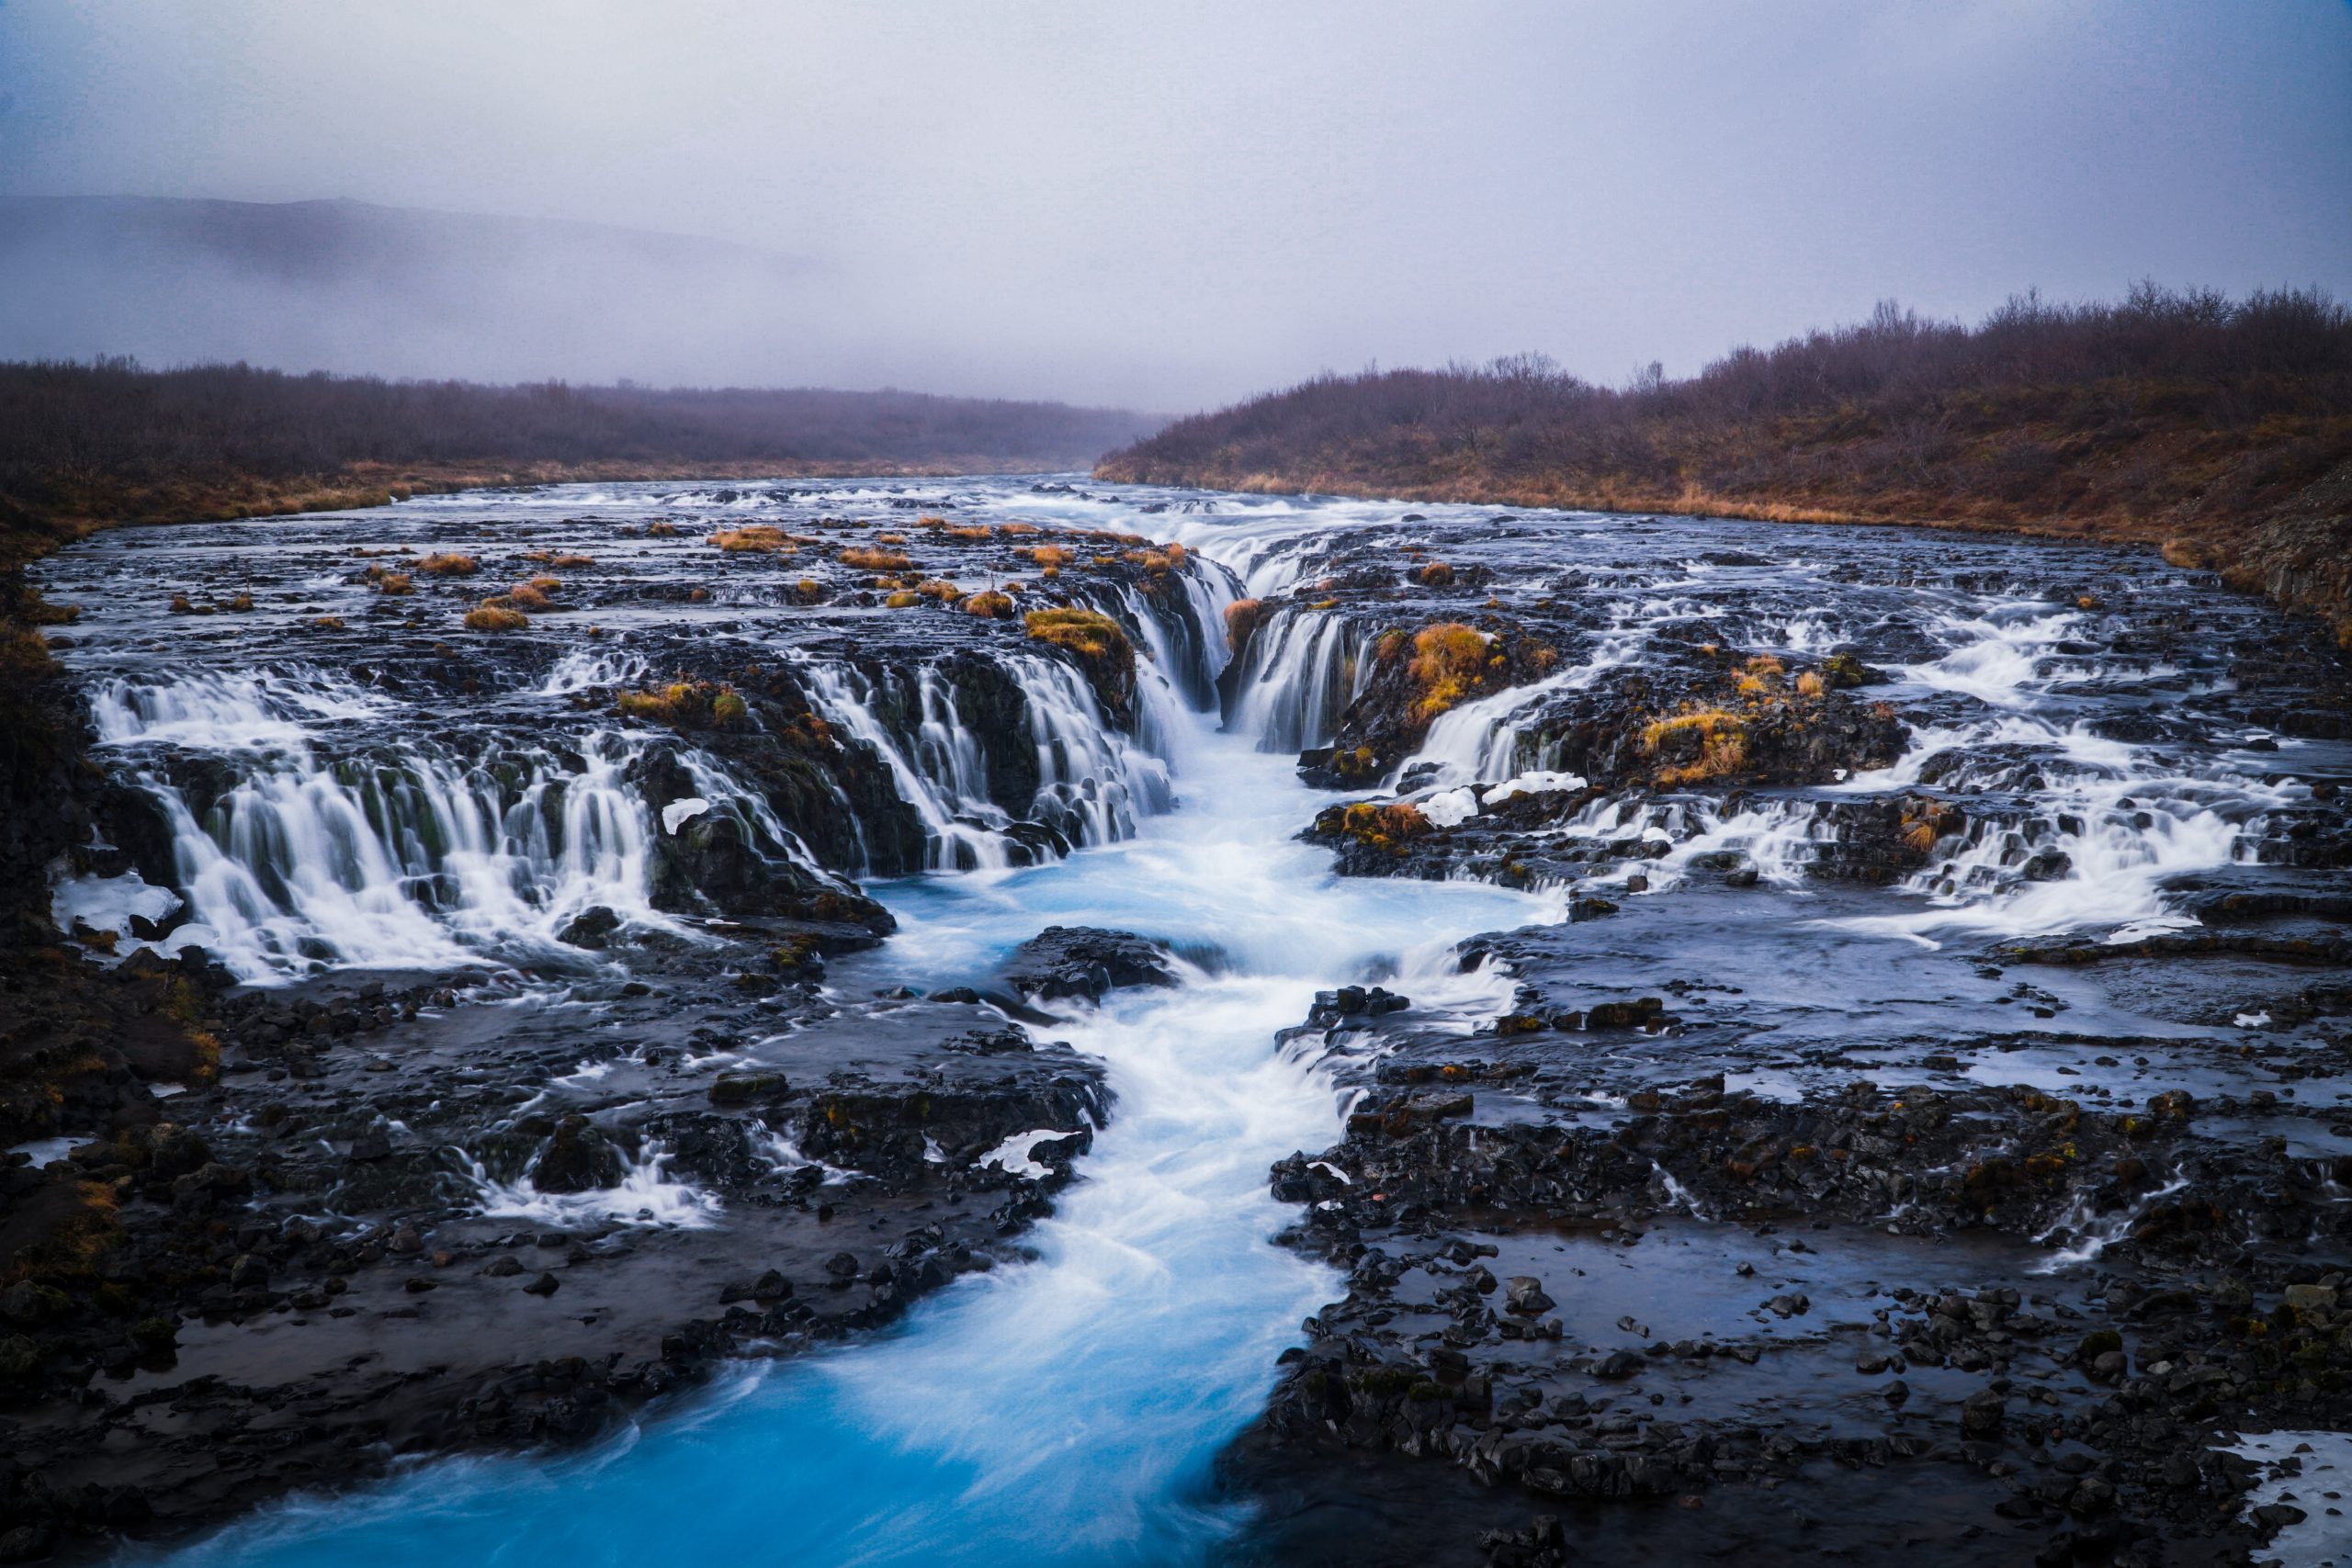
Brúarfoss is a fairly level hike, and one of the lesser known jewels of the Golden Circle route. Easily recognized by its shocking glacial blue color, and linked in a chain to a multiple waterfall system, this may be a spot that you have to visit again in the daylight!
The South Coast Region
Home to some of Iceland’s greatest treasures, this stretch of land is populated by hundreds of our island’s most famous sights. From waterfalls, to gaping caves, to dramatic columns of basalt rock- the cliffs and valleys of the south coast region are second to none.
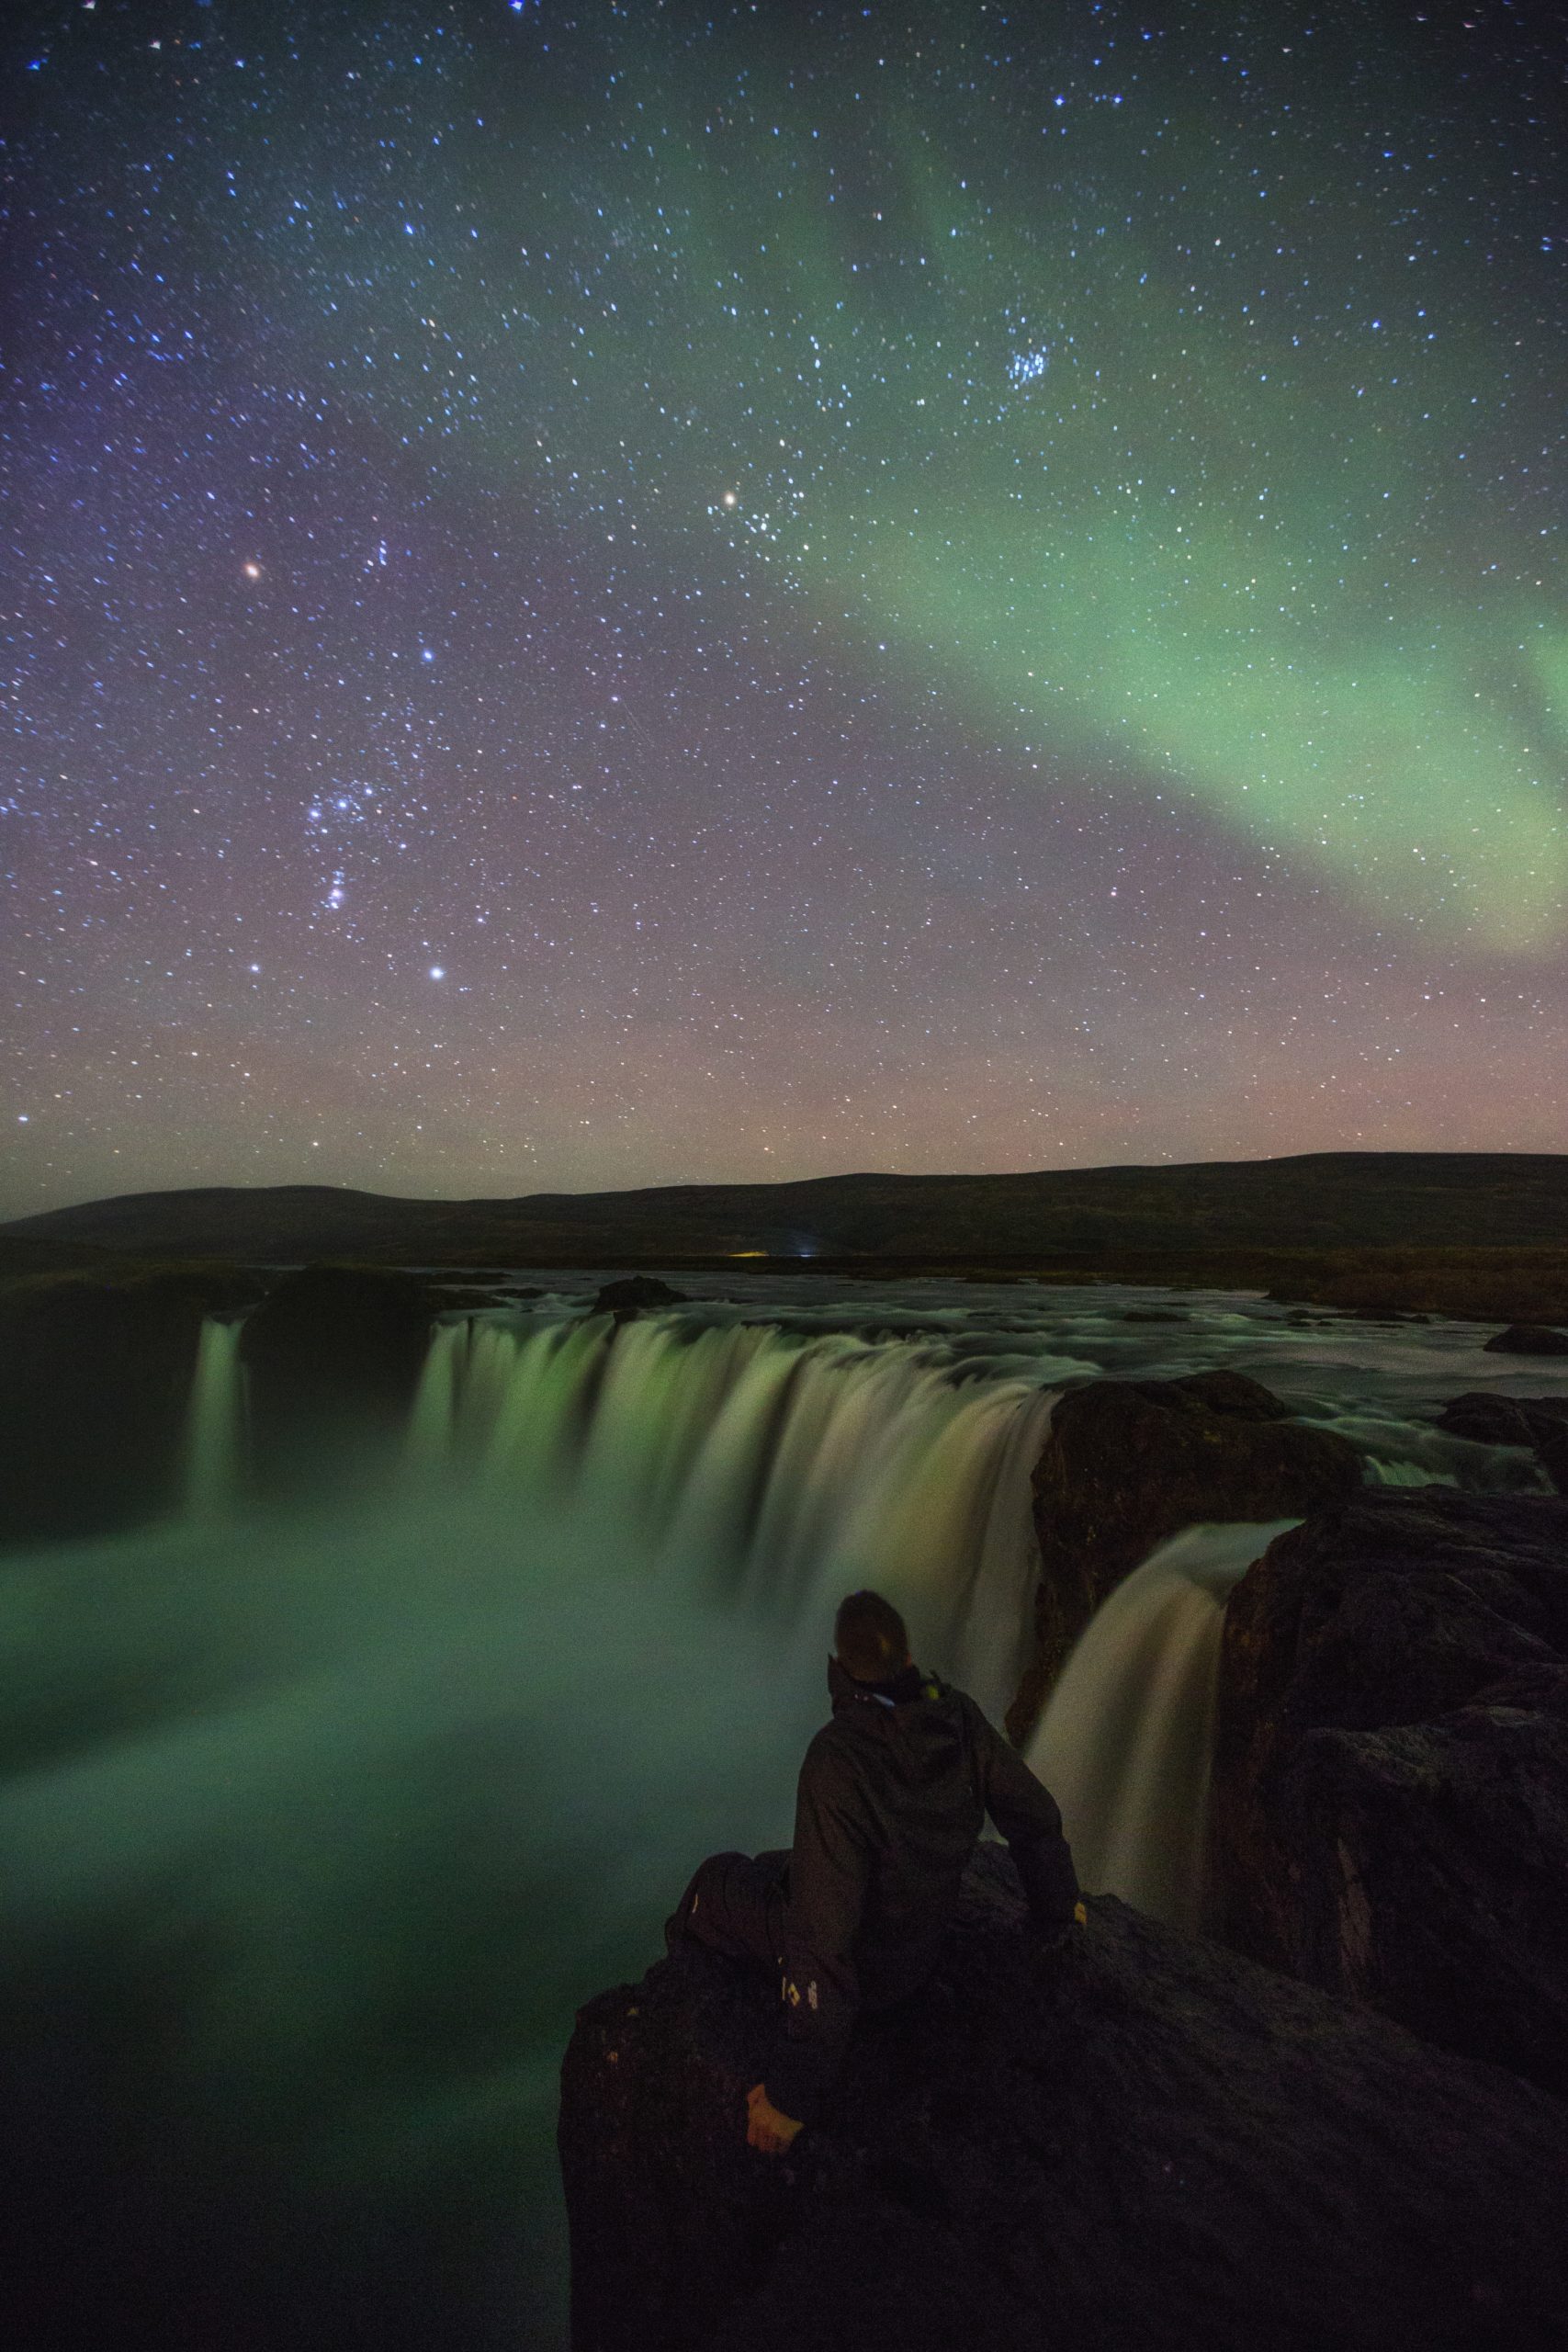
Seljalandsfoss/Gljúfrabúi
Bring a raincoat, because this is a waterfall you can walk behind! Positioned with a wide, sweeping view of the southern sky from the cavern behind the falls- many an auroral night have been spent near the waters of Seljalandsfoss. Don’t forget to visit nearby neighbor, Gljúfrabúi while you’re there! This tiny crevasse treasure is worth braving the spray.
Skógafoss
Busy producing countless rainbows during the day, Skógafoss shines under the northern lights at night. Home to a lofty observation deck and emptying into a fairly flat surface, one can easily view the vista of this waterfall from afar, or right up close. If you’re looking for a versatile spot to spend time in, this may be for you. (Be careful of the ice created by the spray in winter, and consider bringing a walking aid if you plan on venturing close to the falls.)
Vestrahorn
Though the Vestrahorn mountains rightly belong in the eastern category, one can access them at the end of a long (and adventurous) south coast drive. Resting on a vast beach that often holds water after the tide goes out- Vestrahorn’s jagged peaks have created many a breathtaking scene in those surprisingly shallow reflections. If you’re looking for mountain drama right off the roadside, don’t sleep on this remote spot.
Sólheimasandur
If the weather is calm and conditions are fair, the old plane wreck at Sólheimasandur can be an otherworldly location to watch auroras from. Abandoned here in 1973, the grounded shell of the aircraft stands vigil near the sea even now- and makes for a haunting stop both day, and night.
Reykjadalur
Only a half hour outside of Reykjavik, the Reykjadalur Valley hike is a steaming climb into the mountains of the Hengill area near Hveragerði. This flowing hot river is an unparalleled reward after a scenery packed walk, and is a popular local spot to lay and gaze for Northern Lights. Because of the graded nature of the path, this location is further down the list due to ease of access- but for a basic hiker, this can be an accessible trail. Remember to bring a torch if you are hiking at night, and exercise caution in all seasons, as the terrain can change quickly here.
Fjaðrárgljúfur Canyon
Accessible only by 4×4, and standing on bedrock believed to be nearly 2 million years old- Fjaðrárgljúfur is a cascading, bending delight to behold. A reminder of the power of nature, and possible to hike both inside and on top of, Iceland’s feather canyon can be an intimate spot to catch the elusive polar lights.
Þakgil
Home to jagged peaks and rounded caves, “roof canyon” is a popular local recreation area. In the summer, Þakgil fills up with campers, but in the winter it can be a quiet amphitheater of vantage points for the perfect aurora sighting. Home to many treasures in its own right, Þakgil is located within the Katla Geopark, and is the starting place of many of Iceland’s most famous myths, folktales, and fantastical stories. (Not hard to believe, considering its many volcanic neighbors!)
These are only a few of our favorite spots- and depending on the route you plan to take, there are countless more to visit. Our staff are always happy to provide further insight, and would like to remind you to keep an eye on the weather in the quickly changing winter season. The status of any road you may plan to take can be checked on www.road.is, and if you are hiking, you can leave a travel plan on https://safetravel.is/.
Weather alerts are easily accessible here, along with important safety tips and area information. If you plan to attempt one of the more adventurous routes, one can also rent a Personal Location Beacon from this site, or skype with a safety agent for advice. Remember, when viewing Northern Lights it is imperative that you park your vehicle in a safe location, and do not pause in a roadway, despite the temptation. Good luck, clear skies, and happy aurora hunting!
PLAN YOUR JOURNEY
Travelling to Iceland?
Check our overnight tours with a driver guide that includes a one night stay in a bubble.
*Starting from ISK 59.900 per person